
So You Want to Be a Better Hunting Photographer?
You want the simple answer on how to be a better hunting photographer don’t you? One fail safe formula that will get you noticed by all the big companies, that will get you in the field 200 days a year and living the dream?
Well I’m not qualified to get you to that point because I haven’t figured it out myself, but I think I have found out the secret to better hunting photography or for that matter any photography. And the answer might be more fun than you think. Hell, it’s as obvious as it gets. It can turn a mediocre photo into a spectacular one. You don’t even need that much technical skill with your equipment if you accomplish this one thing.
Are you ready for it? Are you dying to hear what I have to say?
Get off the couch and go someplace!

Finding a shed (or two) doesn’t mean you have to take a picture of it laying on the ground. Pick the damn things up and look for a backdrop worth taking a picture of!
There. That’s it. The secret recipe. Almost as valuable as the secret ingredients in Coca-Cola.
Go someplace epic and let the photograph take itself. Go find something worth photographing. Find places other people aspire to be and give them that glimpse of it. Find that perfect angle in a mediocre landscape. Look around you and make the best with what you’ve got.

With a backdrop like that, it was hard to screw up this picture!
Now it’s true that a truly good photographer can tell a story and make just about anything look thrilling, but that takes time and experience. If you don’t have either of those, this one bit of advice should suffice for the time being. I’ll go over storytelling with photography in another article, for now it’s location, location, location!
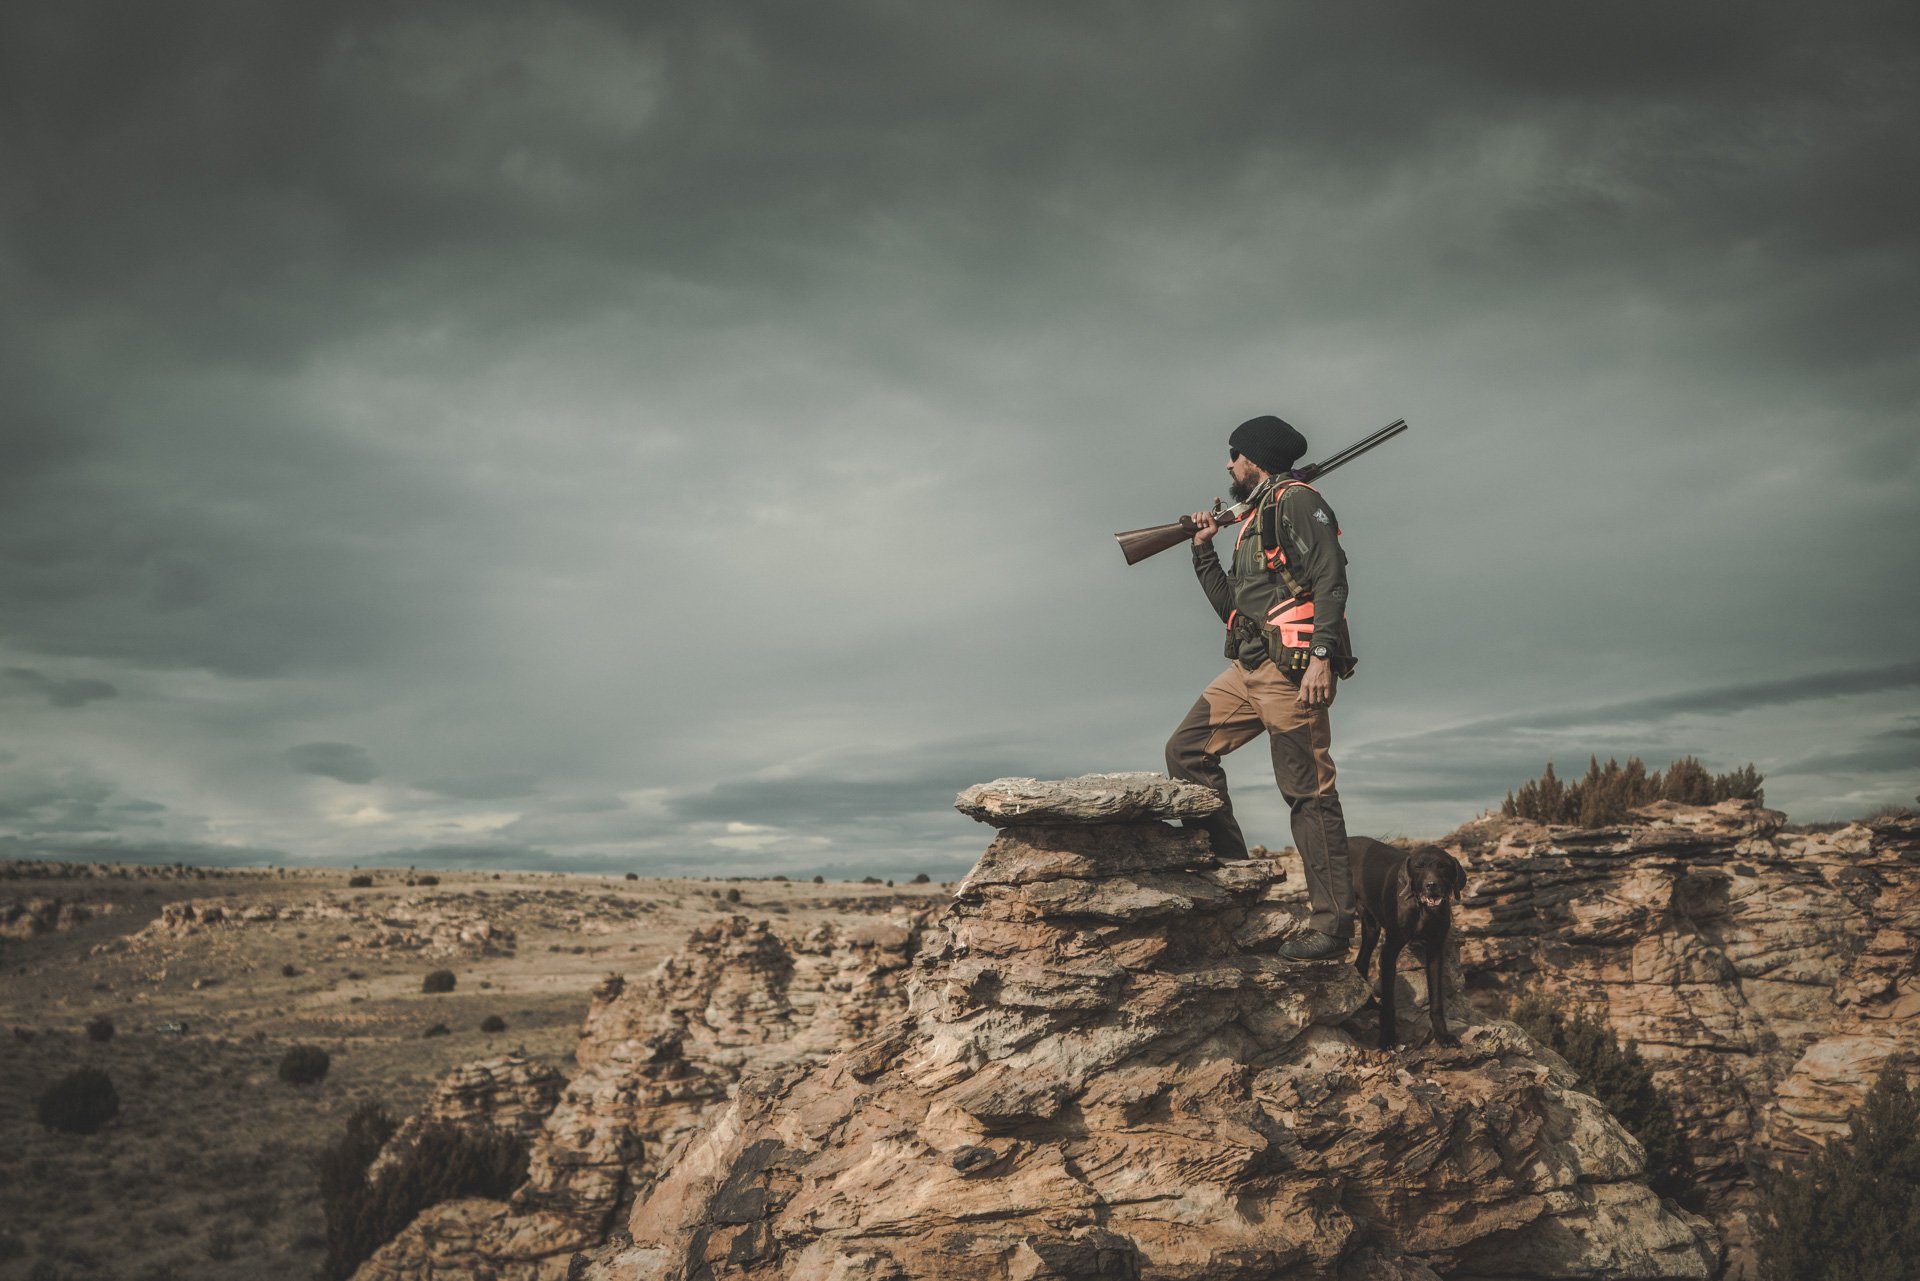
If you find cool features while out hunting, don’t be afraid to show them off.
Now I want to be clear that this doesn’t mean that you have to be in the Swiss Alps hunting Ibex to make it an epic picture (although it doesn’t hurt). What I’m talking about here is to use what is available to your advantage.
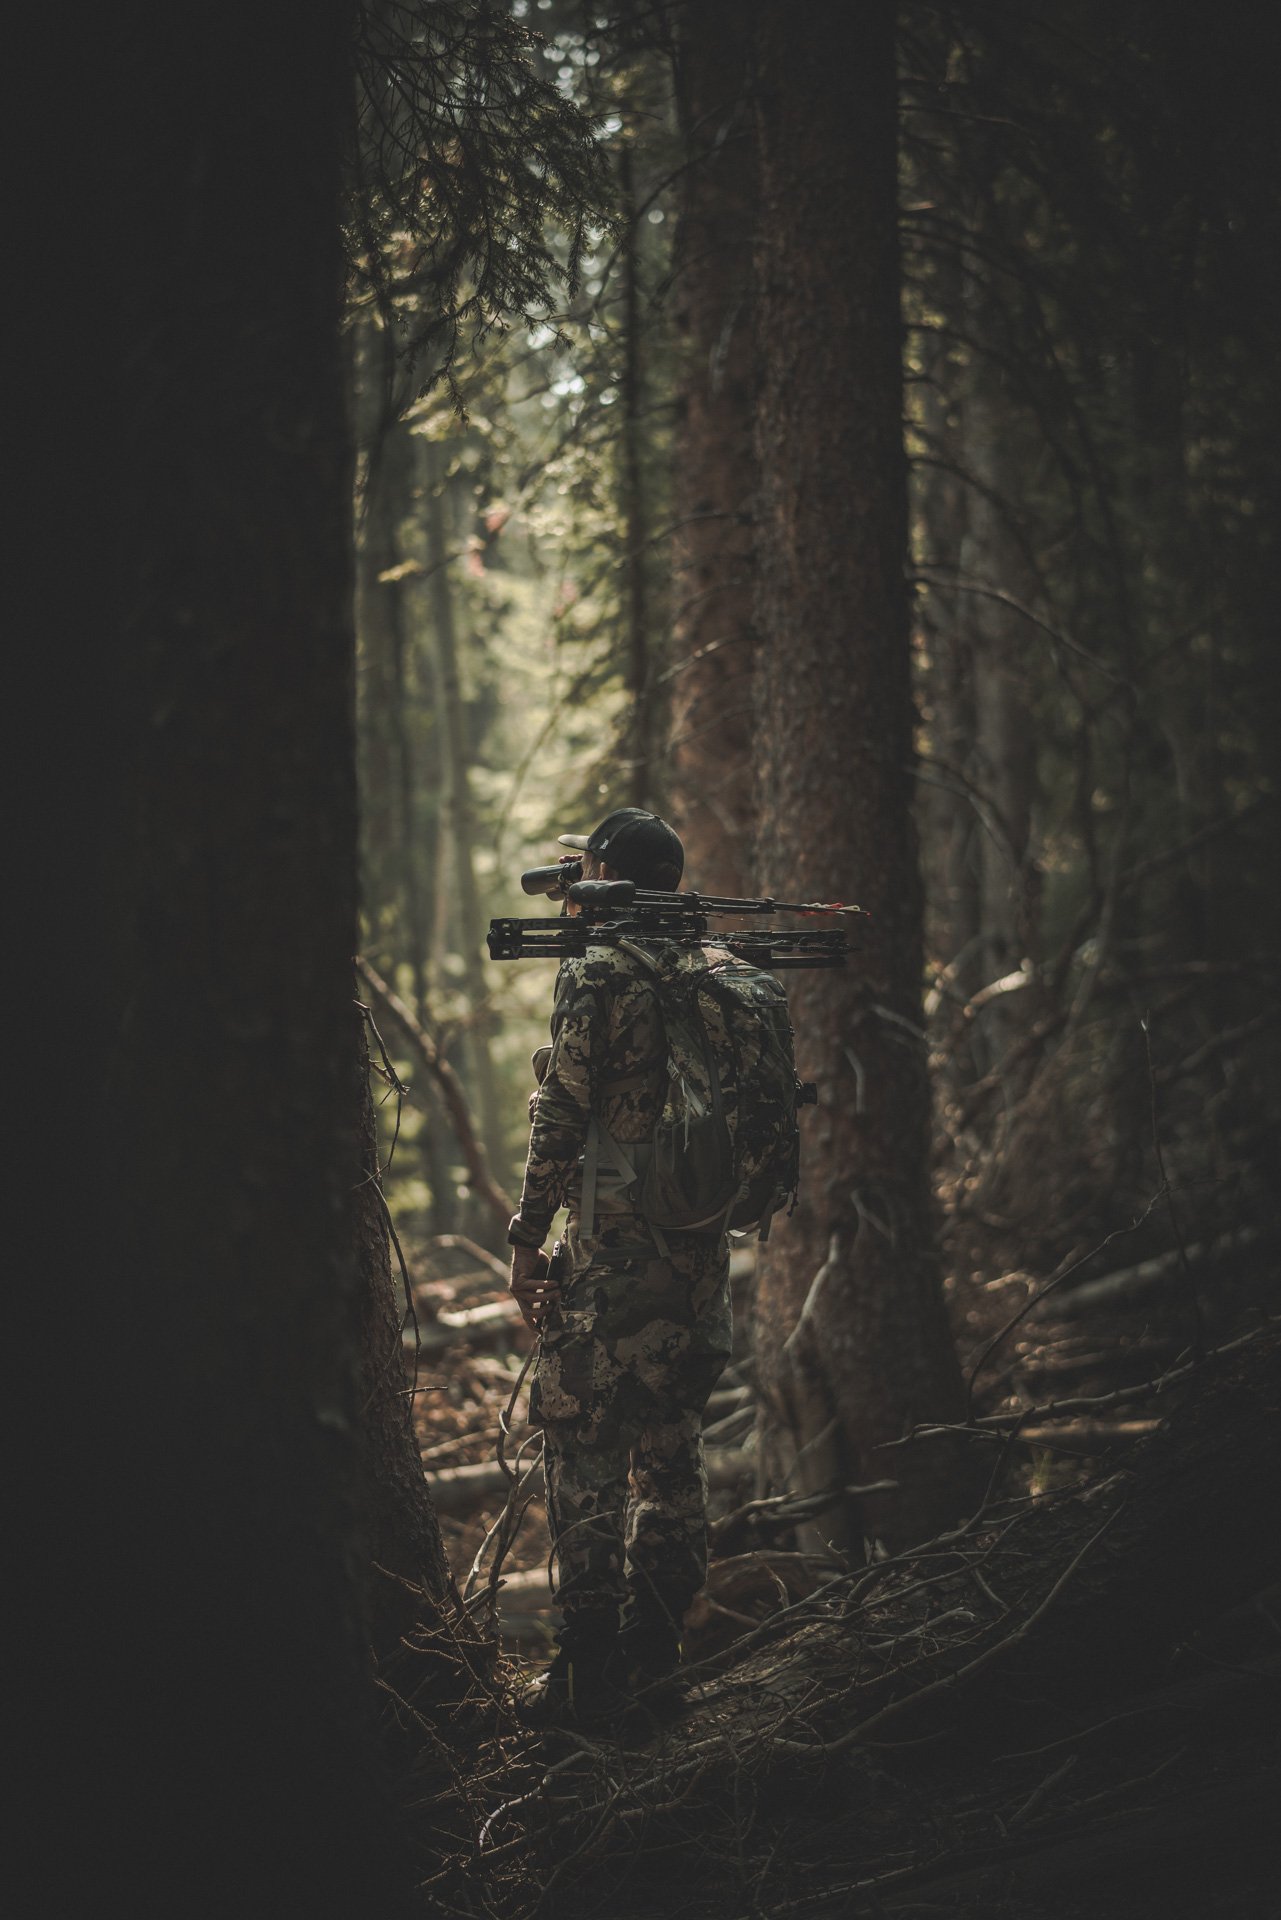
Thick timber while chasing screaming bulls can make for tough photos. Use the depth of the forest to your advantage a keep an eye out for cool lighting.
You’re not going to be able to control where that elk finally piles up on the ground after you let the air out of him. You do however have 365 degrees to work with. Don’t just arbitrarily pick a spot to take a picture from. Look at your background, ask yourself some questions.
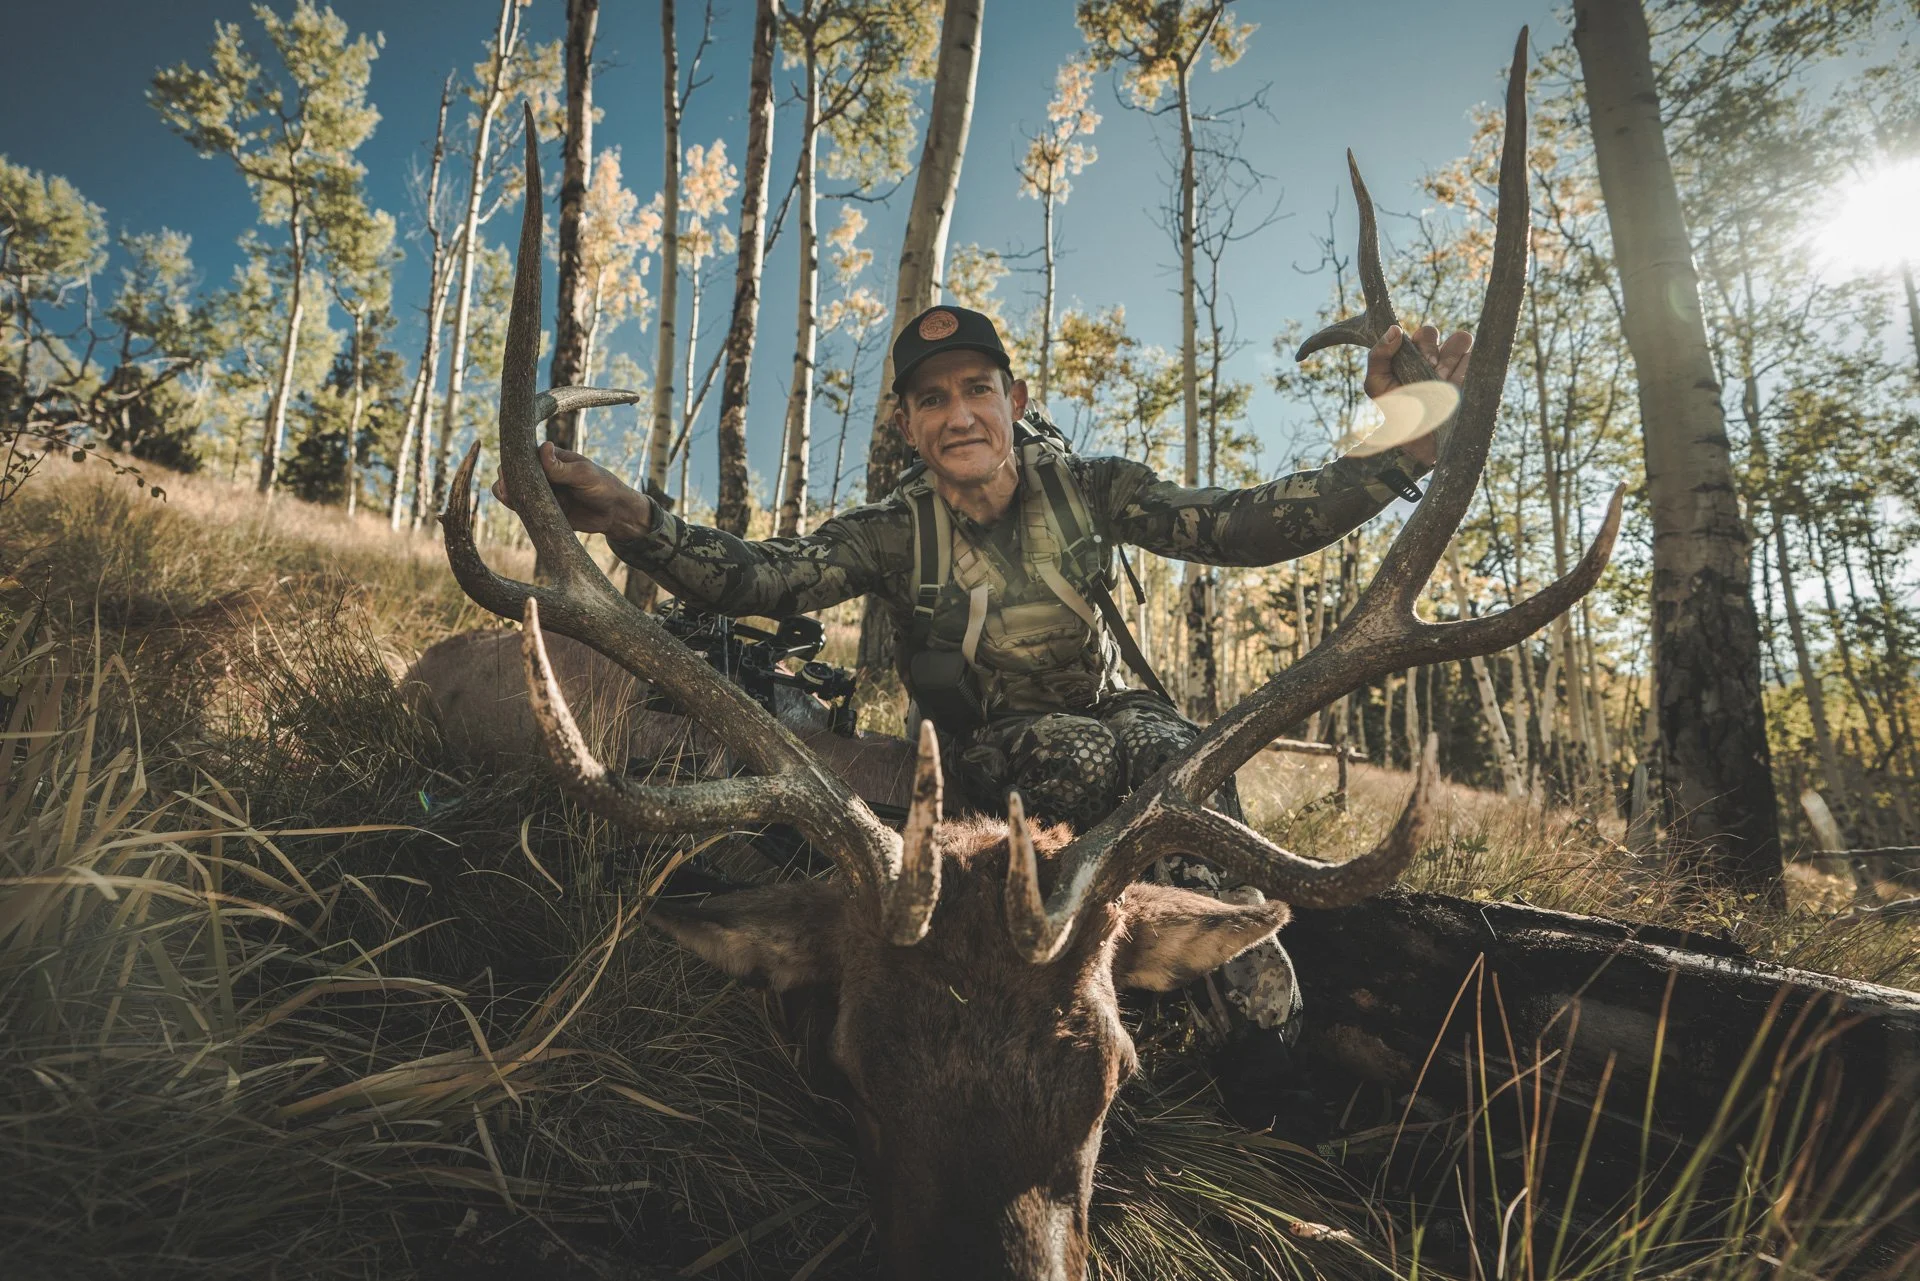
I had no control of where this bull decided to die. I spun him as best I could to get me and his rack above the horizon line and to include some aspens changing color.
Is there something in the background that will help me tell the story of the hunt better? Foliage changing to a brilliant yellow in an aspen glen, a dramatic mountain, whatever looks cool. When in doubt, look for a horizon line. Depth to your image will add a tremendous amount of aesthetic to your image and a great way to do that is by letting the background go on forever. There will be nothing that will bore your viewers more than looking at a picture pointing down at you and your trophy from above. Flat, boring and tells nothing of the story and the environment you’re in.

Bend those knees and show some depth to your trophy shots!
So bend those knees, get the camera down low and get your head and your trophy’s rack above the horizon line.

Reflections and unique structures can go a long way in making a picture worth taking. There’s not much out there pronghorn hunting so take advantage of what you can find. This stock tank and windmill was a saving grace.
There’s more to your photos than just trophy shots however, especially if you’re looking to bring your hunt to life. Think of the everyday mundane details. The setting up of camp, boiling coffee, hiking the ridgeline (don’t skyline yourself!) or waiting out a storm in your tent.

Making coffee on a scouting trip. The angle I shot this wasn’t haphazardly picked. The snowy mountains in the background, the frozen lake, all these elements help add to the story of a freezing cold morning where coffee is essential.
All of these other elements of your hunt can use the spice of a beautiful backdrop!

Waiting out a storm. Might as well glass and take a picture or two. Use the tent to frame the mountains in the background. Get creative.
Whitetail hunts can be difficult to take dramatic pictures of. The landscape often lends itself to monotony if you’re not looking carefully. Find something to make it different than just showing your bow hanging in the treestand.

This fence begged to be jumped. The blank landscape lets you know I’m in the plains. Add a little action in there and you get yourself a decent photo.

Glassing for bedded whitetail in the plains can be frustrating. Luckily the farmer letting us hunt his land was cool with using his center pivot as a glassing spot. Use of leading lines helps make this picture a bit interesting.
Now I know all hunts aren’t created equal. Some places you may hunt are just prettier than others. The key is to keep your eyes open to angles that will look better than others. Take advantage of reflections, unique scenarios and outrageous weather. Anything that can help tell your story.
Whitetail hunts can be difficult to take dramatic pictures of. The landscape often lends itself to monotony if you’re not looking carefully.
Next up, I’ll talk a bit more about storytelling through a still image.
// Fred Bohm

Photography Video Tutorial - How I Created the "Windowed Man"
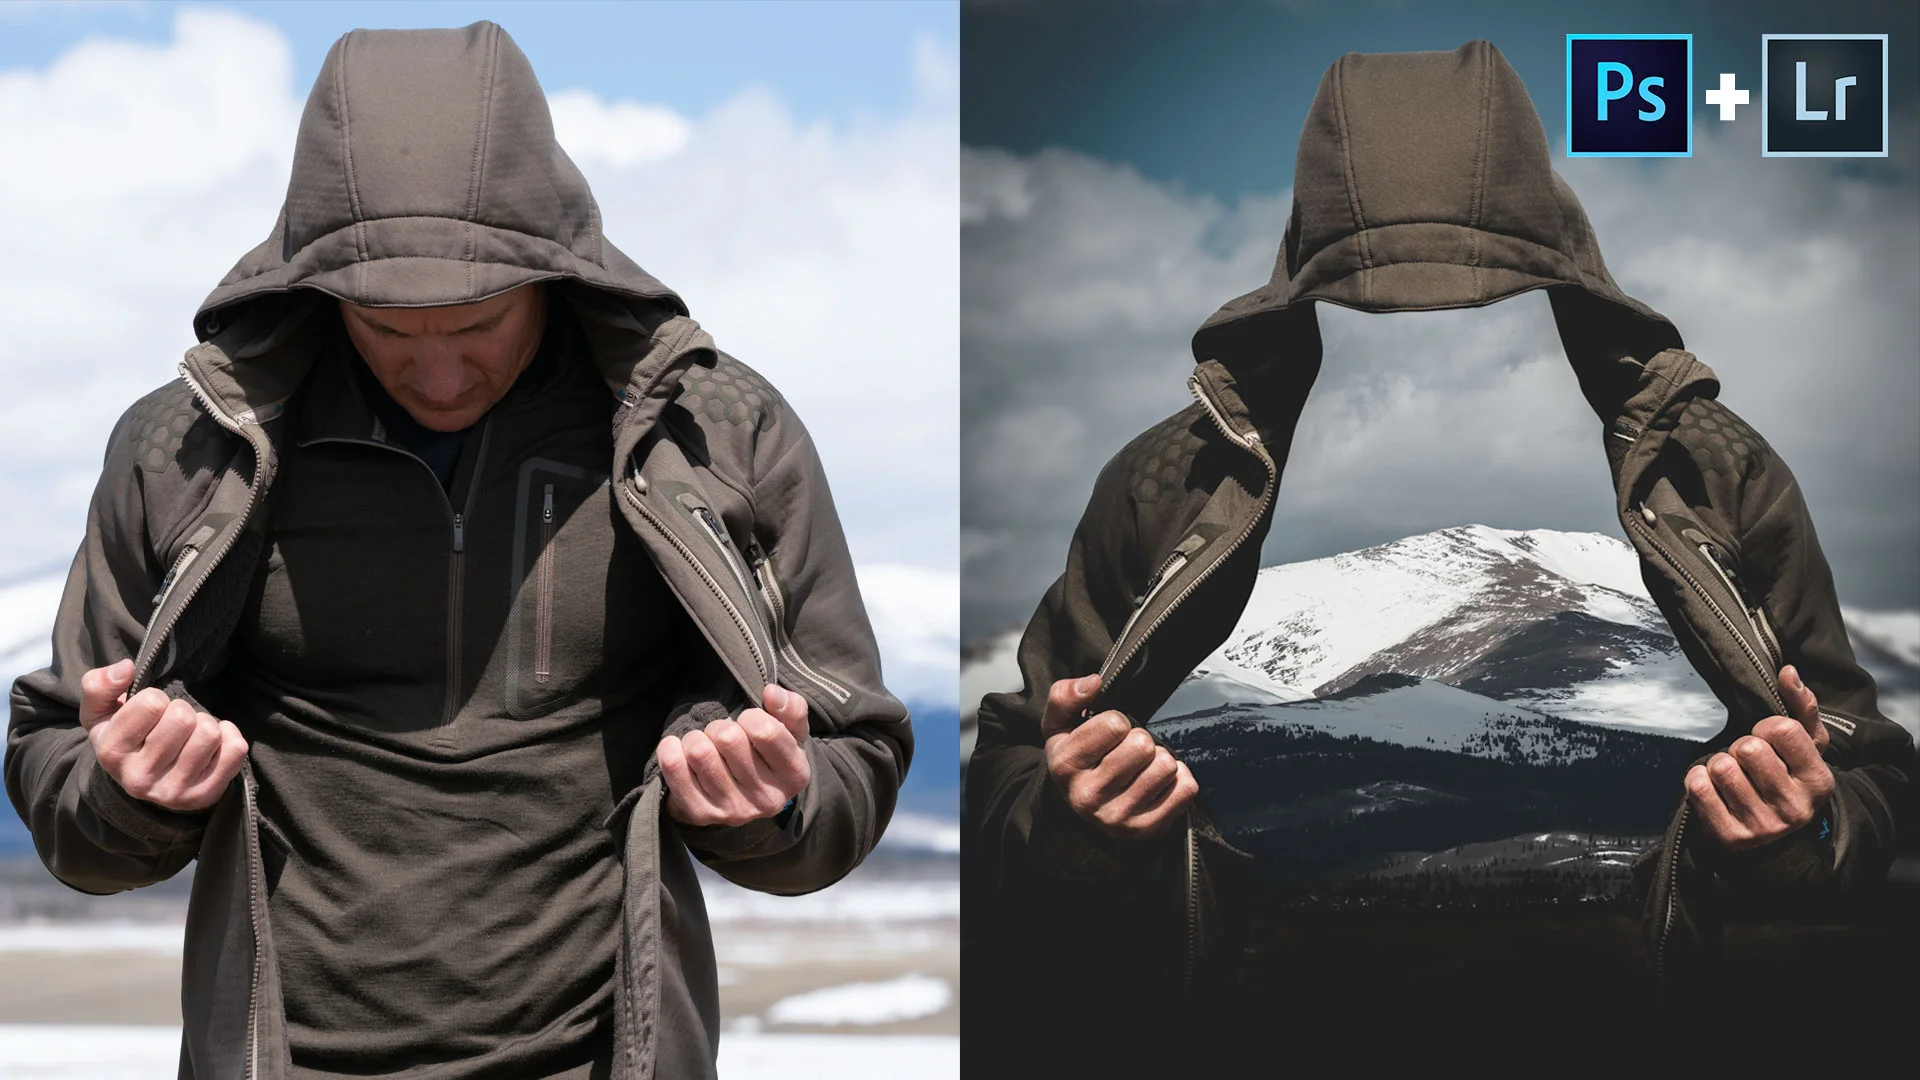
Here’s a breakdown on how I created the “Windowed Man” image. I’ll run you through the how-to’s in Photoshop and Lightroom, from the beginning right to the end.

Framing Your Hunting Trophy - Hunting Photography Series - Part 6
Part 6 - How to Frame Your Hunting Trophy - Hunting Photography Series
Framing Your Trophy
You worked your ass off training and getting in some range time during the preseason. You weeded your way the application systems and pulled a tag. You begged time off from a boss that doesn’t understand why anyone would take “vacation time” to sit in the dirty woods with man eating animals. You’ve spent countless hours away from your family, sleeping in the dirt and chasing animals that did everything they could to elude you. At long last you finally arrowed one, tracked him down and took a knee and gave a fist bump to the heavens above.
Now it’s time to get the cover photo for Eastmans Magazine. Snap a pic with your iPhone and be done with it, right? If you’re looking to impress grandma maybe, but if you’re looking to have the photo seen you’re going to want to take your time and do this right.
When telling the story of a hunt we want closure. Either failure or success. Often it’s the former, but with success comes the grip and grin. Don’t let others shame you into not taking that photo. Hold that trophy in your hands and be proud of it.
Using Your Background to Your Advantage
The background of this all important photo is almost as important as the trophy you hold in your hands. It tells a large part of the story. Was the animal taken in the mountains or on the plains? Simply having your hunting partner snap a pic of you while he’s standing there won’t tell either story. Great pictures don’t simply happen, they’re planned out.
So how can you include more story in the shot?

Break the horizon line with you and your trophy.
Get that camera closer to the ground so you and the animal break the horizon line.
You’ll want to place the camera on a tripod or have your hunting partner get the camera close to the ground. You’re looking to have the animal’s horns/antlers as well as your head break the horizon line. By doing this you’re reducing the clutter in the background. It will force the viewer’s eyes where you want them, on you and your trophy. The rest of the background elements are important to help tell the story, but keep you and your trophy as the primary focus.

The cool butte in the background is iconic for the area.
Position the animal and camera angle to integrate key elements of the background.
Is there a cool mountain peak full of snow in the background? How about a windmill off in the distance standing erect in an otherwise desolate plain?
These are element that belong in the story. They help the viewer picture where the hunt has taken place. These are elements that are going to strengthen you picture.
Pro Tip: Make sure those elements aren’t directly behind you or your trophy. Set them off to the side a bit. You don’t want it to look like that windmill or mountain peak is growing out of your head.
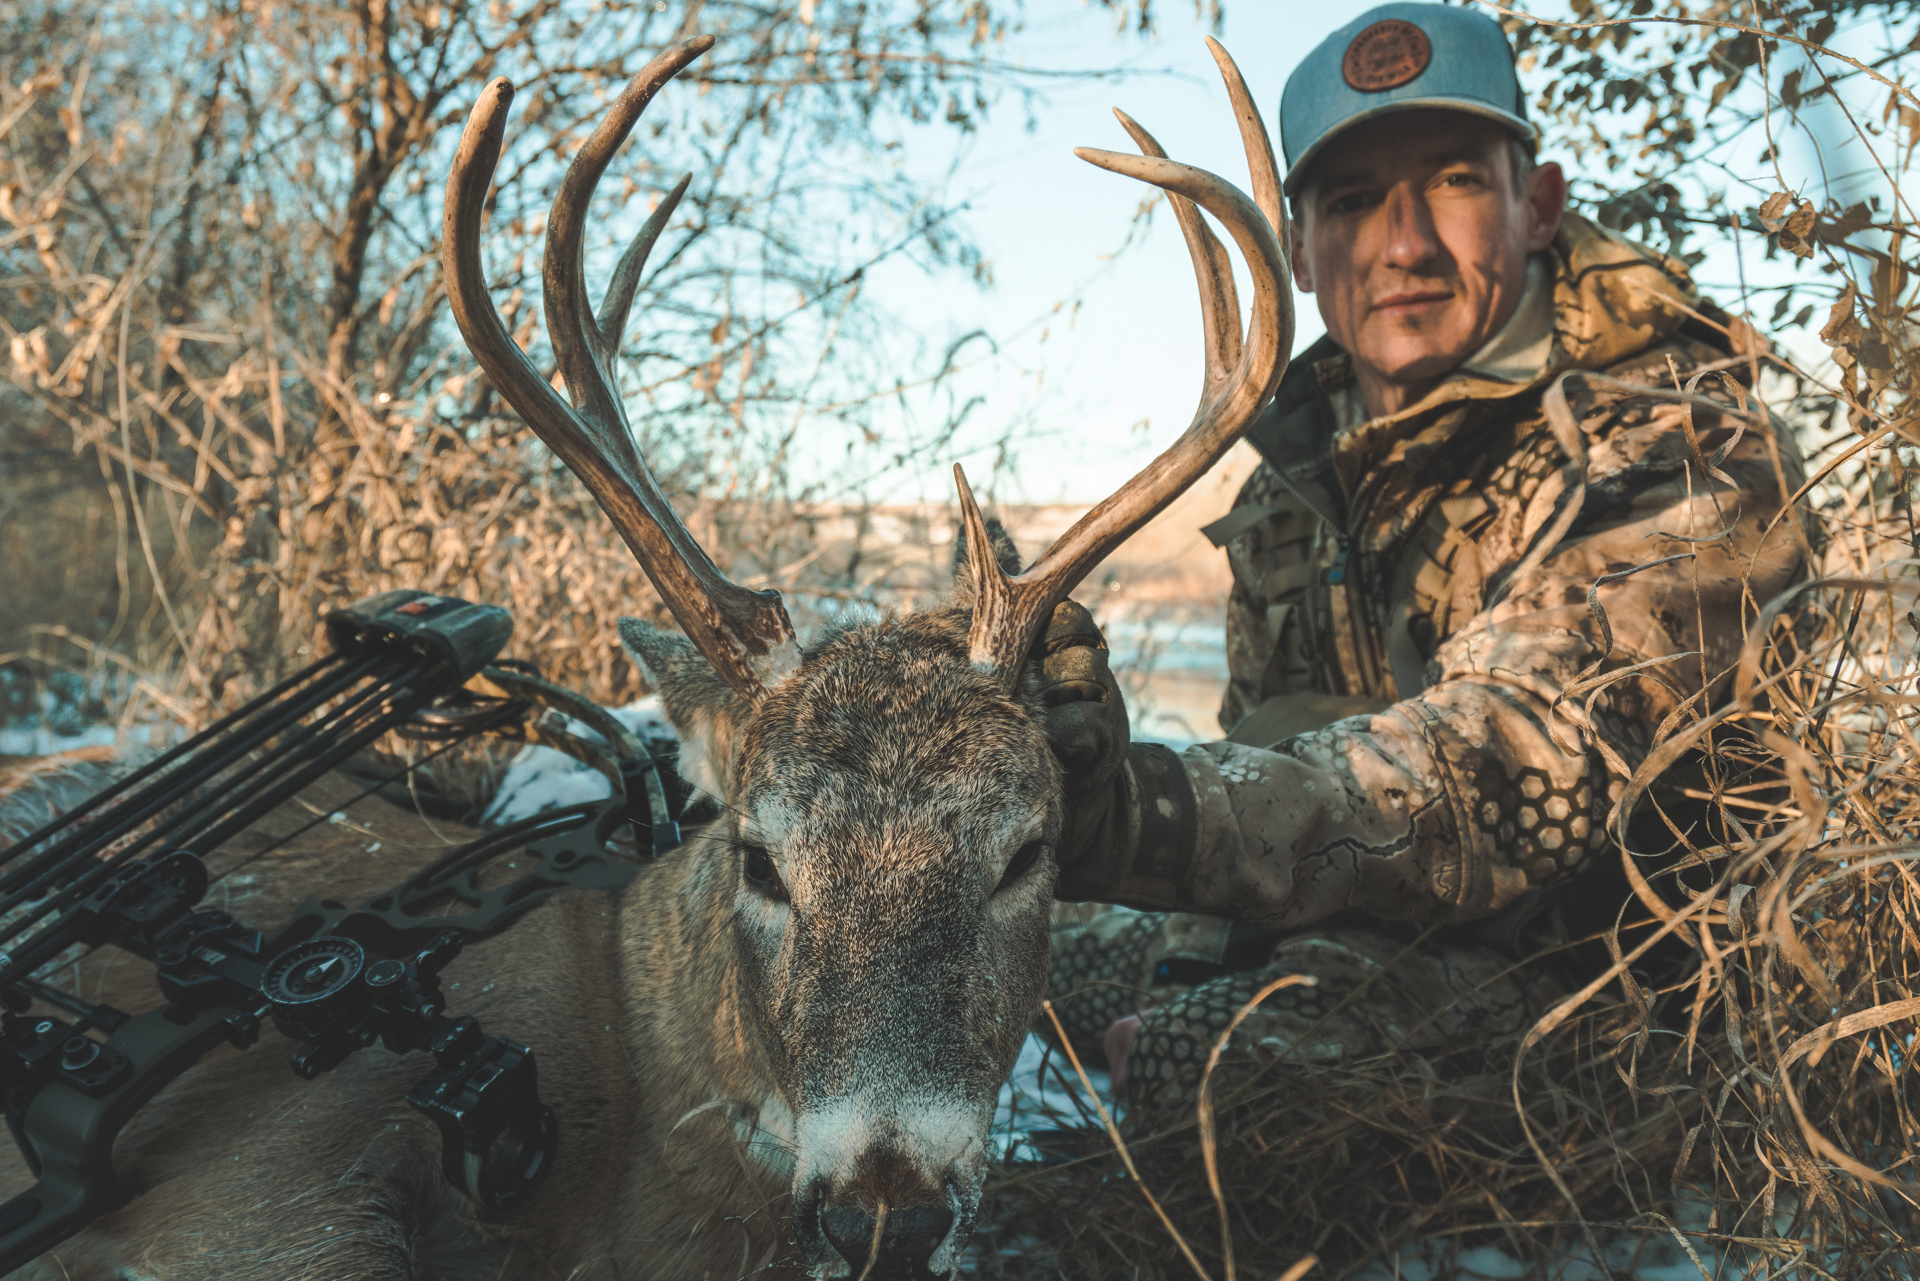
There wasn’t much I could do with the background and positioning on this one so I cranked down the depth of field as much as possible.
What happens if your simply not in a cool looking location? This is where a shallow depth of field helps. Keep you and your trophy in focus and let the background blur out creating a cool texture.
How to Pose and Clean Up the Animal
This is often debated within the hunting community and honestly, I can care less. We live in a time where most people feel the need to tell others how to live their lives. I refuse to participate in these ridiculous debates.
So if you want to clean up the animal so theirs not blood drooling out of their mouths? Do it. Position it so that the it emphasizes the animals headgear? Have at it.
Often you’ll want to tuck the animal’s legs underneath it and position it in a laying down position. Grab the antler with one hand and twist his head so he is looking perpendicular to the length of his body. Make sure that there isn’t any tree branches or distracting features behind his rack. Reposition the camera or the animal to fix that if necessary.

You’ll want to position yourself off to the side so you’re lined up over the animal’s body. Again you want your head as well as the animals above the horizon line if possible.
I often clean up the wound a bit with anything lying around. Grass typically does the trick. I’ll also push the animals tongue back in it’s mouth. You can carry a twisty tie (like what they use to close a bread bag) to wire the animal’s mouth shut if necessary.
What Lense Should You Use?
Here starts another debate and can get you laughed at a good bit if you overdo it. We’ve all seen those pics where guys are standing a ways behind their trophy and shooting with a wide angle lens. The animal ends up looking like a prehistoric beast that will break all the record books. It’s bordering on an outright lie.

It can feel like this sometimes with the pictures I see out there.
But there is something to be said for highlighting the animal’s strong points. So tread lightly here.
Get your camera close to you and your trophy and use a wide angle lens. I wouldn’t go less than 28mm otherwise you will be treading on what we talked about above.
Being an arm’s length behind the animal seems to be acceptable and keeps the shot looking realistic.

I brought a flash with me on this hunt. I used it to help separate me from the background.
Lighting Options
Underated to the uninitiated. Lighting is extremely important. If you have that sun blasting behind you and your trophy with nothing to fill in the dark shadows it creates, the picture could be lost.
So there’s several ways to work around this. I always carry a flash with me, but I understand that is not practical for most people. I love this stuff to no end, so for me I’m willing to add a pound or so to my backcountry pack.
An alternative is to use what’s handy. I’ve had the sun to my back before and had a hunting partner hold up a white game bag in front of me to use as a reflector. It’s a great way to fill in deep shadows.
Another simpler way would be to just position you and your trophy to face the sun. Keep hat bills back so there isn’t a drastic shadow across your face if possible.
If it’s a semi-cloudy day it is often to your advantage to wait until a cloud goes over the sun. This will diffuse the light and give less dramatic shadows.

Here’s a different way to display your trophy besides having them on the ground.
Conclusion
I always like to end these photo series posts with this caveat. These are just ideas for you. A simple formula, but please by all means make up your own. That’s what will make your images unique and different from the crowd. These are ideas to keep in the back of your head and to be used to help spark ideas of your own.
Tag me on Instagram @fredbohm. I’d love to see how you put some of these ideas into action.
// Fred Bohm

Capturing Action - Shutter Speed and Motion Blur - Hunting Photography Series - Part 5
Part 5 - Capturing Action - Shutter Speed When and Why - Hunting Photography Series
Capturing action in a photo? Doesn’t sound like something that photographers worry about, it sounds more like it should be in the realm of film. If you believe this to be true you are missing out in a very important element that can take your photos to the next level.
Some may think we are at a severe disadvantage when it comes to telling a story with photography compared to guys who shoot video. We don’t have thousands of frames running together to show what is going on in the scene, we lack audio to inform the viewer of what is going on and no music to set the mood. Disadvantage perhaps, impossible to do with photography? Certainly not. Capturing action within the photo is an art form and can be a powerful way to tell your story through a still image.
You should always be thinking how you can add action to your shots. It’s not always appropriate, but at least having it in the back of your mind will help you determine if it should be used or not.
There are a couple of different ways to catch action in your still photos that we’ll go through in this article.
Implied Action - Capturing movement that the viewer understands is occuring due to the nature of the shot.
Motion Blur - The streaking of objects implying their movement within the image.
Both of these tools are simple to use, but can have a powerful effect on your imagery. Capturing action helps tell story better and with a lot more excitement. Plus its under utilized by many photographers so it will help your imagery stand out.
Look back to some of the photos you have previously taken and ask yourself if action could have enhanced the image. More than likely in just about all of them the answer would be yes. It doesn’t always have to be the subject performing the action as well. Moving background elements can be just as beneficial.
A technical heads up. You will need a tripod to be able to shoot with slower shutter speeds. You are trying to capture motion within the scene, not the shake of your hands. A general rule of thumb is to use a tripod for shutter speeds slower than 1/60 seconds.
Let’s break down the two ways I described above on how to capture action so you can get started on using this tool in your own photos.
Implied Action
Implied action is pretty simple. Often times it’s more about being aware of it than actually creating it. It’s as simple as having something in your image that the viewer assumes is moving.
Perhaps it’s a train locomotive moving towards the camera with smoke billowing out of its stack and covering the train cars behind. The viewer’s brain will automatically assume the locomotive is moving. Why? The smoke pouring out and covering the cars behind is likely occurring because of the train’s forward movement. Add a subject in front (and off to the side, let’s not get anyone killed here) and you have yourself one powerful image.
What can we do with our subject that will suggest action? Instead of just standing there how about making them do something? Look for simple actions they could take that would help create a story in your image.
Jumping can be a great way to add action to a shot. There is no other way that the subject could be in that position other than jumping. Implied action at its best.
Here’s a shot I took of myself jumping a gap in the rocks. There is no other way I could be in that position other than jumping. An instant injection of action.

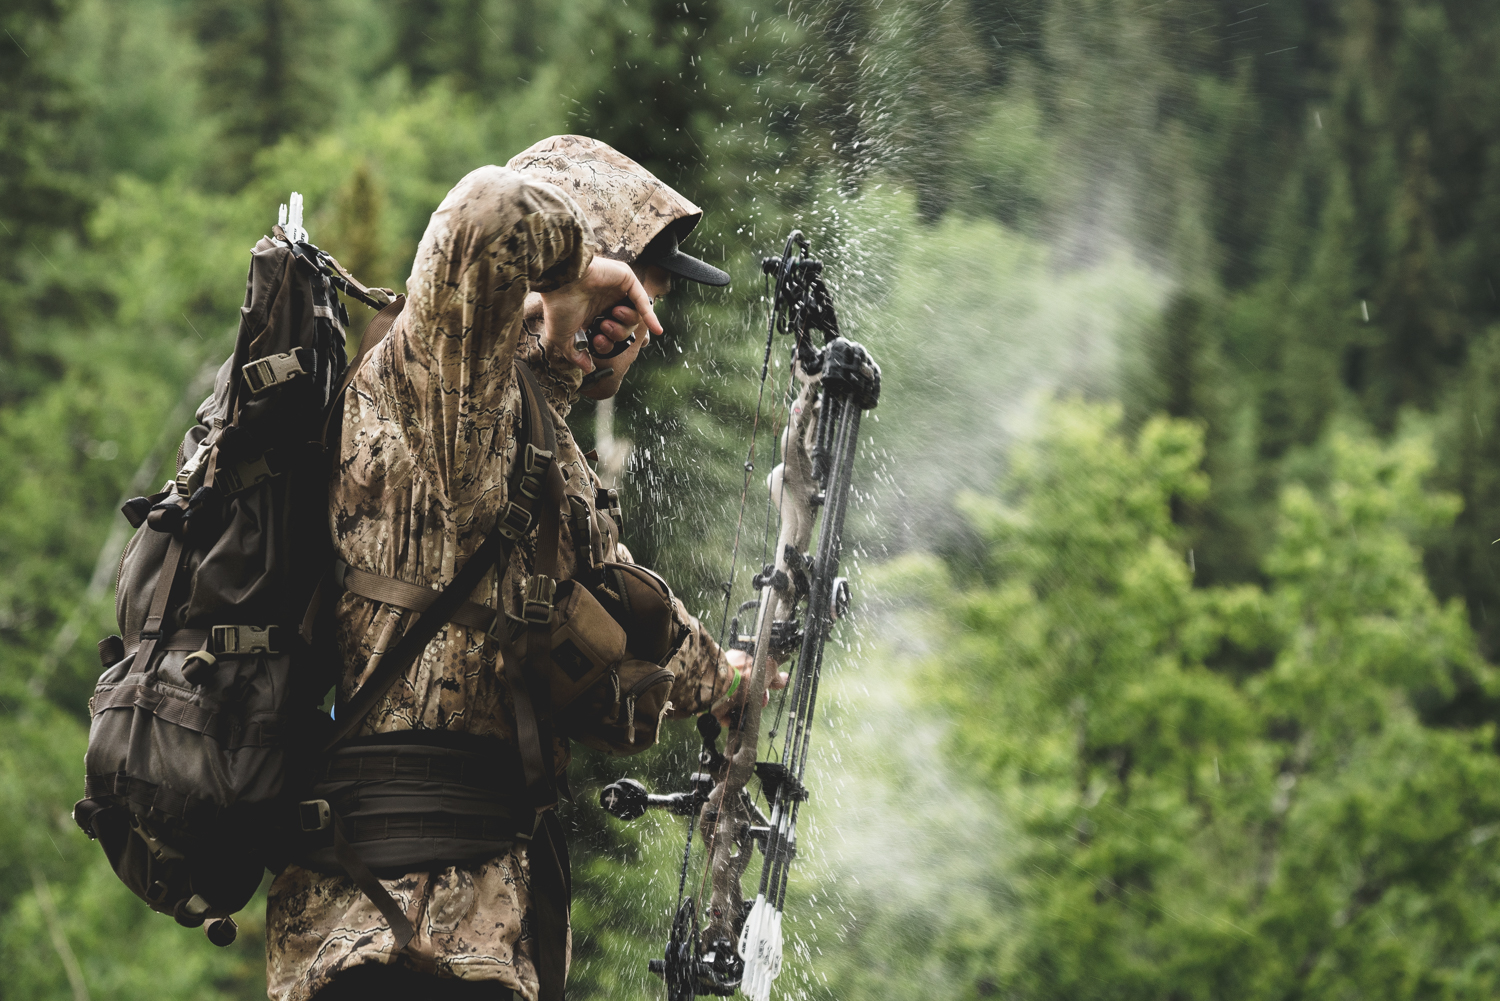
Or how about water flying off of your bow after a rainstorm? A pretty cool way to enhance a shot.
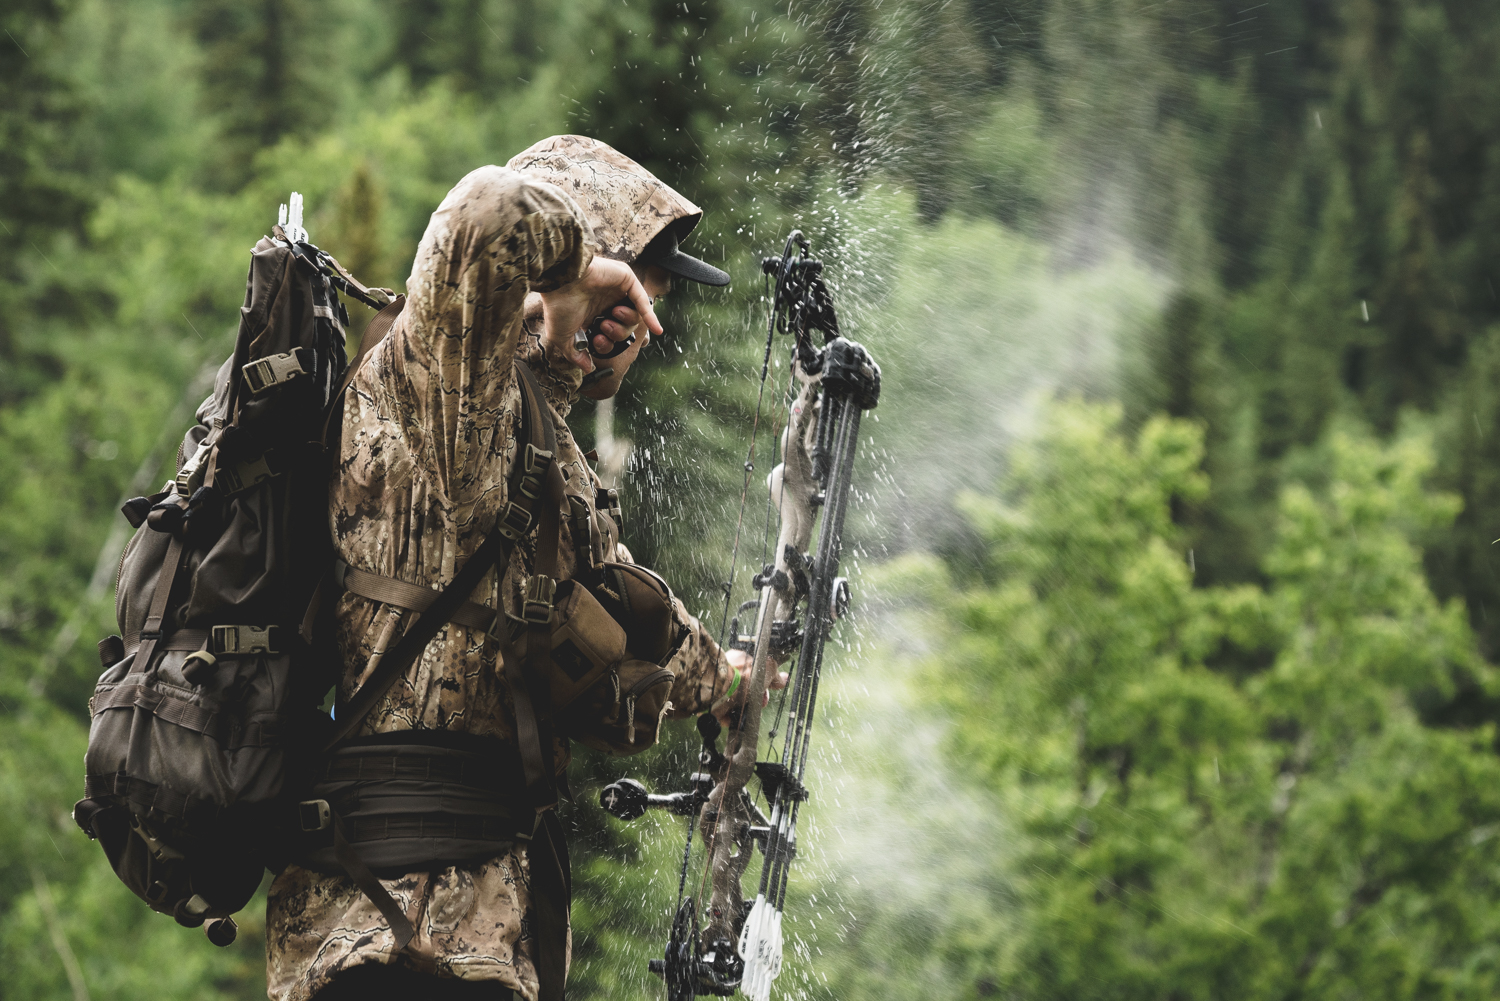
If you’re trying to show off a piece of gear lets say, a great way of doing it would be tossing it in the air and freezing it there. A levitation effect so to speak.

This is a great spot to jump into our next section as capturing the techniques above will take some forethought when it comes to the shutter speed you choose.
Motion Blur
To motion blur or not motion blur, that is the question. But perhaps I’m putting the cart before the horse. Let’s go over what motion blur is and how we can capture it for those of us that haven’t heard of it.
Motion blur is the apparent movement of an object in a scene that shows itself in streaks. What is happening here is that the shutter of your camera is open long enough that the moving object isn’t completely still in the photo, rather you see where the object starts and stops during the time the shutter is open. Basically a very fast shutter will make the image appear still and therefor crisp in the scene. A slower shutter will show motion blur that represents movement.
Both can capture action, but you’ll have to determine which will look better and tell the story better in each particular instance.
What determines a “slow” shutter speed is how fast the object itself is moving. You might have to speed up the shutter to say 1/5000 to capture a hummingbird without motion blur, but a human walking might only require 1/100 of a shutter speed. You will need to determine what is the appropriate shutter speed to get look you want. Luckily in this age of digital cameras you get instant feedback and can make appropriate adjustments almost instantly.
Let’s take a look at some photos and determine how they were created using motion blur to our advantage.
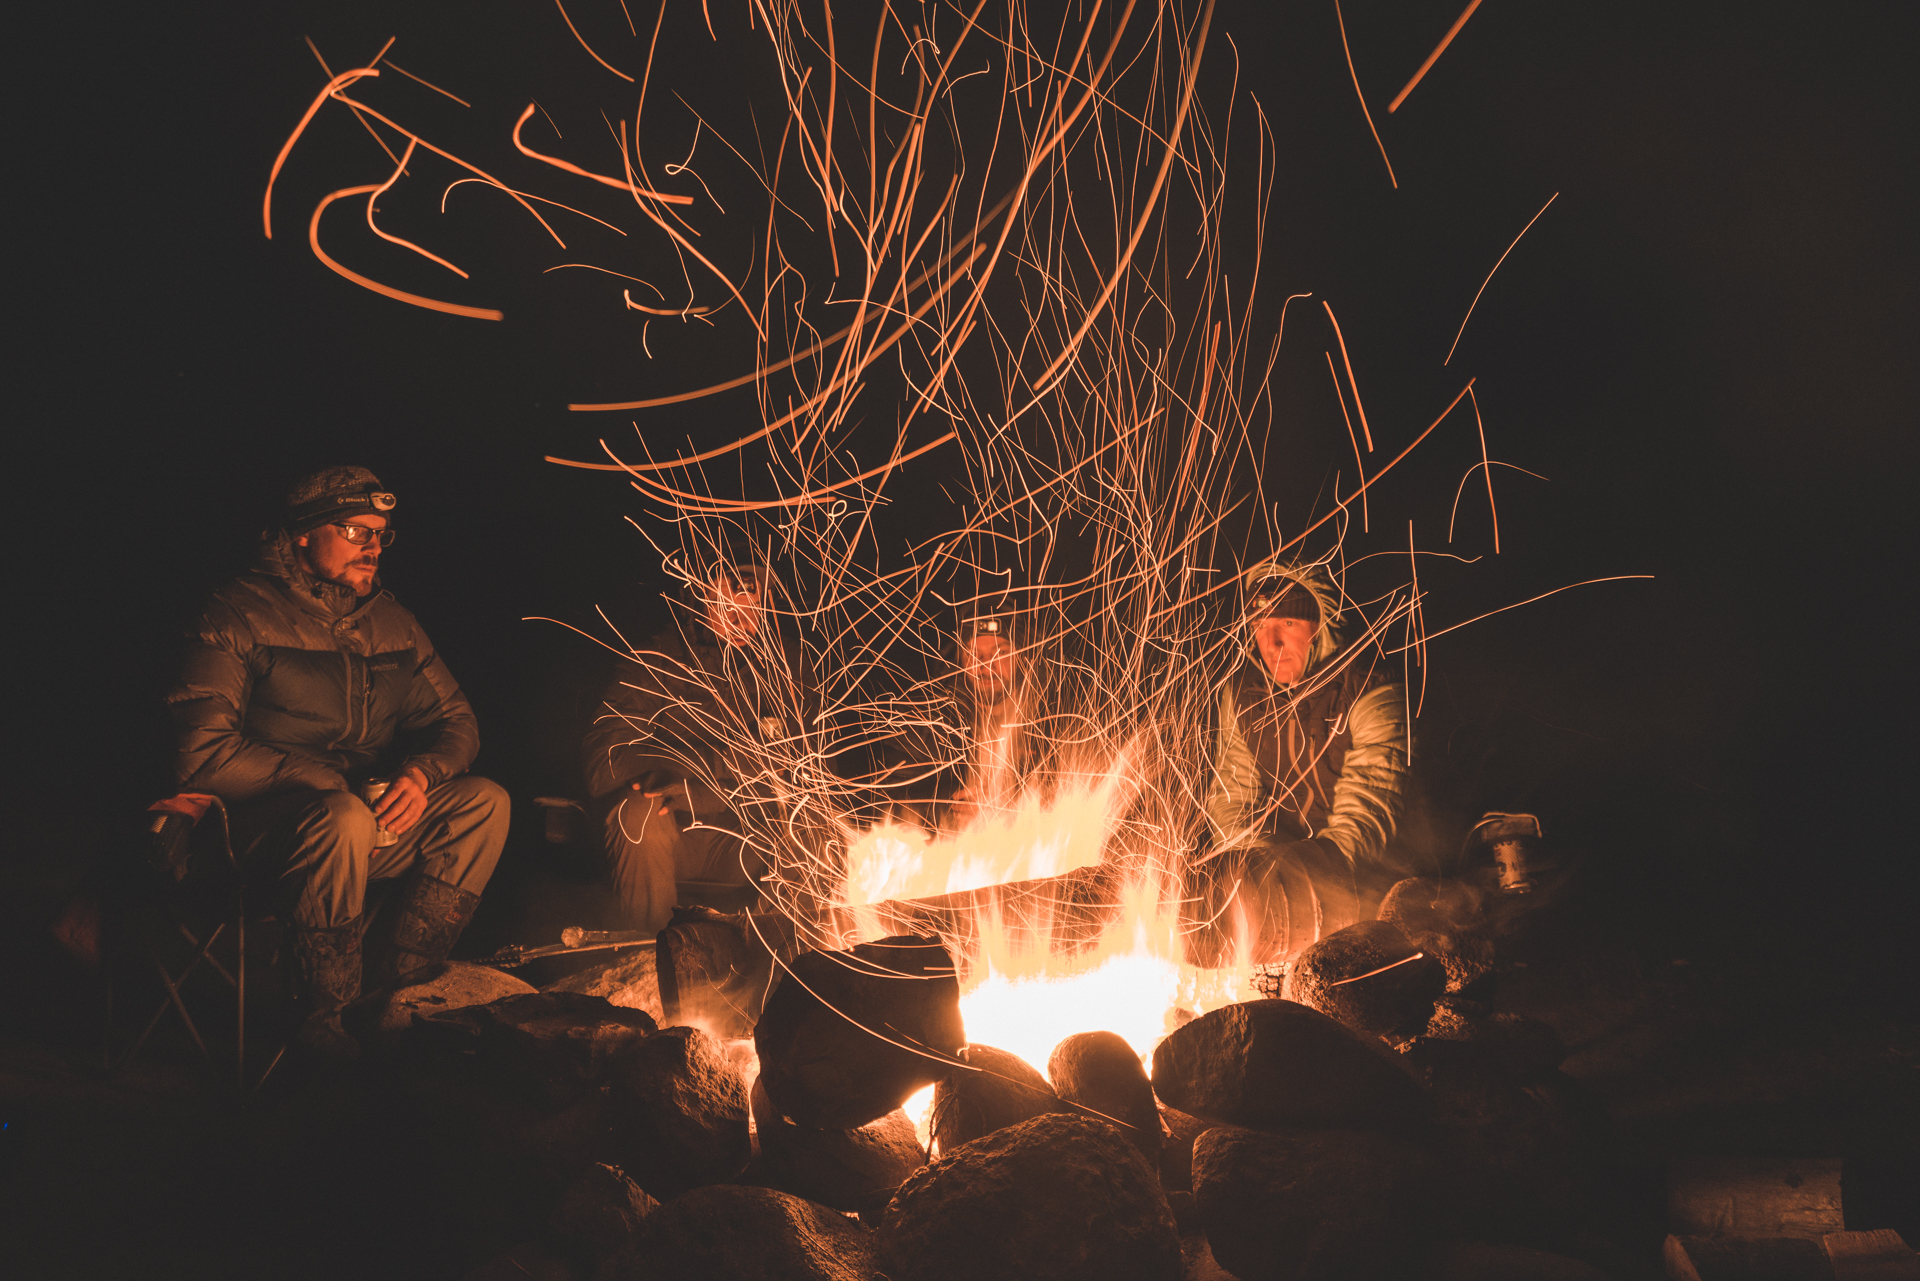
Here is a picture of me and some buddies sitting around a campfire. I set the shutter speed to ⅕ of a second in order to capture the trail of the campfire sparks. At that shutter speed we get beautiful streaks that both make the image interesting as well as imply action. Warning: at that slow of a shutter speed it is easy to pick up motion blur on your human subjects. You will need them to hold as still as possible to avoid “ghosting”.

Here’s one of my favorite ways to capture a trophy shot at night. Most of us don’t carry a flash in the backcountry so it can be hard to capture a kill in the dark. Considering most animals are shot early in the morning or late in the evening this can prove to be a photographers nightmare for the later. So we have to improvise.
“Light Painting” is a really cool way to light the scene as well as create a really cool light streak from the motion blur of your light source. In this instance it’s my headlamp.
For this shot I used a shutter speed of 10 seconds. That’s really slow so any movement in the scene will create motion blur. Your subject is going to have to stay as still as possible so that they don’t look blurry.
What I did here was open the shutter and then shine the light all over the front of the hunter and elk. Then I slowly walked around the subject painting the back of them and making sure the camera lense received a healthy dose of headlamp as well. I also used a second headlamp to backlight the subject to create a rimming effect behind the hunter and elk. I didn’t worry about me showing up in the image although I walked completely through it. My movement was fast enough that I didn’t show up in the image.

Another example of how we can use as slow shutter speed and motion blur to make a more interesting picture. Here the archer is shooting with a lighted nock. I set the shutter to 0.4 seconds. As you could imagine this is a tough window to hit for the arrow flight so there was a lot of 1,2,3 shoot! In there to get it right. But hey, pixels are cheap so let them fly.
Whip Zoom

This is a fun way to add motion blur and force the eye of the viewer. What you’re looking to do here is use a slower shutter speed, let’s say around 1/30th of a second, and zoom in real quick with your lens. This will give you the above effect. Adds more motion to a picture instantly.
Another variation of this is to use a slower shutter speed again and move the camera quickly to follow the subject. The subject will be relatively unblurred while the background has considerable motion blur.
Putting It Into Practice
And there you go. It’s as simple as that. Slow down your shutter speed, use a tripod and start making your picture more interesting. Start looking for action in every picture you take. You will start looking at how you use your camera and what’s going on around you in a completely different way. Is it raining? That’s action. Are the clouds moving fast in the sky? That’s action. Is your subject moving over an obstacle? That’s action. Now use it to your advantage and start making some really cool images!
Find me in Instagram at fredbohm and start tagging me in your shots. I’d love to see what you’re up to and how you are using action in your shots.
Now stop listening to me and get out there and shoot!
Continue on to Part 6 - Framing Your Hunting Trophy
// Fred Bohm

Composition - Angles, Framing, Rule of Thirds and Image Depth - Hunting Photography Series - Part 4
Part 4 - Composition - Angles, Framing, Rule of Thirds and Image Depth - Hunting Photography Series
Now we’re getting into the good stuff. We’re starting to understand a good bit about lenses and how to use them through the last two parts to the series. Now we’re going to talk about composition, how and where we want to frame what is in our image. We will go into giving your image depth as well. This will make your image more robust and interesting and less flat and boring.
Why Does it Matter?
We as photographers are here to tell a story through our images. I’m sure you’ve heard someone spin a tale that had you leaning forward in your seat, had you captivated and hanging on the every word, just dying to see where the tale would take them next. I’m also sure you’ve listen to a five year old tell you a story about his day. The amount of “ummms”, nose pickings and jumble of incoherent and unintelligible words may have had you looking for the closest exit to save.
So we can probably agree that not all stories are created equal. And I’d imagine you’re reading through this photo series because you don’t want to be that five year old babbling words, but rather the Hemingway of the photo world.
So just like a great storyteller we want to infuse our images with energy, interest and tension. We don’t have a lot of time to do this. While a storyteller may have a captive audience around the campfire, our audience is usually scrolling through hundreds of pictures on their Instagram feed, only stopping when something stands out and catches their eye.
We live in a world where grabbing someones attention is a near impossible event. There is just too much competition and too many people trying to get in front of eyeballs.
Being different and being better than the norm is what is going to grab attention. This is why different angles, framing, using image depth and implementing the rule of thirds is so important.
Now we know why. Let’s get after the how.
Angles
When you look at a typical family photo you should notice they can all look the same. Just swap out the people, add in new family members, it doesn’t matter. They all feel the same. Why is that? Usually all the members are lined up and stretch from one side of the frame to the other. For a really artsy feel they may add the family dog in the front of the line. Straight on, everyone facing the camera.
What could we do better? How about adding a new camera angle. Instead of a straight on shot, how about getting closer to one side and shooting down the line. Create a diagonal. Give the shot some depth. Or add in some really interesting elements. What is going on around you? Is there a cool backdrop you could use that describes your family? How about some props to help tell the story?

I took our family photo in grouse country because we hunt as a family. We were wearing our hunting clothes and I had my double barrel over my shoulder to help tell our story.
I once heard a photographer say, “Never take a picture standing as you normally would stand.” I hate to say never, but I’d say he’s right 99% of the time.
Don’t be afraid to bend those knees. Different camera angles will create more interesting compositions. Stop standing and pressing the shutter button!
If we are going to captivate our audience we need to start showing them a fresh way of looking at things. If we constantly shoot from our regular standing position we are only showing them what they see everyday. We need to offer them a new perspective.

Here’s an angle we don’t see everyday. I got up above this whitetail hunter and shot down while looking for a spot to place his stand. Variety goes a long way in photography.
When shooting a picture of your son on his first hunt carrying his bolt action .22, looking for the nearest squirrel, get down to his eye level, don’t simply stand there and shoot down at him. If you do that his background will be a bunch of browning leaves on the ground and will tell nothing about what is going on that day.

Get down to eye level when taking photos of the little guys.
Angles that angle up and ones that angle down say something very different and very powerful. If you have the camera on the ground pointing up at your subject it gives the subject the feeling of being in power. The opposite holds true if you shoot down on the subject. The viewer will have the power in this situation. Use these angles to help you tell the story of the image in a very simple way.
The use of leading lines in your images is another great way to force the viewers eyes to go where you want them too. Find natural lines in the image and have your subject placed at the end of them. When viewing the image, your eyes will naturally look down these lines and end on your subject.

Our eye naturally follows the center pivot irrigation line to the hunter above.
Finding diagonals in the scene is a great way of adding interesting elements. Use them and avoid the straight on flat looking shots.
Framing Your Subject
There’s a reason we put pictures in frames, they look good that way. What if we could frame our subjects within the image itself? Well we can!!
We can use elements around us to literally frame the shot. Now I’m not saying that it will be a perfect rectangle. It may only have one or two sides, but using something to help put the subject in a frame will help the viewer’s eye to go where you want it too.
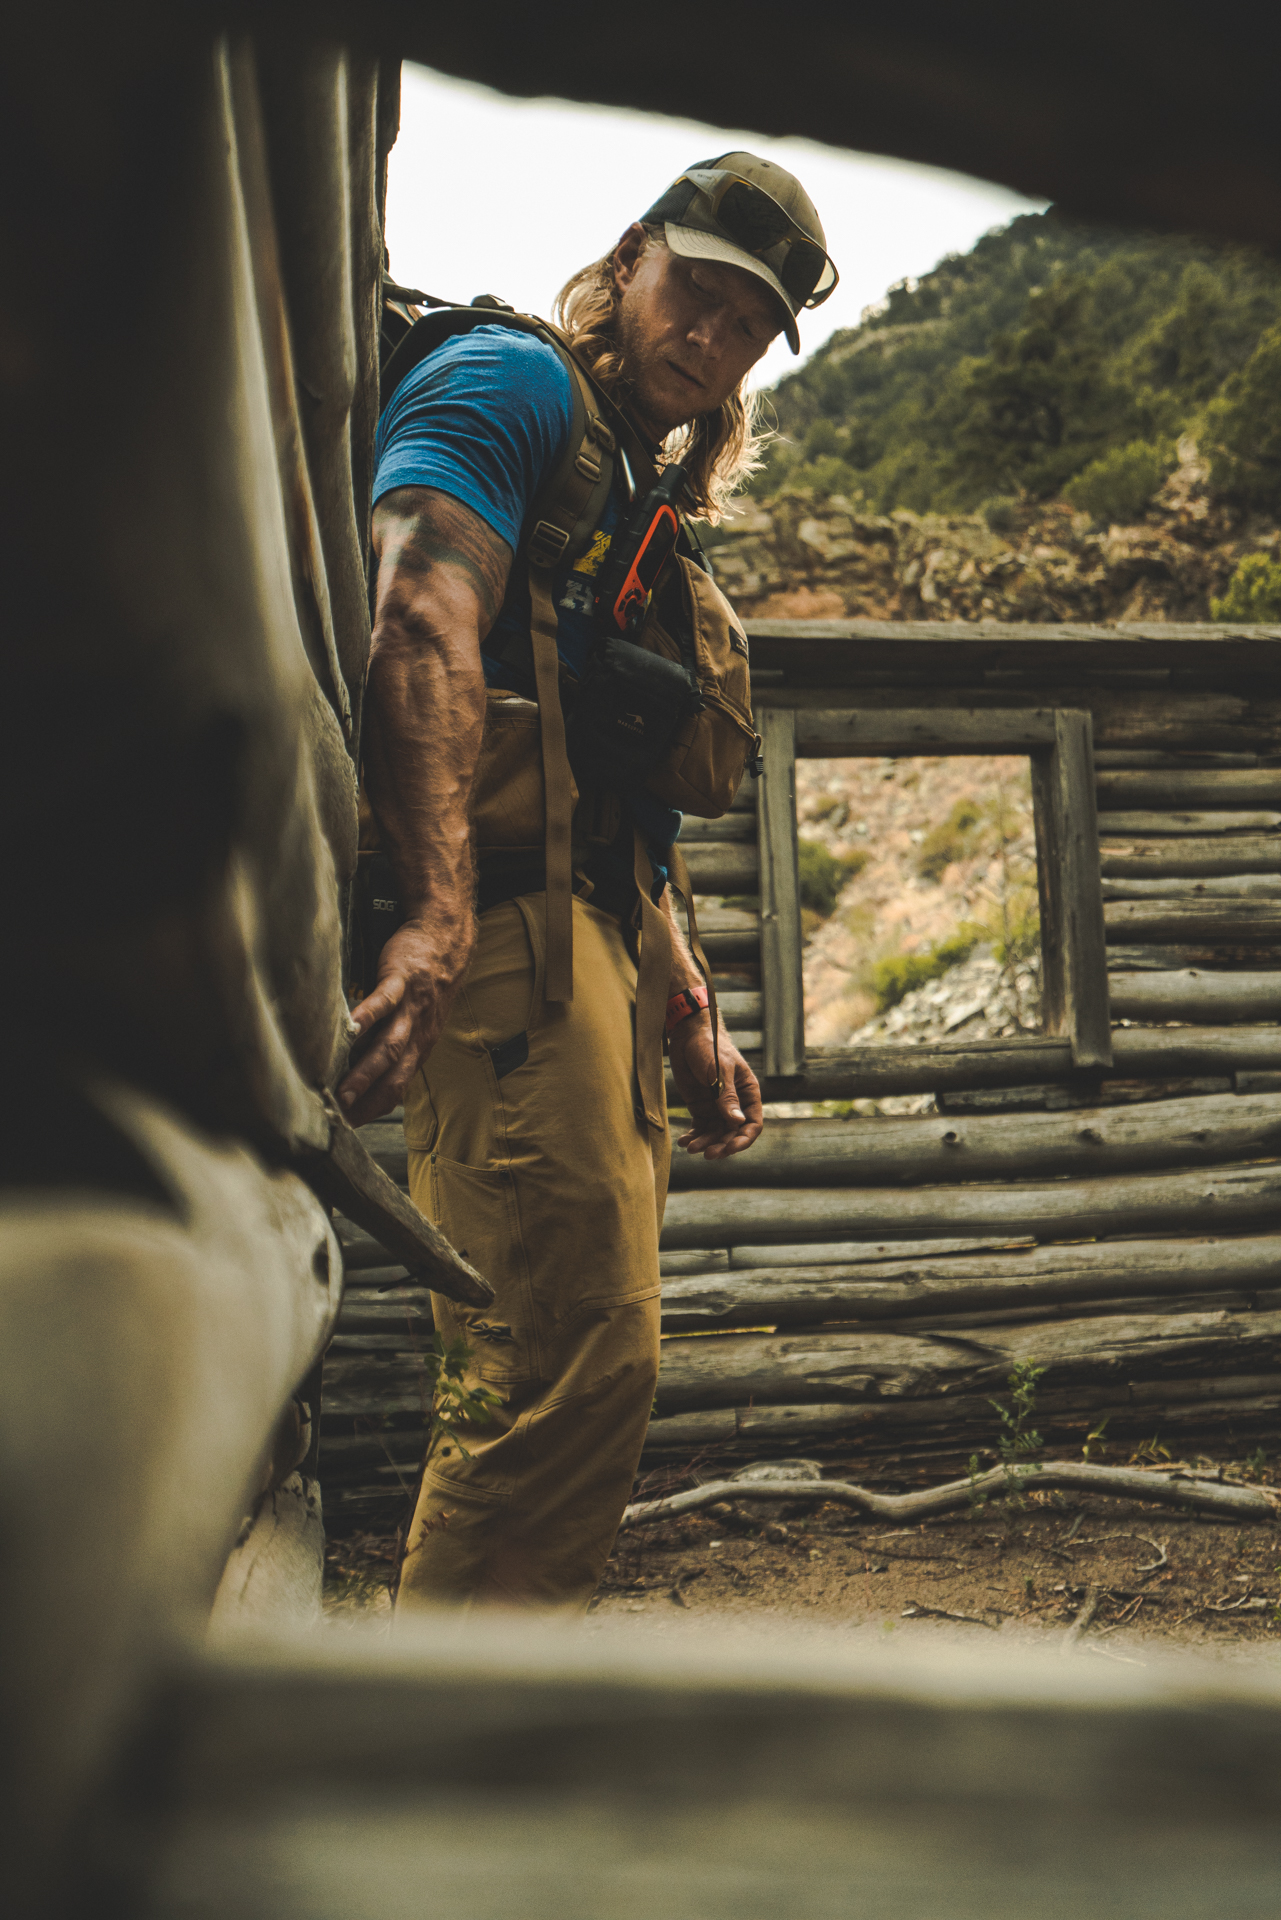
Using a window is a perfect way to frame a shot.
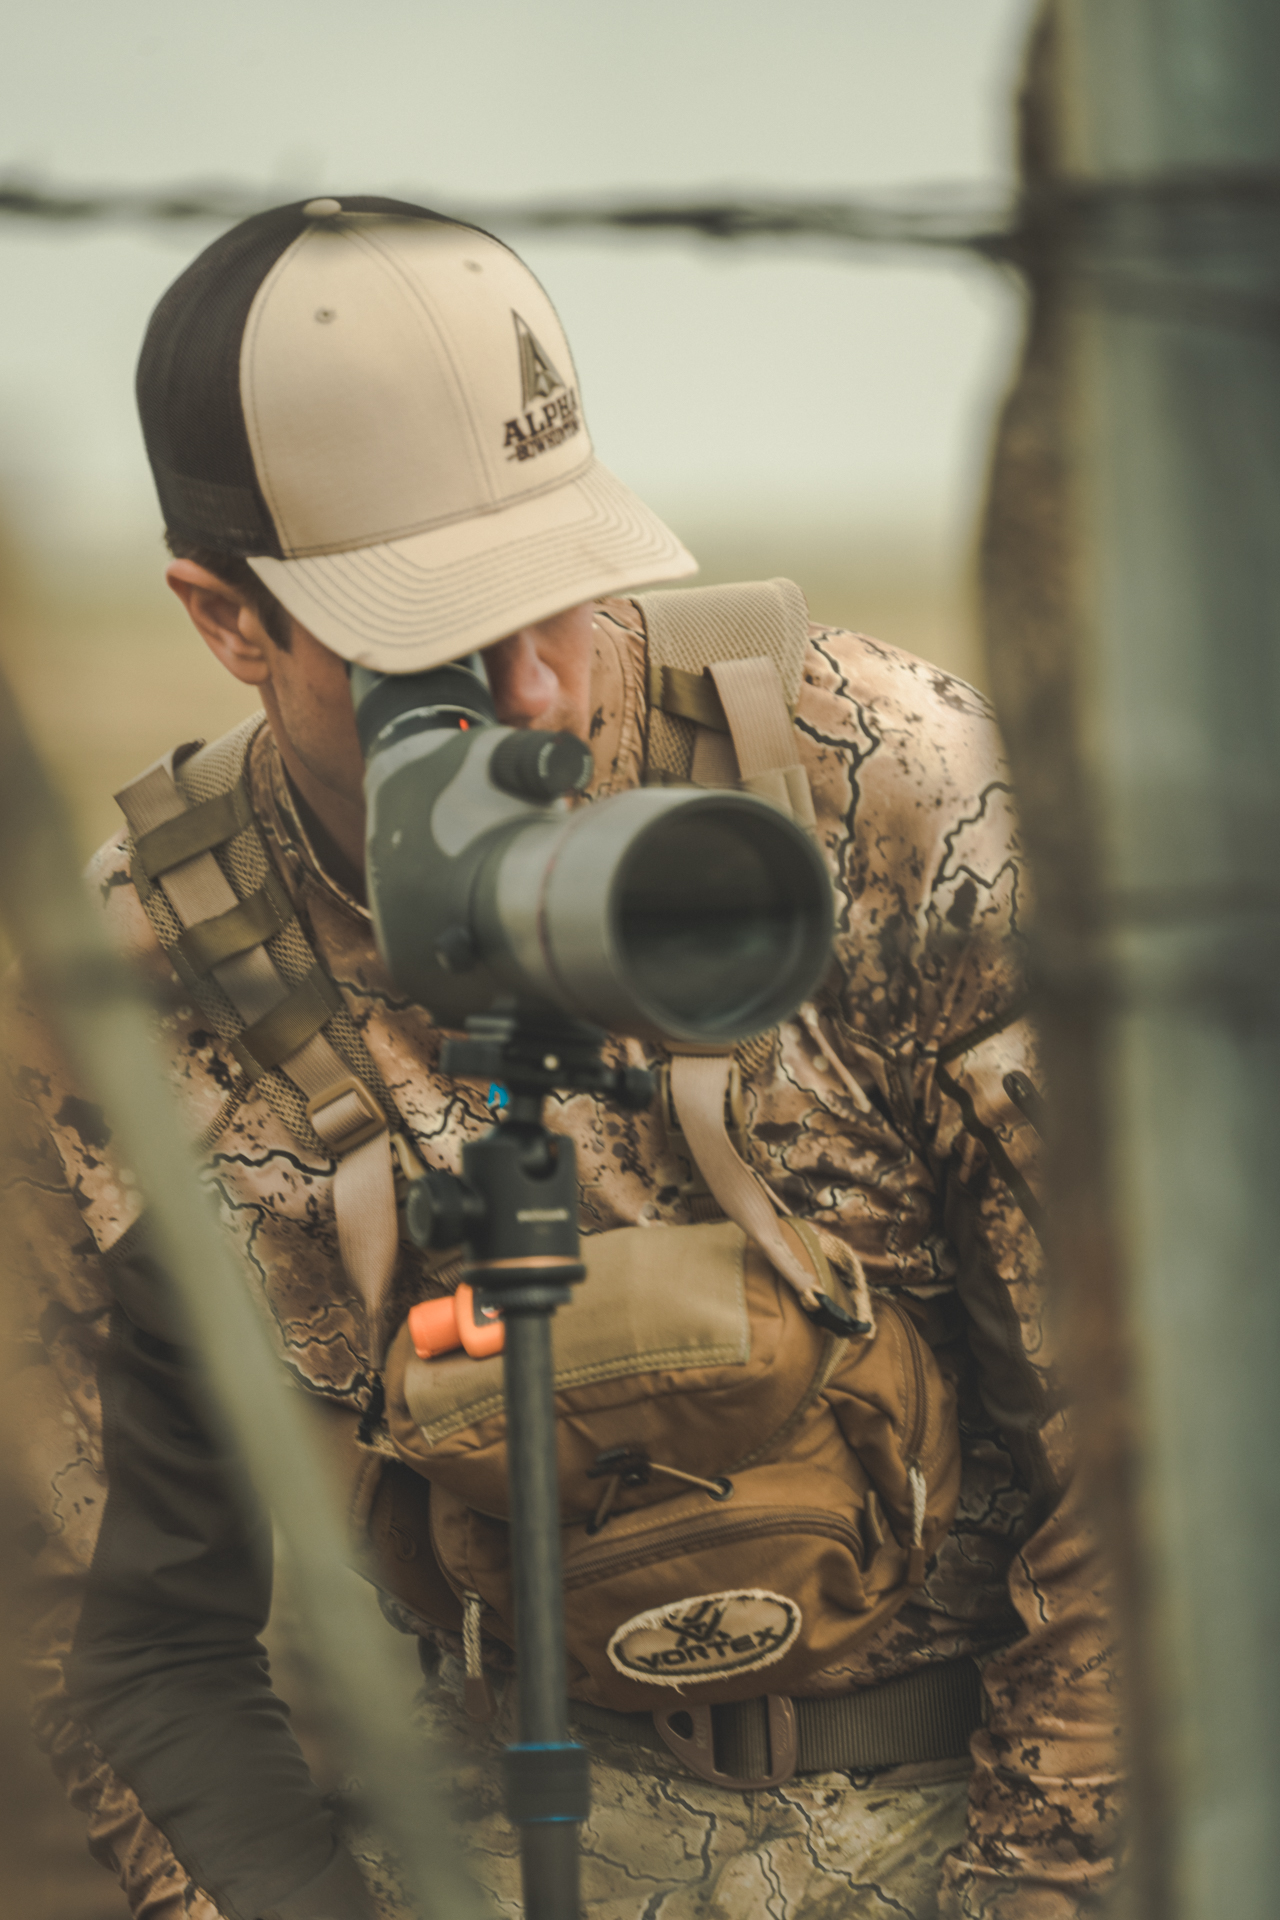
Fence posts also work great to frame your subjects.
Rule of Thirds
This rule was developed back in the late 1700’s and the world has been a better place for it since. Essentially it says that we divide up an image into nine equal parts with two equally spaced horizontal lines and two equally spaced vertical lines.

The horizon line was placed in the lower third (roughly) and our subject’s head in the upper right third for this composition.
Now we try to put the important parts of the image at the juncture of these thirds or if they’re long like a horizon line, running along the third.
Typically a subjects eyes will fall into one of the two top junctures of where the thirds meet. Horizon lines will be along the bottom third.
Image Depth
With image depth, we are attempting to take a 2D scene and make it as 3D as possible. We give it a foreground, the area where the subject is and the background.
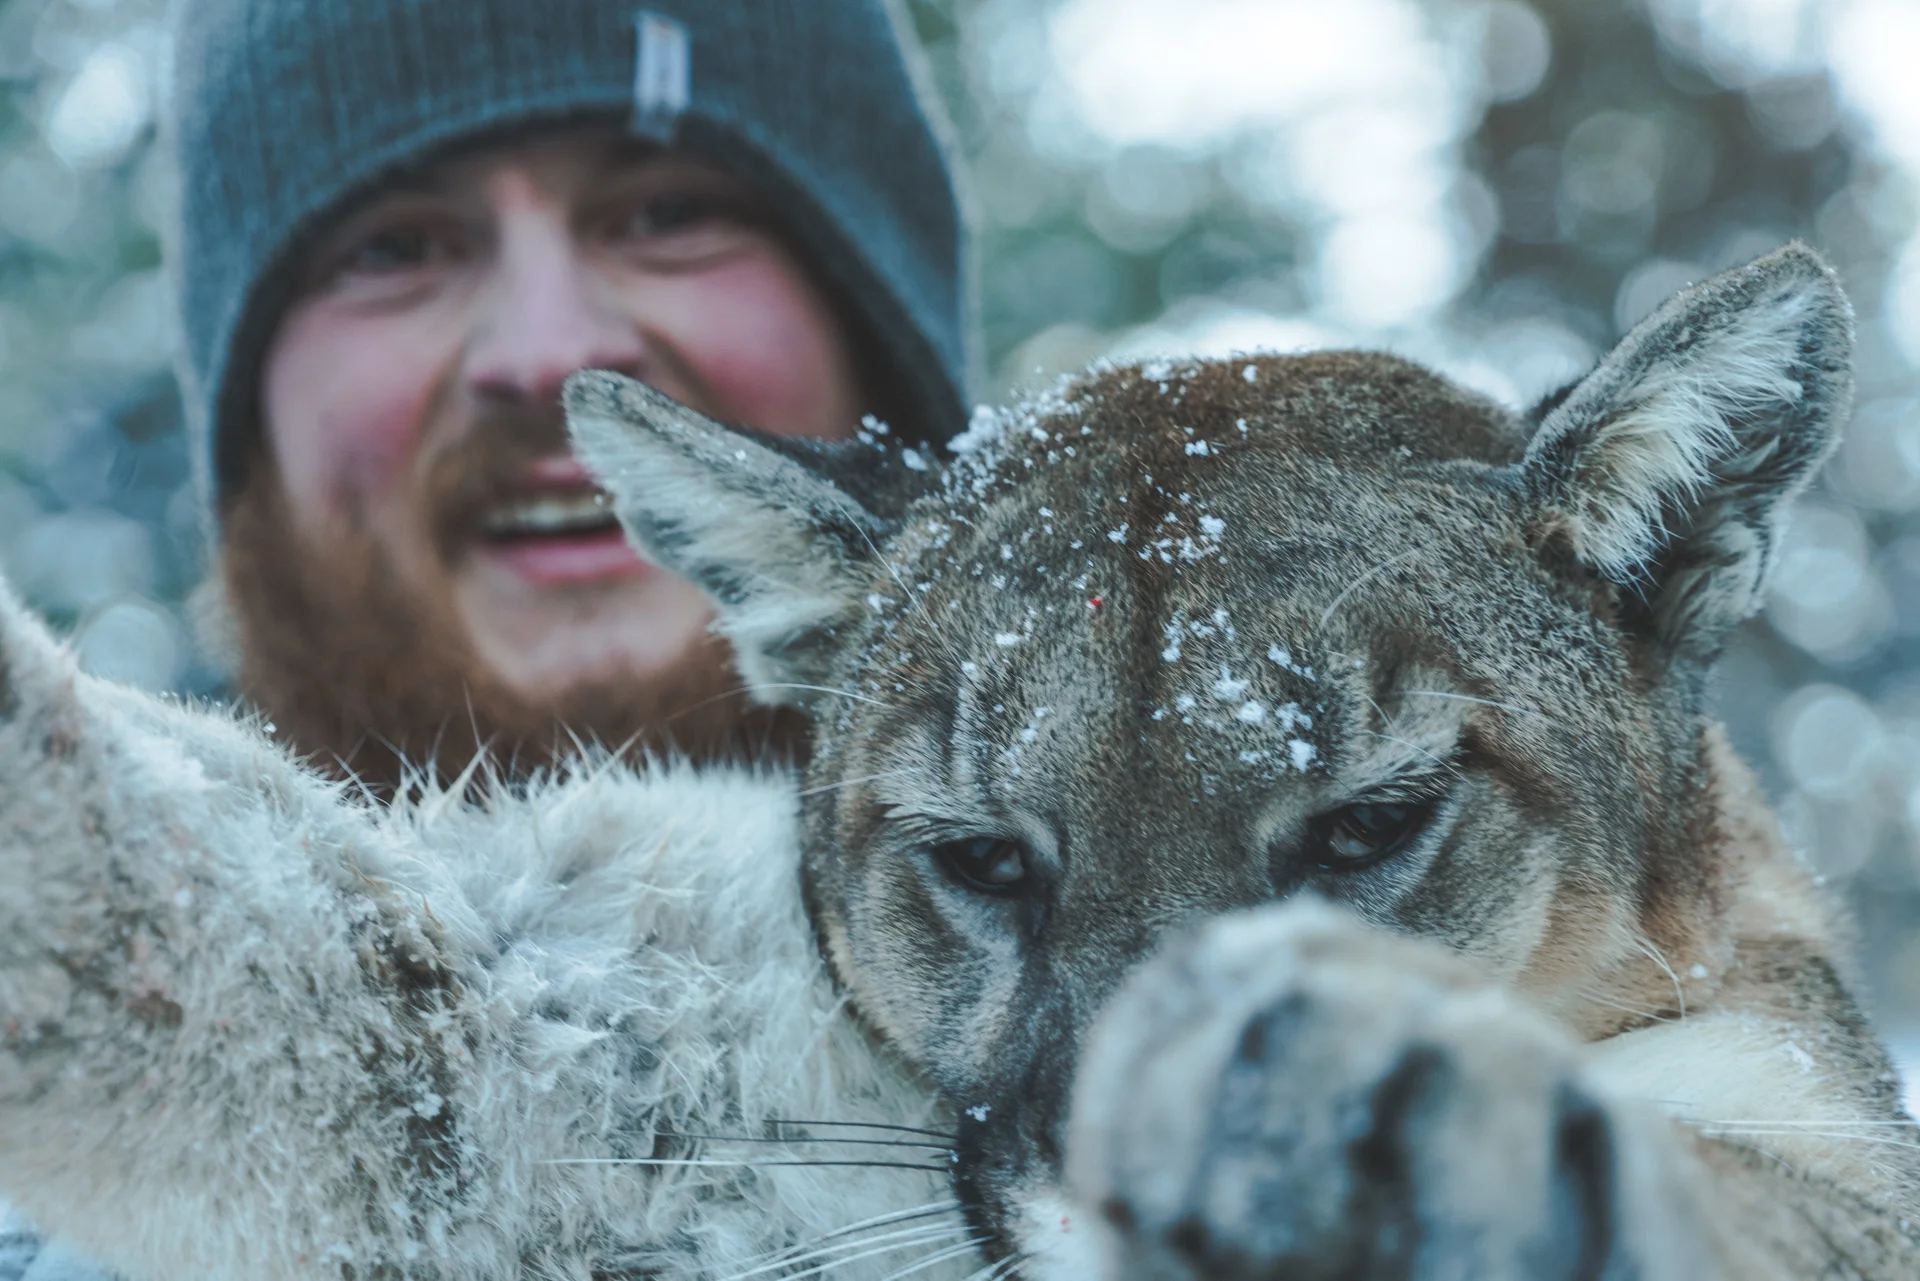
Notice the paw in the foreground that is out of focus. The subject, the lion, is in focus and the hunter which is the secondary subject is just our of focus. Finally the background is completely out of focus but gives a nice textural element for an appealing look.
Image depth has a lot to do with depth of field. We covered that in a previous article so I won’t bore you with it again here.
Typically we won’t want everything in focus when an image has a lot of depth. The foreground element will be out of focus while the subject is in focus and again the background out of focus. If you have everything in the scene totally in focus the viewer’s eye won’t know where you want it to go.
The background and subject are a given in a photo. Creating some separation between the two is important as to not have the subject blend in with the background.
A foreground element can be anything in the scene and you can use it to frame the shot. Just make sure that it isn’t overbearing. I often will take a branch with some leaves and actually move that into the shot in order to add a foreground element.

I put a corn stalk in front of the lens to add some texture to the foreground. Then the long line of corn allowed for a gentle drop off of focus. You’ll notice there is an obvious foreground, subject and background in this image.
This should get you started in telling a story with your images. Try these different techniques out and I can guarantee you will see an instant improvement in your photos and less yawns from the friends you show them to.
Hit me up on Instagram at fredbohm and tag me on some of your pics. I’d love to see how you’re composing your shots!
Continue on to Part 5 - Shutter Speed and Motion Blur
// Fred Bohm

Close Up vs. Wide Angle - Hunting Photography Series - Part 3
Part 2 - Close Up vs. Wide Angle - Hunting Photography Series
Shot composition makes or breaks a shot, simple as that. Using the proper focal length is one of the more powerful ways of making sure you compose it right. When the photographer doesn’t consider how he frames a particular shot, the picture often doesn’t grab the attention of the viewer because nothing is being said.
An image tells a story. How you frame it will purvey the mood through perspective.
So you must first think what you want the photo to convey before you determine the focal length of the lens (or how much you zoom in or out for that matter).
Ask yourself some of the following questions before you snap the shot to help you determine whether to use a wide and or close up shot.
Are you trying to share the emotion, the frustration or elation of your subject?
Are you trying to show how insignificant the subject is in his/her environment?
Is it a landscape shot without a specific subject?
There are a ton of questions such as this that you should be asking yourself before you push that shutter button.
Focal Length Defined in Terms We Can Use
The focal length of a lens determines the magnification at which it images distant objects. This is how Wikipedia defines it. I could agree with that. A fancy way of saying how much you’re zoomed in. But that’s not what’s important to us, rather what it does to the images is what we care about.
So we’ll cover what the difference is between a wide angle vs. a zoomed in shot and how it will effect your composition.
We should talk about how focal length is measured. We’ll be conforming to the rest of the world here and be working with millimeters. A wide angle lens is anywhere from 14mm up to about 35mm. Going up from there out to 600mm you’ll be getting into a longer focal length.
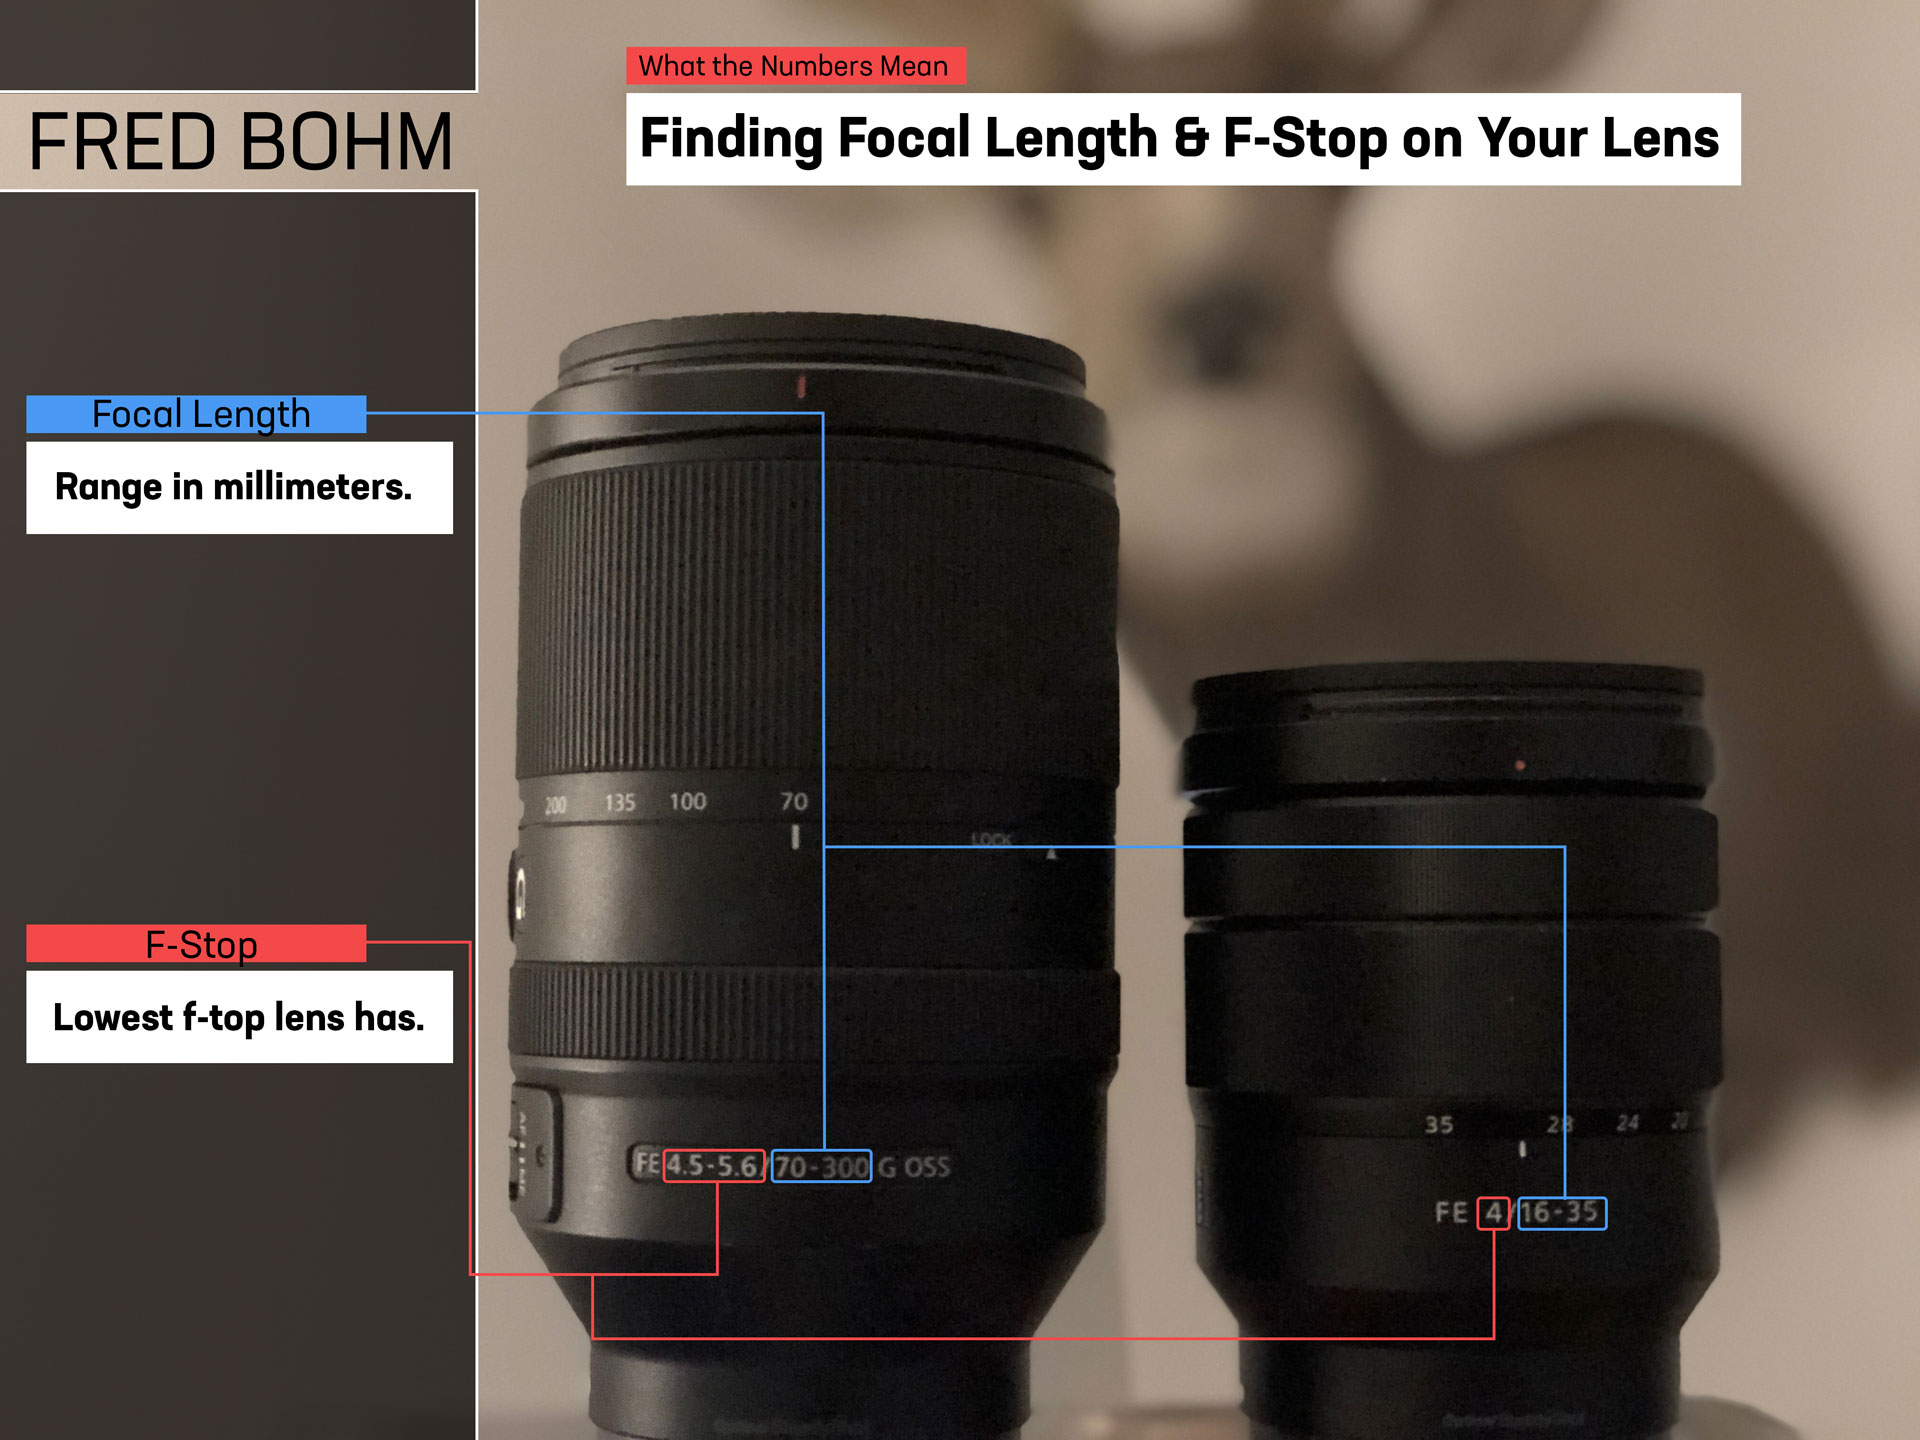
Here is where you can find the lens focal length and f-stop.
A wide angle will show more of the scene. It will also make the distances between objects appear further apart than an image shot with a long focal length (you can also read that as “zoomed in”). Using a wide angle lens will also give you a greater depth of field.
A long focal length will make a scene more compressed, or make it seem like there is less distance between objects. It’s a great way of pulling the background in closer to your subject. You can also get a shallower depth of field with a longer focal length.
We’ll work through some examples of when you might want to use different focal lengths according to different situations. When it comes to art, there are no hard set rules. But knowing why you’re doing what you’re doing is important so let’s try to get an idea of that first before we going breaking the rules.
Close-Up Shots
Ninety percent of my shots are close-ups. For me I just think they tell more of a story. Sunsets are well and great, but everyone shoots them and they won’t separate you from the crowd. Find a way of showing the emotion in a given photo and you become a master at storytelling. Having your subject standing out in a field blending in with his surroundings just won’t cut it. There are many ways of accomplishing this, but getting in there nice and close will certainly be one of those ways.
Get in there, see the pores on his skin, see the troubled look in his eyes. Use the background to help place the setting, but use your subject to relay emotion.

Keep the subject in focus and let the background help tell the story.
You can achieve a close up in two ways.
Standing a bit back from your subject and using a longer focal length.
Standing very close to your subject and using a wide angle.
I typically will shoot these shots with a longer focal length. This allows me to make the background appear closer to the subject. Don’t get me wrong, standing really close to the subject with a wide angle lens for a close up can be cool as well. Don’t go overboard however, a really wide angle can make a the subject look distorted.

This picture was taken with a 14mm lens. Notice that it has a great depth of field. This is mostly due to using a wide angle lens.
Example:
You’re five days into a hunt and the only shot opportunity was just blown by your hunting partner. Frustration levels are high, disappointment and doubt have crept in. You’ll never be able to recreate that feeling, so get that lens in there and capture that authentic moment. You can relay a slew of emotions to the viewer just by the look on his face. Make sure the weapon is seen in the shot, although subtly to relay that he is hunting. The background environment will convey the setting, whether you are hunting in deep timber for elk or spot and stalk hunting in the high country for mule deer. Capturing the surrounding elements are crucial in the story, but they need to be secondary to the subjects emotions. Meaning, capture it in his eyes and face.
Tip: Make sure the eyes are always in focus. An image is lost if the subjects eyes are blurry, so if using a shallow depth of field make sure the eyes are crystal clear in focus.
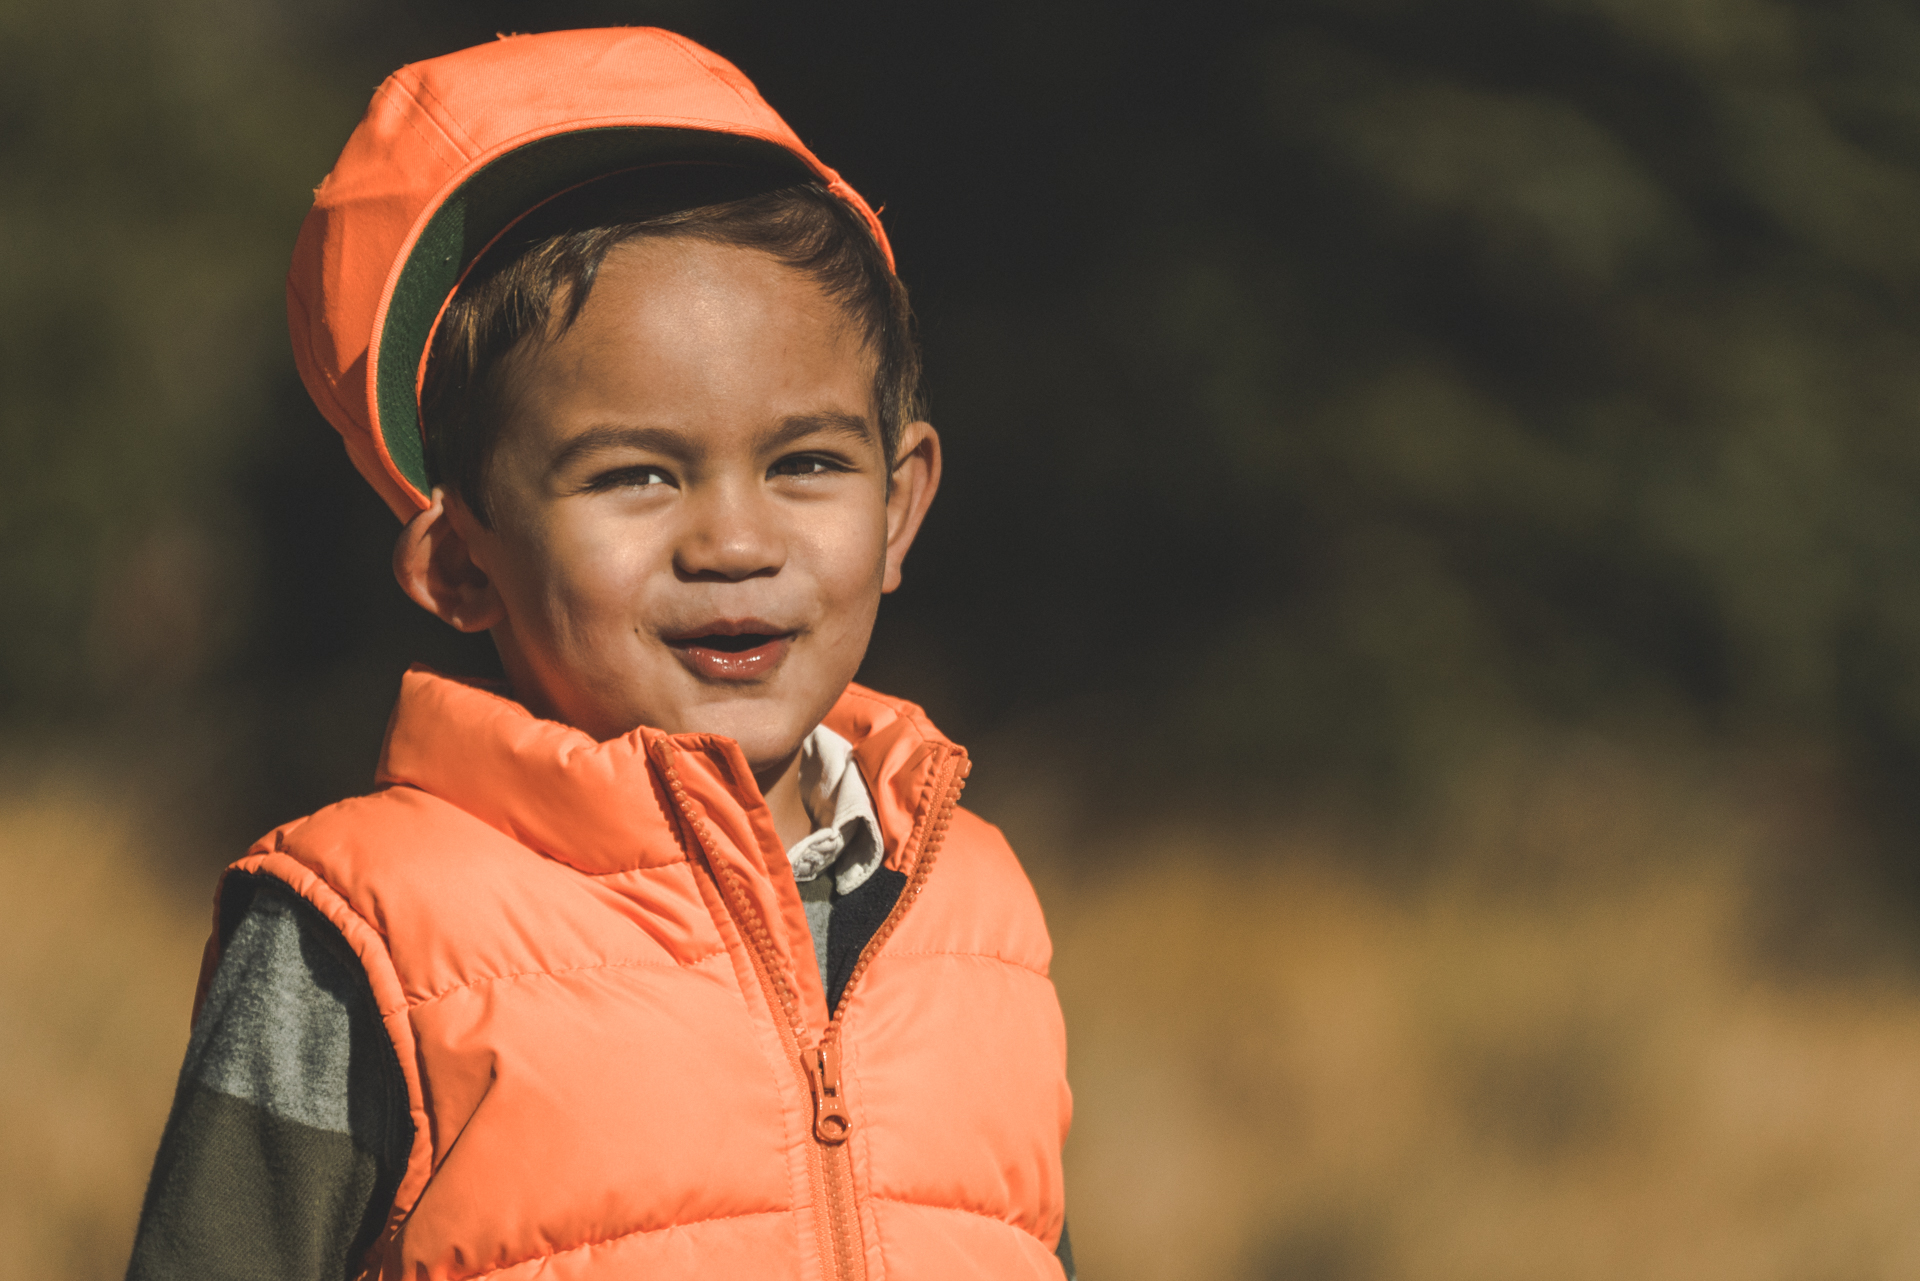
Make sure you keep the eyes in focus.
Close-ups can also show a subject in a light that has never been seen before. A close-up of the broadhead laying on your bows rest with the background element of sitting in a tree stand is way more exciting than another selfie of you duck-lipping it for the crowd in your tree stand showing off the kitty cat face paint pattern you work so hard on.
Or how about that dew about to fall off the tall grass while your Labrador works the pheasant fields in the background.
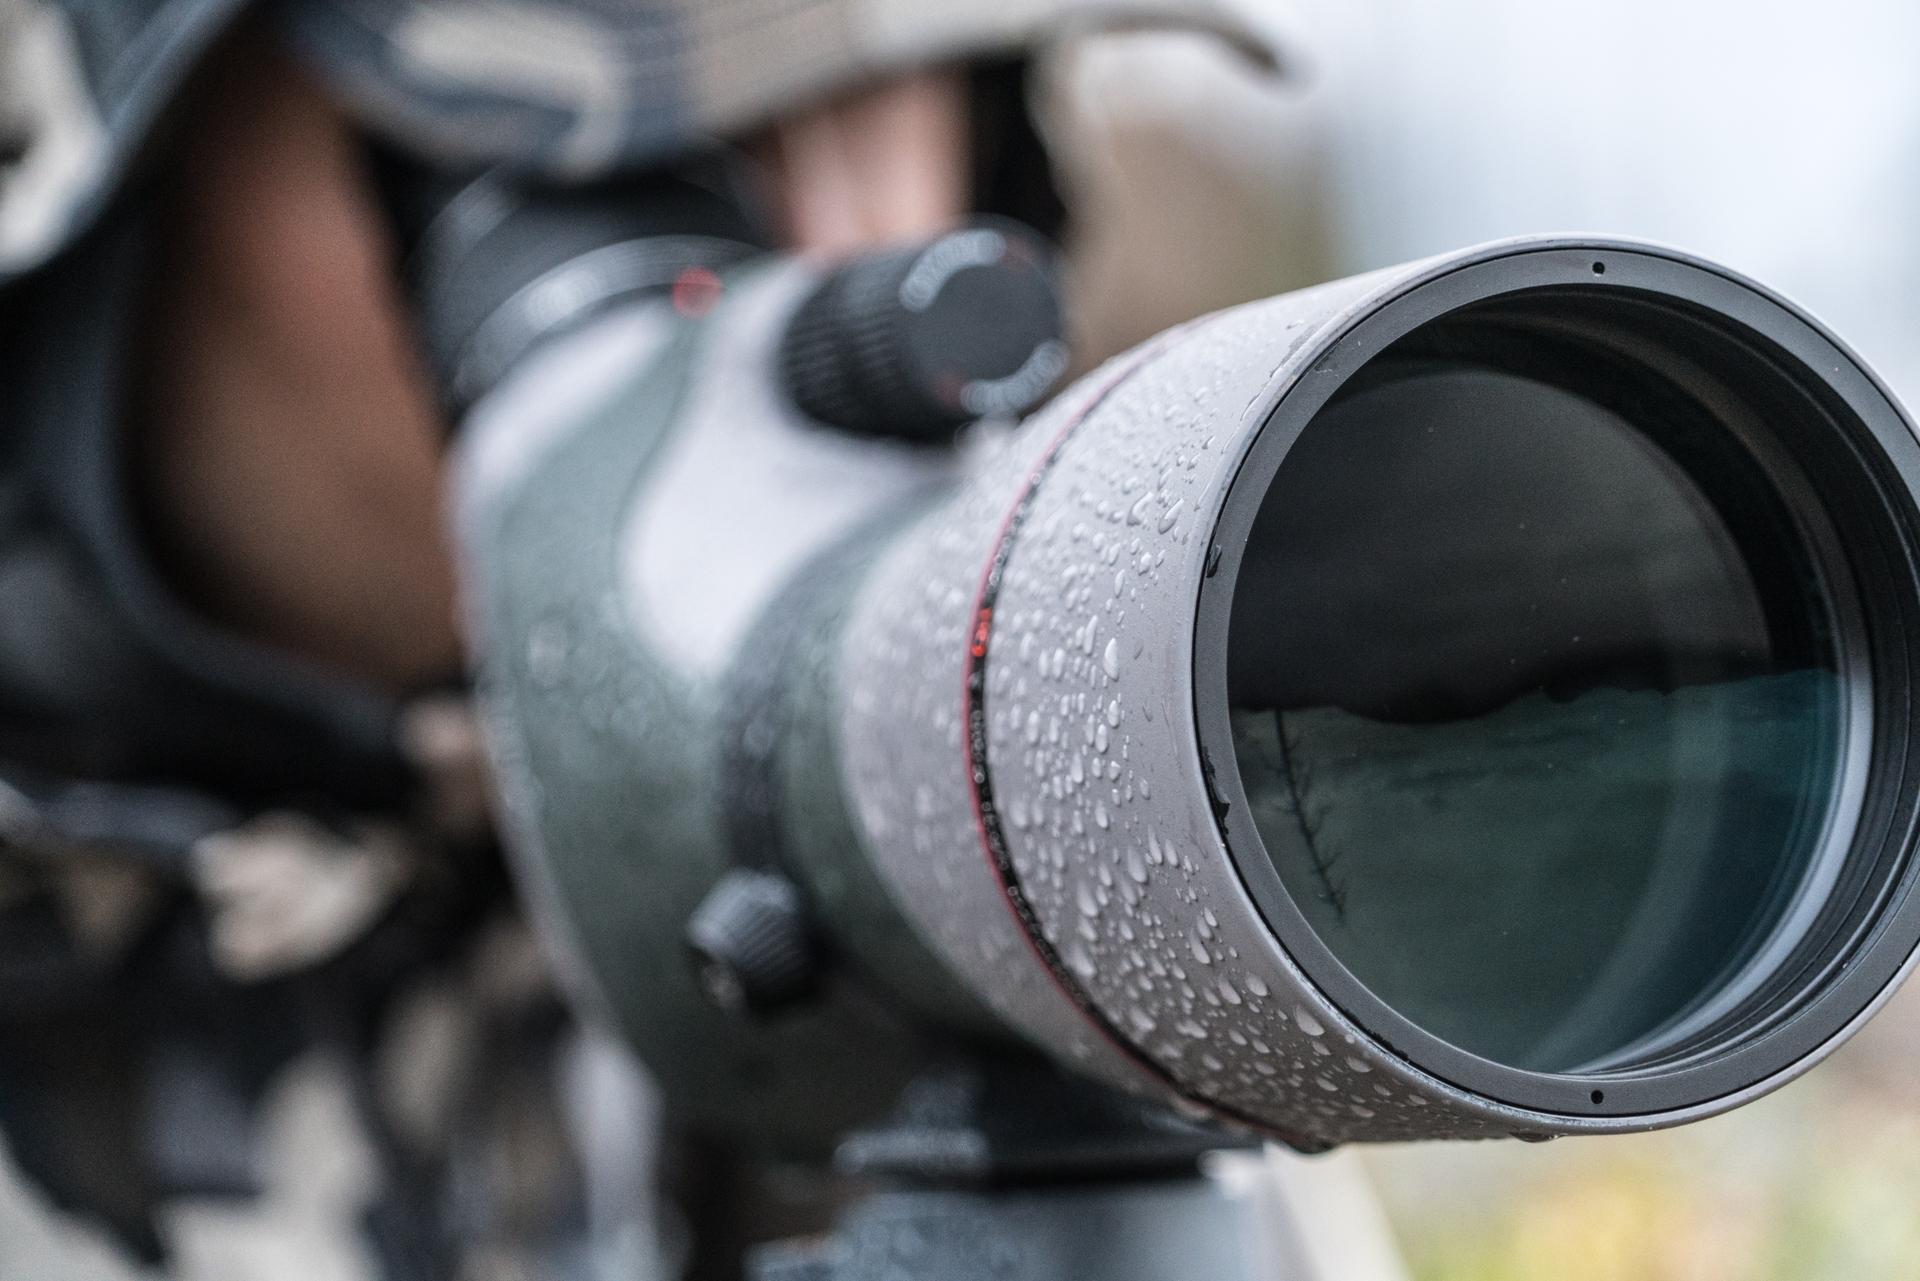
Getting close up in this shot helps tell the story. Seeing the water drops on the spotting scope helps relay the weather and misery that comes along with it.
Think of different foreground elements that represent the hunt and use background elements to reiterate what you are doing, but have it out of focus making it secondary to the main object.
Shooting close-ups can instantly change your game. Try it out. Go on a hunt and promise yourself that you’ll shoot nothing but close-ups for a couple of days and see how quick your photos improve.

Try to mix up your shots to tell a story.
Wide Angle Shots
Wide angle shots certainly have their place. What would a gorgeous mountain range be if you were only focused a singular tree jutting out of the side of it? How about a fly fisherman casting out below a roaring waterfall? It might be worth capturing the whole scene in this case, not just the wooly bugger he’s flipping out there.
A wide angle shot is often used to capture the beauty of the environment you’re in, whether there is a subject in it or not.

Wide angle shots allow you to capture more of the environment that the subject is interacting with.
Again for me, I always like to have a subject in the shot, interacting with the environment. This usually involves having them very close to the lens to separate them from the background, but keeping a great depth of field so that everything is in focus.
As with many rules, the opposite can also make for a terrific composition. Maybe you want the subject to feel insignificant in the vastness of his environment. Then by all means have them further away from the lens so that they feel small in the environment.
Warning. You need to find a way to have the subject stick out if you use the above scenario. Have them dress in bright clothing to stand out or above the skyline so they stand out above the horizon.
Putting it Into Practice
You read about it now it’s time to do it. Knowledge is worthless if not put into practice. Go out there and try four different shots. I’ll list them below. Use the same subject so you can compare how each picture makes you feel when looking at it.
Close up shot with a long focal length. Say somewhere above 100mm.
Close up shot with a wide angle lens. The camera will often only be a foot or so away from your subject. Less than 35mm.
Wide shot with a wide angle lens. Think landscape here.
Wide shot with a longer focal length.
Now sit there and analyze the differences between the four shots. All four of these techniques can be used for different situations and different moods. Find what does what and then use it! Create an image, don’t just snap the shutter.
Remember to hit me up on Instagram at fredbohm and let me see how you’re using these techniques.
Continue on to Part 4 - Angles, Framing, Rule of Thirds and Image Depth
// Fred Bohm

Depth of Field - Hunting Photography Series - Part 2
Part 1 - Depth of Field - Hunting Photography Series
We went through a 30,000 foot view on how to make your hunting photographs better, but as often happens with just a cursory look the basics are learned but the need for in depth detail is a must to fully understand and be able to implement it.
I will be doing a blog series on upping your game when it comes to taking great images while out in the field. Whether you’re an upland hunter, bowhunter, big game hunter or somewhere in-between, this series will help you take your photos to the next level. It doesn’t matter if you’re trying to beef up that family photo album or trying to work your way into sponsorships through Instagram.
A fully manual camera, preferably an SLR or one of the mirrorless variety will be crucial in order to obtain these types of photos. You can find my Camera Gear list here. This is just what I use, any of the major camera brand companies make amazing equipment and will work just as well.
Depth of Field
Mastering this technique of depth of field is a must for any budding photographer. Spend the time to learn this and you will take your photos from so-so to wow, just like that.
You may be asking yourself what the heck is depth of field and why the hell do I care? That’s a fair question. I’m going to keep it simple and in layman's terms to that you don’t just skip over this one and move on to the next, it’s that important!
What is Depth of Field?
Easy. Depth of field is how large of an area (from the nearest object to the furthest) is in focus within the image.
OK. So that made no sense right? Reading it is one thing, seeing it is another.
Take a look at these photos. They’re different right? They’re not. Well at least the composition hasn’t changed at all, but rather the depth of field.

Great Depth of Field
You see how everything is in focus? Everything is crisp and pretty much everything in the shot catches your attention just about the same.

Shallow Depth of Field
Now the second image, what’s different about this one? One object is in focus and everything else gradually blurs out as it gets further from it. Where is this forcing your eye?
Why and When to Use Shallow or Great Depth of Field
You’re going to start to notice something about all of these tutorials if you haven’t already. I will always be asking “why” we should do something. That is because great pictures rarely happen by accident. They are considered thoughtfully beforehand and then executed.
Shallow Depth of Field
So let’s start with shallow depth of field. When you make a spot of your choosing in focus and have the rest blurry, this forces the viewers’ eyes where you want them to be. It clouds out the insignificant elements in the photo and allows whatever you choose to be the important focus of the shot.
It keeps objects from blending into the background. It makes them stand out and be the hero of your story.
You often want to use this when you are taking a picture of a hunter and trying to relay emotion. His face is what matters and what it is saying, so make that the primary focus through a shallow depth of field and let the background become secondary.
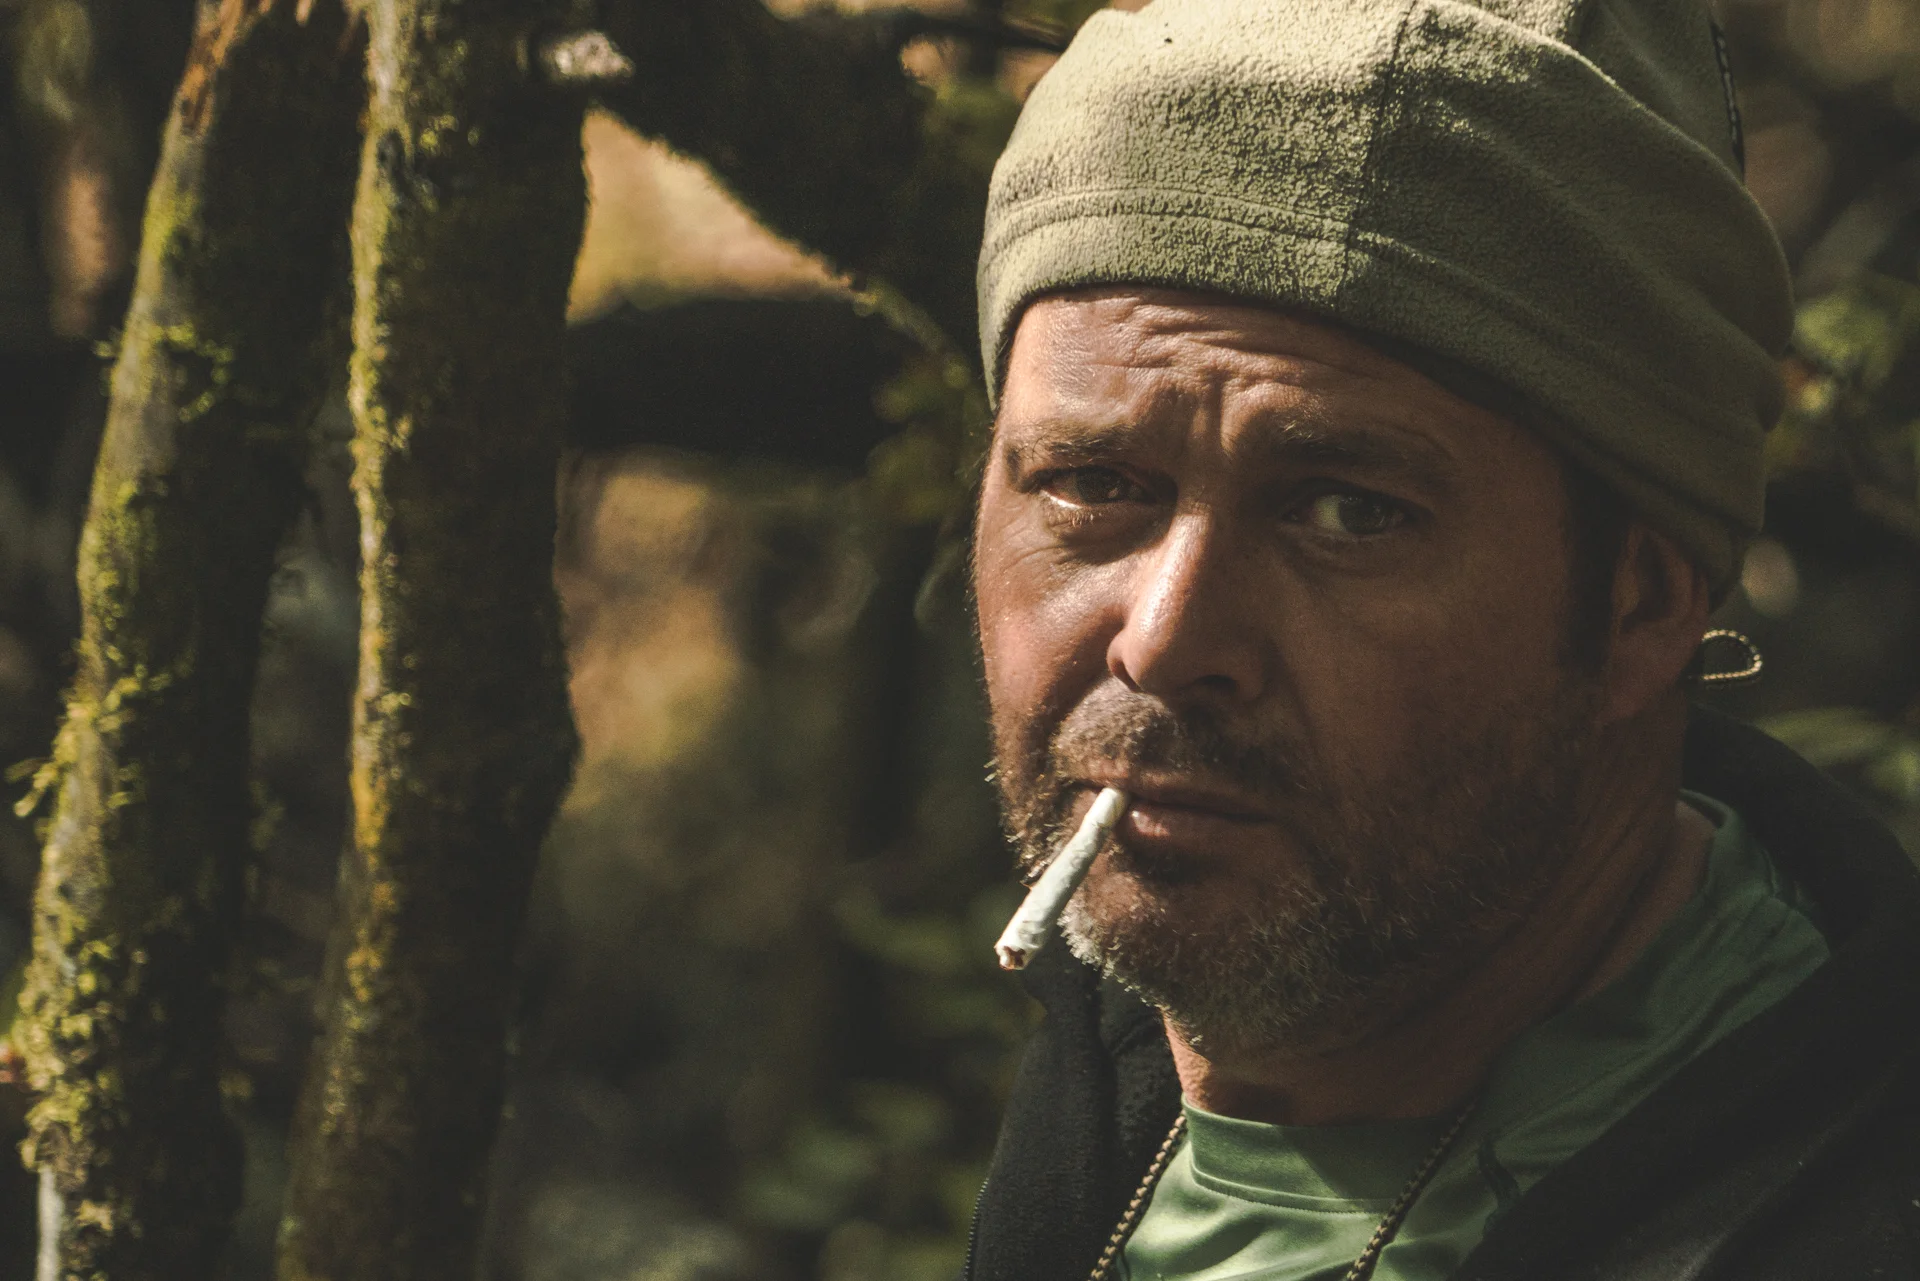
The eyes are telling the story here. All other elements are just there to solidify the subject into a setting.
How about that monster 4x4 mule deer you just shot, but it happens to be next to the sewer treatment plant? Not something you’re particularly looking to advertise. Use a shallow depth of field to make your trophy shine and turn that bucket of turds in background into a cool textural element.
Maybe you want to show off the cool new broadhead you’re trying out. Sure you want to see it on the rest along with the rest of the bow as well as the hunter. But the broadhead is the subject right?

The shallow depth of field in this picture is forcing your eye to look where the photographer wants you to look.
Put that in focus and let the rest fade away into a soft blur. We still can tell there’s an archer there and holding the bow that the arrow rests on, but they become secondary to the broadhead.
Great Depth of Field
If you’ve used auto settings on your camera or used your phone’s camera, chances are it was giving you the greatest depth of field possible.

Great depth of field lets you soak in everything in the image.
So when do we want everything in the image in focus? How about a landscape shot. You’re not trying to have one particular element compete for the viewer’s attention, rather you want them to sweep across the shot appreciating everything you captured.

The bright colors the subject is wearing as well as his upper body being above the skyline is enough to force the eye where you want it, no need for an extreme shallow depth of field.
Or maybe you have the subject above the skyline and close to the camera using a wide angle lens. The sheer size of him will force the viewers’ eyes to look at him first, thus the background isn’t competing for attention.
How To Create Shallow and Great Depth of Field
Great, we understand why we want it, now how the heck do we get it? As mentioned these tutorials are meant for cameras where you can control almost all of your camera’s settings. You will need to in order to be able to obtain a shallow depth of field.
There are three things that control the exposure of your camera.
Aperture (what we’re interested in for depth of field)
Shutter Speed
ISO
As you change any one of the above, you will need to compensate with the others to get the correct exposure.
But we’re talking about depth of field here so we are going to be talking about aperture. This is one of the main ways we can obtain a shallow depth of field. Focal length and distance the objects are from the camera and from one another come into play as well, but that will be for another day.
Aperture or f-stop is what controls the amount of light that the iris in your camera’s lens allows through. The smaller the hole, the greater the depth of field. The more the iris is opened, the shallower. You don’t really need to know this technical side of it, but if you’re a nerd like me you might be curious.
What really matters to you is the f-stop numbers. The smaller the actual number the shallower the depth of field. The bigger the actual number is, the greater the depth of field will be.
Let’s take a typical lens for example. It could range from let’s say f4.0 - f22. The “f” is in there to represent “f-stop”. The numbers are all that really matter.
An f-stop of 4.0 would give you a fairly shallow depth of field like in the picture below.

Using an f-stop of 4.0 for shallow depth of field.
This next picture has a great depth of field and has an f-stop setting of f22.
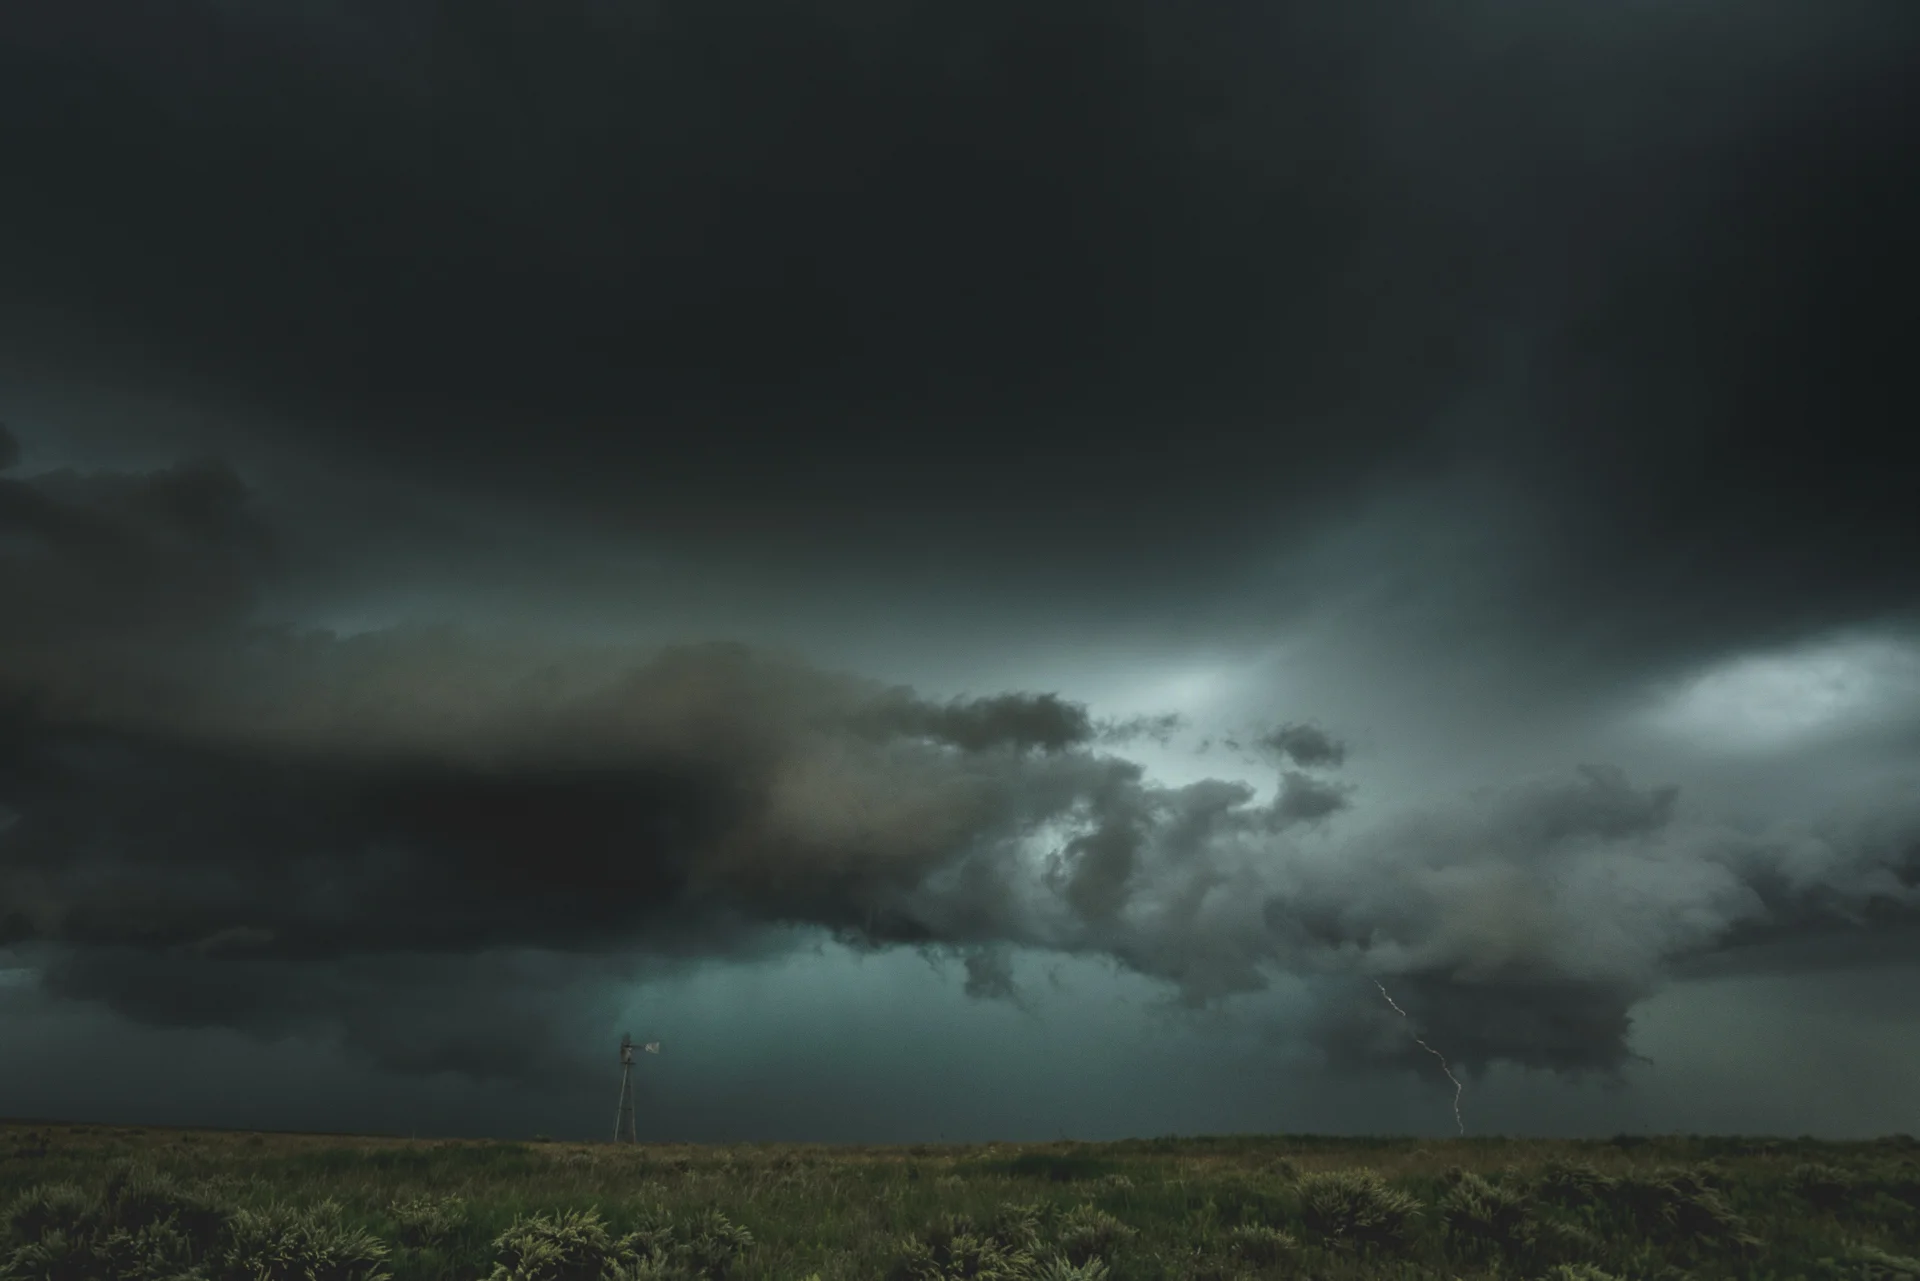
An f-stop of 22 for a great depth of field.
So as you can see you’ll want to use a shallow or great depth of field depending on what you are trying to accomplish. One isn’t better than the other, they just serve a different purpose.
A good exercise is to get out there and start taking the exact same picture with a shallow depth of field as well as a great depth of field. Don’t change focal length or anything else, just the aperture. What works for that particular image?
You can see the lenses I’m using for my pics on my Camera Gear page.
Find me on Instagram at fredbohm and tag me in your pics. I’d love to see how you’re applying depth of field to your photography!
Continue on to Part 3 - Close Up vs. Wide Angle
// Fred Bohm

How to Take Better Hunting Photos - Hunting Photography Series - Part 1
So you’re looking to take your hunting photography from impressing grandma at the nursing home to having every hunting company fighting over you for sponsorships? Well I have no clue how to get you to the later one (or me for that matter), but I can help you up your game. To get you to a point that you have something you will be proud to show at the end of the hunting season.
Snap a photo and you’ve taken a small segment of time and deposited it into your life’s savings account, able to be withdrawn repeatedly and at the time of your choosing. You take something that your feeble memory would otherwise alter or forget and you give it permanence. And if you capture that moment in a way that tells a captivating story you have something that others would be interested in viewing as well.
You may be looking back at last year’s hunt and saying to yourself, “I have none of the above. I have what looks like a half assed selfie of me standing in the woods. And I use the word “woods” lightly, it could actually be mistaken for my backyard. The only story I was telling is that I can stand up straight and slap an awkward smile on my face, or if I’m super talented some duck lips and my ass pushed out.”
I’ve been there. It’s good that you recognize that. Now you can move forward and create the photos that you’d be proud to post.
Photography has become insanely popular over the past years due to both the ability to get an amazing camera in your hands at an affordable price as well as the ability to show off your hard earned work to thousands of people with social media like Instagram and Facebook.
Back in the day you had to process film which was both expensive and didn’t give you immediate feedback. Enter digital cameras and everything changed. You now look back at the photo you took seconds ago and determine if it was a good shot or not, whether you need to take another one, try a new angle or move on to the next shot. Instant gratification in a world that not only expects it, but demands it.
Whether you’re looking to just advance your skills for your own personal satisfaction or trying to get noticed online, it’s hard to argue that becoming more proficient in photography has any adverse effects.
For those of you aspiring to the later of the two, social media can get you in front of a massive audience. That is if you can stand out from the crowd. The negative side to the ease of taking and posting photos online is obvious. Everyone is doing it. It is easier than ever to blend in with the crowd.
Another selfie of you sitting in a treestand? Great. Another sunset over the mountain? Super. If you’re goal is to get noticed, I’m sorry to say you’re failing miserably with those types of photos.
So how do you stand out? The same way you would in any aspect of life. Be different.
A great way to do this is to look at photographers online that you follow and would love to emulate. Then ask yourself some of these questions:
What is the subject doing in the photo?
How close-up is the shot of the subject? What angle is the shot taken at?
Are they using a shallow depth of field? If not, why?
Where is the subject in relation to the background?
Is there a foreground element framing the shot?
What in the composition is conveying emotion?
How did the photographer tell a story through the image?
Get into their minds and try to understand why they are doing what they are doing. A good photographer isn’t just lucky every time they go out and shoot. They take the time to compose the shot according to framing, angles, lighting and a multitude of other things.
I’ve compiled a list of game changers for me after analyzing the photos I’ve taken over the years.
Taking Better Hunting Photos
Take the Time to Stop and Take Pictures
So obvious, but almost never done. This could be the most important of all. You’re not going to get great pictures if you don’t have any to begin with. Every time you think to yourself “Man, that would be a great shot,”, force yourself to stop and pull out the camera. I promise you will thank yourself later.
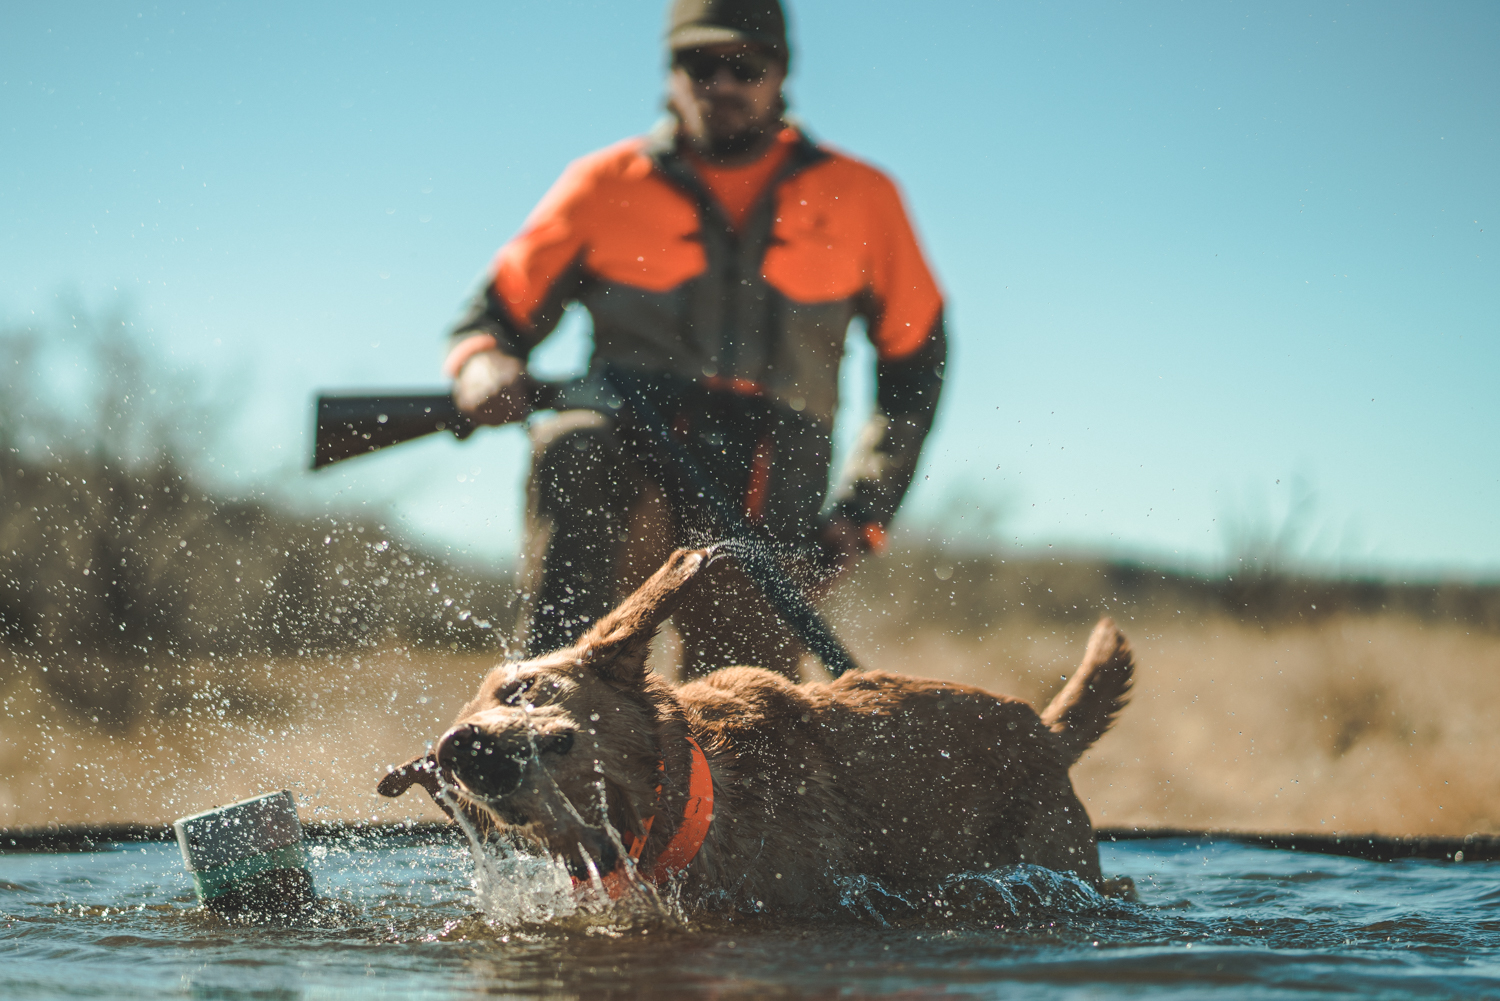
Never convince yourself you will get the picture later. You won’t. The moment will be gone forever. You can’t depend on that perfect misty morning to happen again, the sun flaring through the trees just perfect or your gun dog shaking water off after a dip in the creek. When it’s gone it’s gone. Promise yourself you’ll capture it when you see it.
Buy a Peak Design Capture camera clip. This thing alone doubled the pictures I took after I bought it. It allows you to clip your camera on your backpack’s shoulder strap and gives you easy accessibility at all times. You won’t have to dread stopping and rummaging through your backpack to pull out your camera.

Lighting like this isn't around for long. Commit to taking pics when a moment like this comes along.
Pixels Are Cheap.
Shoot often and liberally. This is almost like suggestion number one. But now that you have your camera out in hand, shoot a ton of photos. Move angles, shoot from down low, up high. You never no what picture will capture the perfect expression on your subject’s face.
Get Up Close and Personal
The easiest way to fall into mediocrity with your photographs? Stand back from your hunting buddy and take a picture where he blends into the background. No emotion, no forced perspective and no fun.
Shoot close-ups. Get in there close. See the stubble on his face. Capture the light reflecting off his or her eyes. Show emotion. Make them the subject and let the background tell the rest of the story. But don’t let them blend in. You can achieve this by...
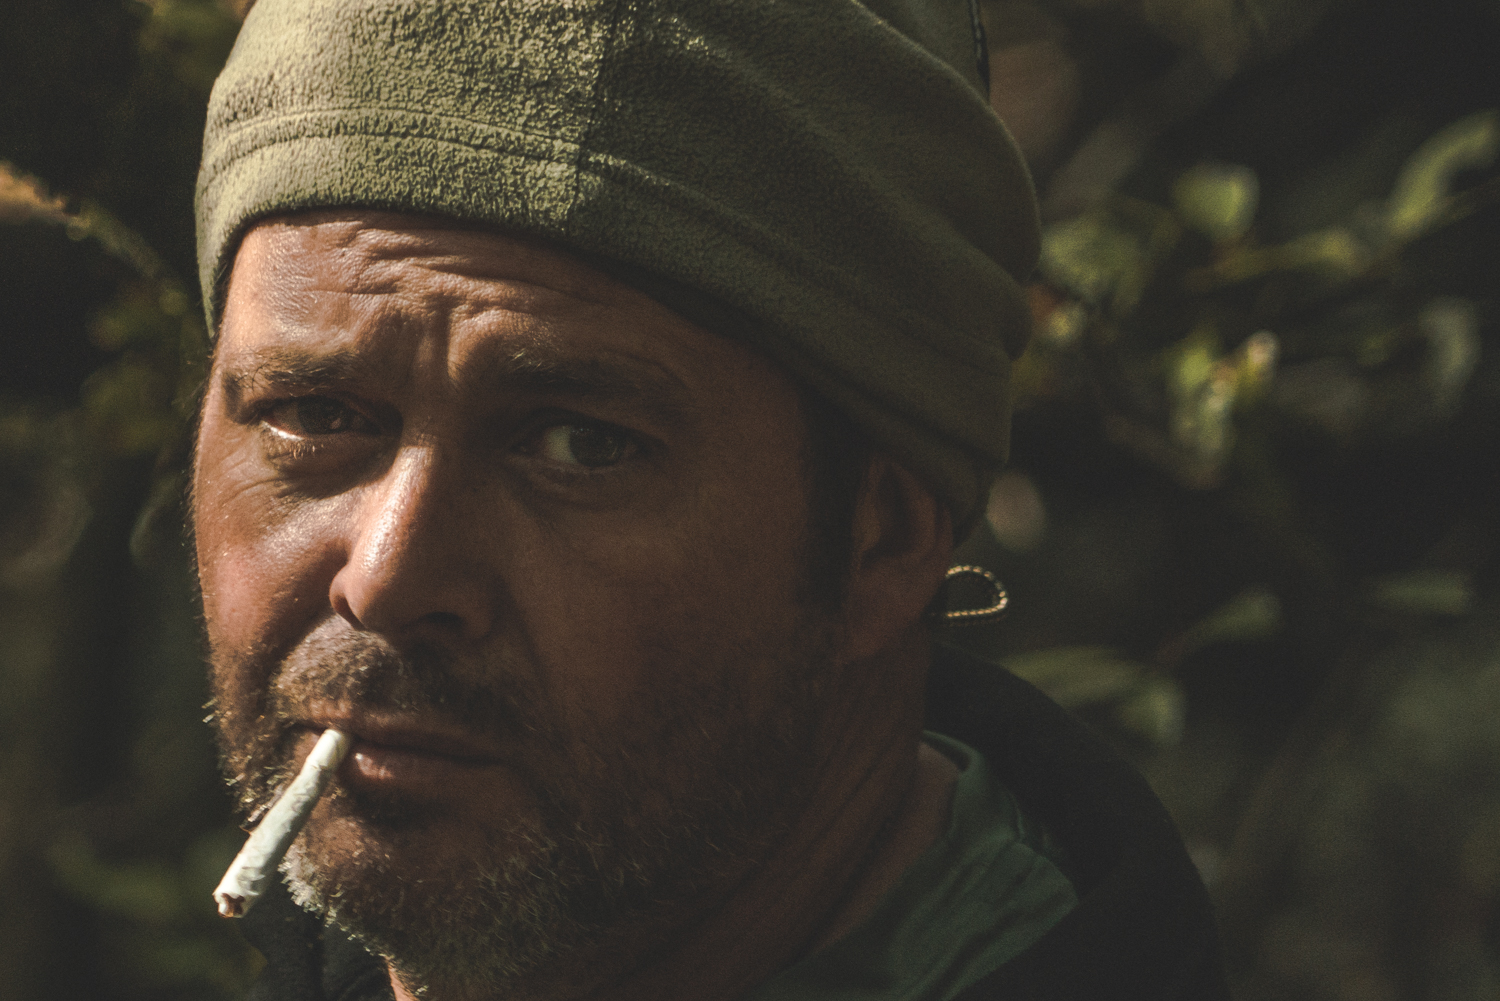
Get up close and personal.
Shallow Depth of Field
Force the viewer to look where you want them too. One of the best ways of doing this is through a shallow depth of field. Your subject is nice and crisp while the secondary element of the picture is out of focus. The viewer’s eye will naturally go to what is in focus.
Using this technique is one of the easiest ways to separate yourself from the crowd.
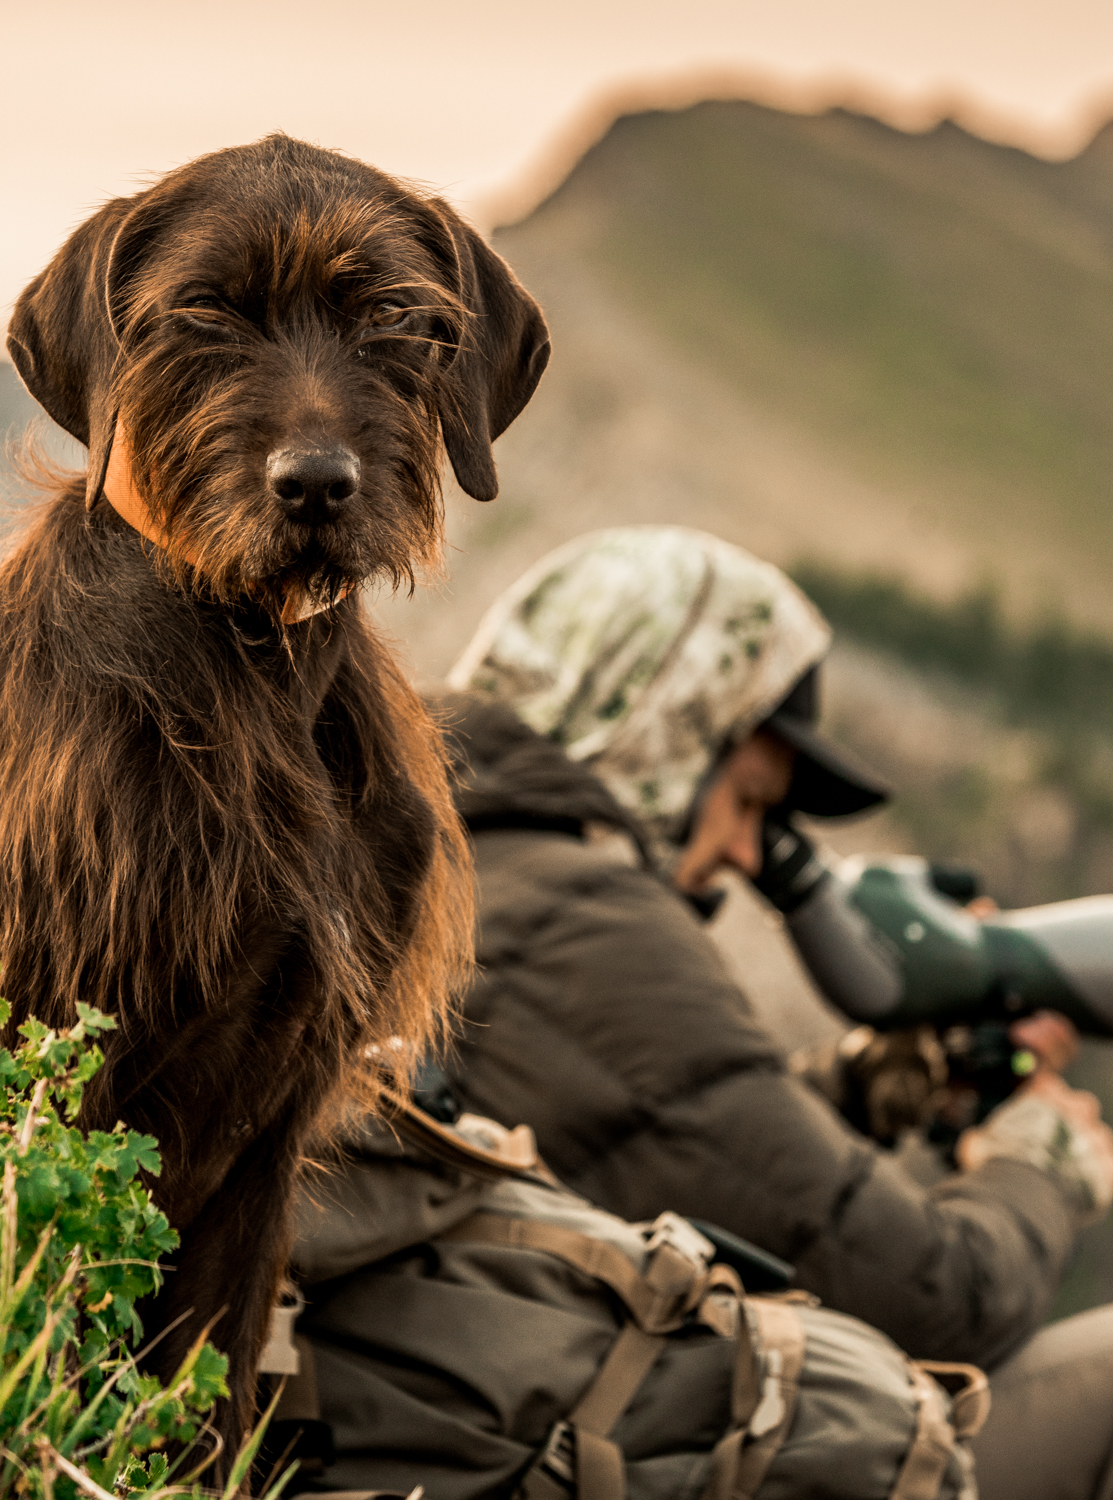
Force the viewer's eye where you want it to be. Then use interesting background imagery to help support the story.
Rule of Thirds is More of a Suggestion, Not a Rule
The rule of thirds has its place, don’t get me wrong. But when everyone is using a rule it becomes the norm. It also can take away from your creativity when you think you need to adhere to strict rules. This is photography, the only rule that counts is getting a spectacular photo.
When using the rule of thirds, make sure you face your subject towards the empty space or you will create an awkward tension that something is coming up behind him or he is looking at something of screen that the viewer can’t see. Or if you are looking for that tension, do exactly this! Remember there are no rules, but know what you are intending your viewer to feel.
Remind the Subject You’re Not There
You’re not taking family photos, you’re trying to capture the essence of the hunt. Having your subjects act as natural as possible and not looking at the camera goes a long way into making the shot believable.
The above is easier said than done. Likely your hunting partner is not an actor whose sole purpose is to act natural in front of a camera. The average person get weird and act awkward when a camera is pulled out. They are self-conscious and don’t know how to act. This is where your job as a great photographer comes in. You need to sneak photos in and take them of them when they are not expecting it. If they know your camera is out start pretending to shoot a picture of a tree your standing next to, then whip the camera around after they’ve lost interest in what you are doing and snap those pics. Whatever it takes to have them act natural.
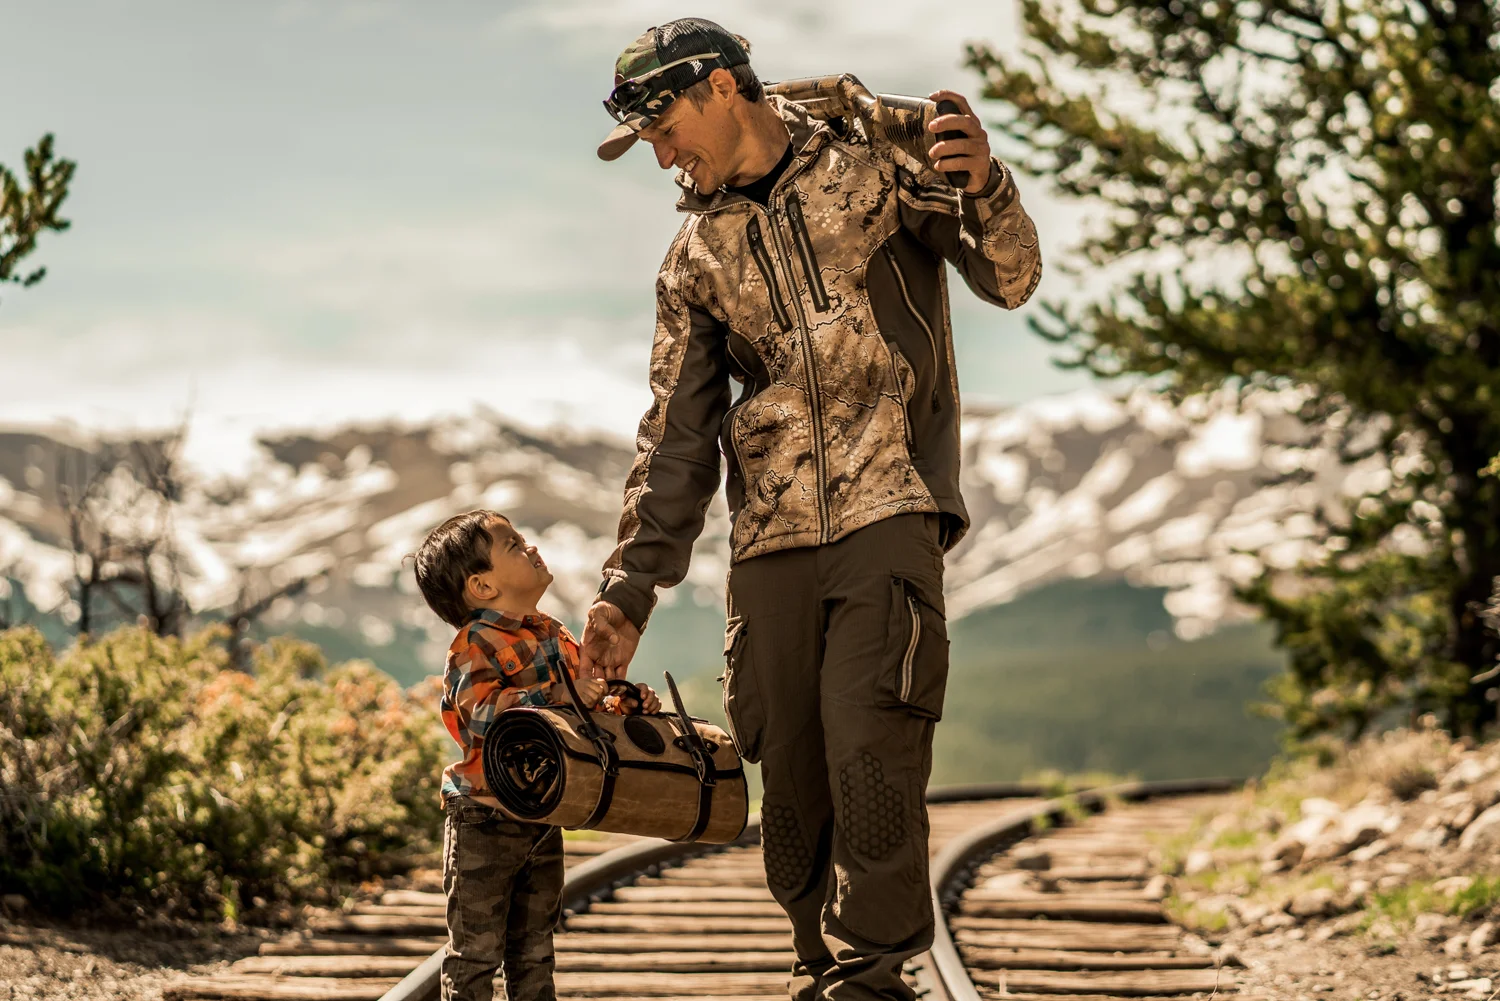
Interact with kids and make them feel like they're playing, not standing in front of a camera.
Framing Your Trophy
You can really make your trophy stand out by getting the antlers, face and your head above the skyline. This way the backdrop won’t be competing with your trophy. He’ll be the center of the show. If the background is boring, use a shallow depth of field. If you are in front of a beautiful backdrop, don’t be afraid to get more of the image in focus to show off the amazing setting you were hunting in.
Wide angle and arms out. But please, don’t take this to far. Hunters can smell B.S. from a mile away. Using a wide angle lens and separating yourself from the trophy with your arms out will make the animal and it’s headgear appear larger than it is. Now that this is the norm, if you shoot with a regular focal length your trophy will feel average. Use the wide angle with caution. Don’t overdue it.

Get those horns/antlers above the horizon.
The Golden Hour(s)
You absolutely can and should shoot throughout the day and if you’re looking for night shots, well then at night as well. But and this is a big ‘but’, an hour after sunrise and before sunset can often take a picture to the next level. Nice warm tones and long, non-harsh shadows appear at this time.

Golden hour and sun flares. An easy way to spice up a shot.
Interesting Pictures With Sun Flares
Most people will try not to shoot their subject with the sun in the sky behind them. It creates harsh shadows and makes the subject to dark. Try having the sun peak through areas of the subject to highlight them and create interesting sun flares on your lens.
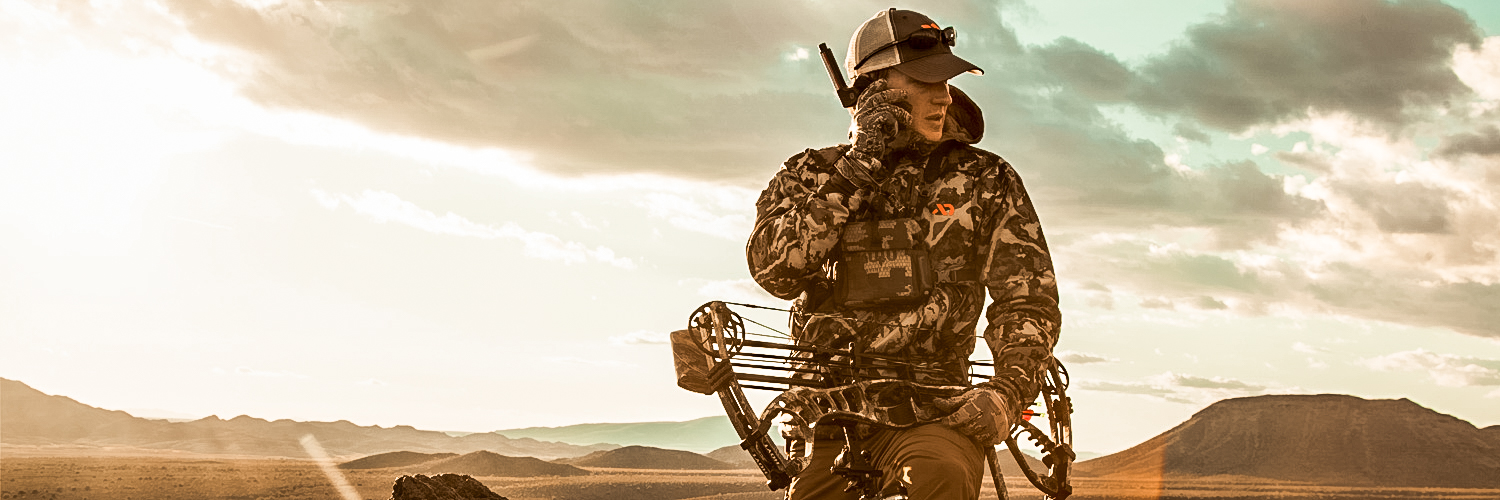
We do more than just hunt when we're hunting. Make sure to show that as well.
Angles, Angles and More Angles
95% of the pictures I see on Instagram is taken with the photographer standing dead level with their subject. The thought never crossed their mind to squat down, get above or use foreground objects to frame their subject. You will. You want to be better and you want to be different. Run around the subject shooting pictures then look back through those images and see what works best. That’s instant feedback from your camera. Use it!
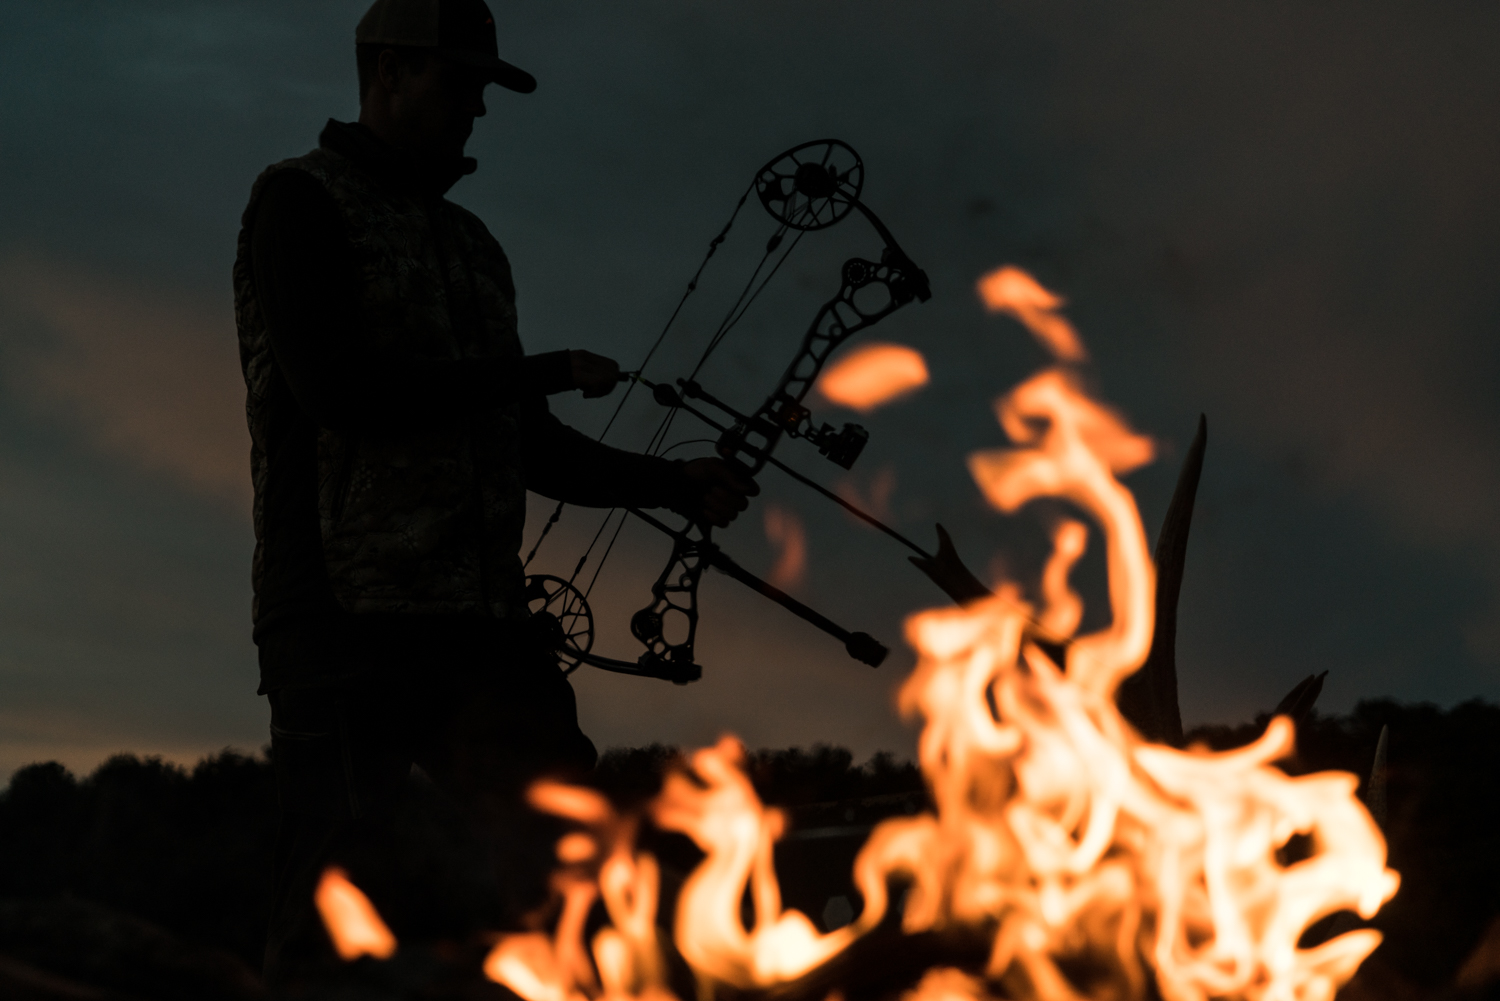
Camp fires are cool. Campfires with something else going on? Extra cool.
Framing Shots and Using Foreground, Subject and Backgrounds
Here is one of the other major factors that separate the big swingers from the pee-wee league. Depth and Framing. This is absolutely critical.
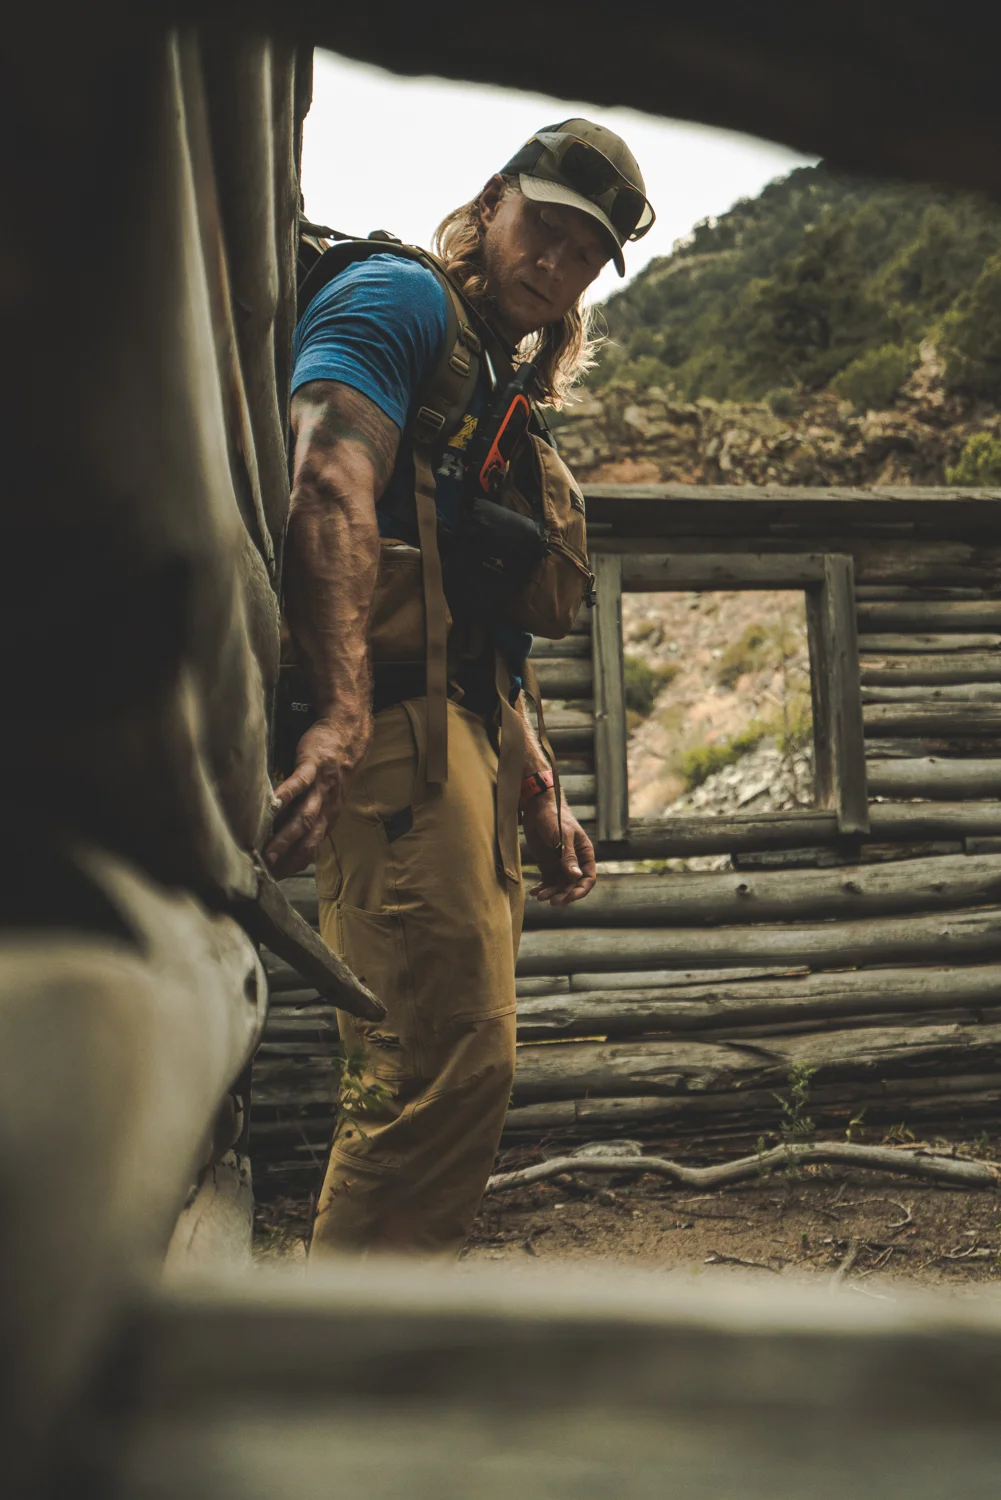
Framing. Use whatever is available to frame your subject. Tree limbs, tree stumps, the corner of a tent. Get creative. You’re using this in the foreground in order to build a natural “frame” for your picture.
Foreground, Subject, Background. Frame the foreground as talked about above. Then keep your subject in focus as the focal point of your composition. Lastly make sure the background is helping tell the story of your photograph. Are you in the mountains? Well then by golly you best have some towering mountains in the background.
Capture Action
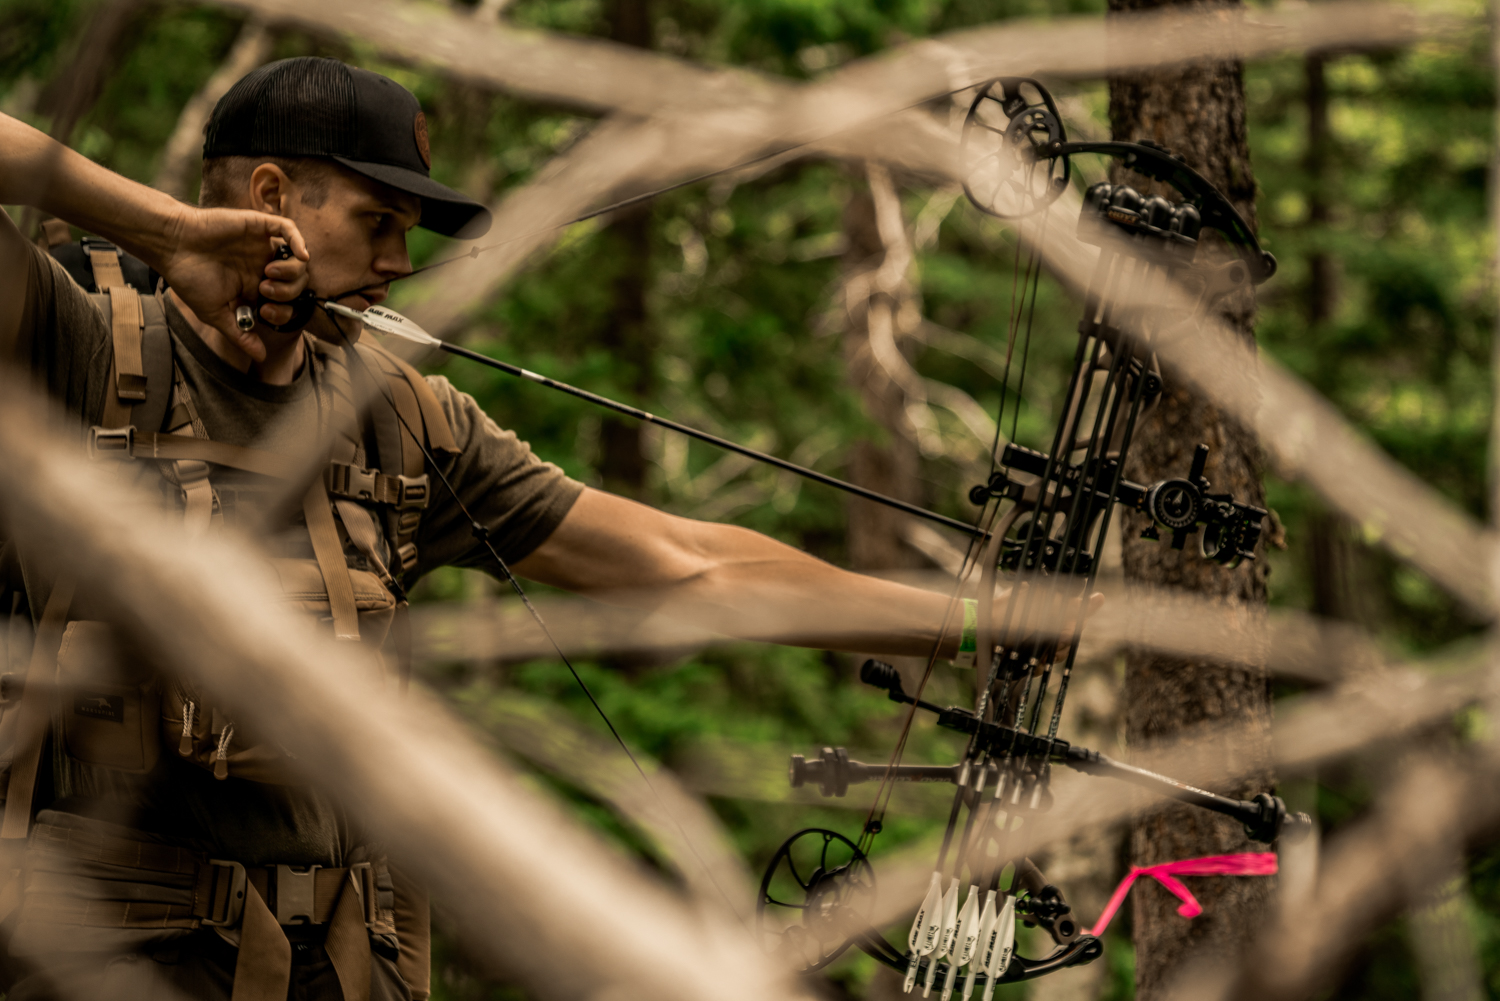
Pictures of people standing around is just about as interesting of the action of standing around… boring! Capture movement and imply action in your shots. You may want to slow down your shutter speed to allow for motion blur. Maybe a fast shutter speed to freeze your hunting partner jumping off that boulder you needed to get down from.
The Shot Doesn’t End After You Snap the Shutter
The image captures the raw image for you and is the foundation of a picture. However don’t underestimate the power of post production work. Lightroom and Photoshop are your friends. Learn them and you open a whole new world of telling a story.

Raw image from the camera.
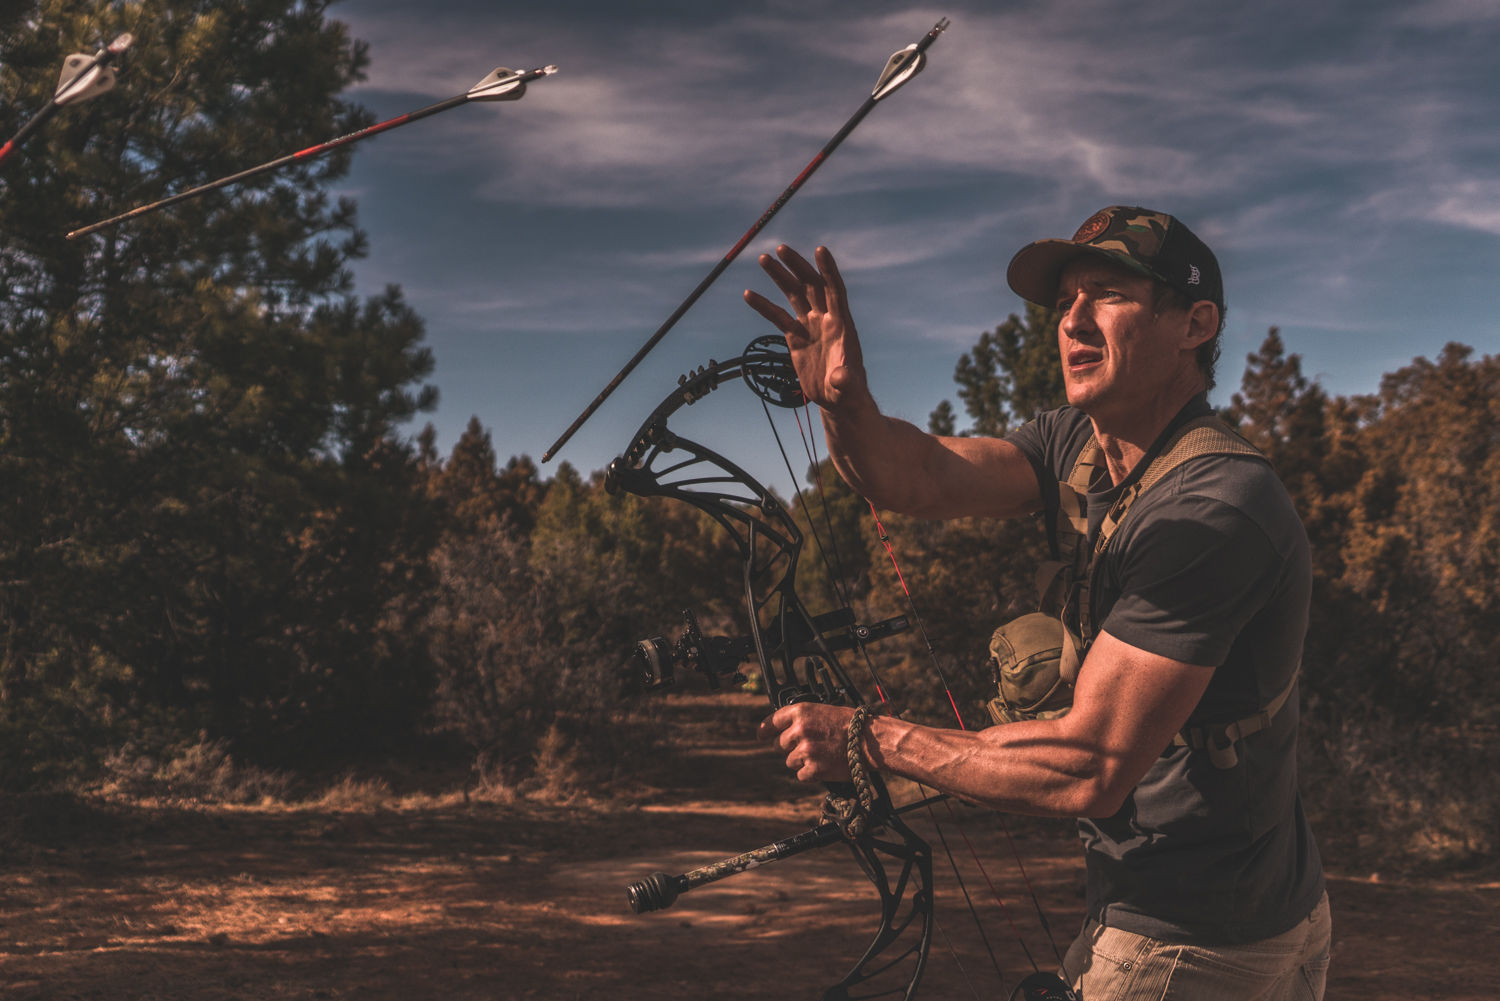
Image after color grading and composited.
Emulate Pro Photographers
I follow photographers I love on Instagram both to be inspired and to get ideas. I see what is working in my eye and then I type up a shot sheet on my phone for my next hunt. This way I have a slew of ideas to work with and don’t get caught up by taking the some old shots. Look for angles you like, different ways of using lighting and how they are framing their subject. Get inspired!
Get Your Work Seen
Never has this been easier. With social media, especially Instagram, never has it been easier to get noticed by Ω the attention of viewers. This point again reiterates why you need to stand out. Find your own style and work your tail off to refine it.
We have a special and unique job as photographers. We get to tell a story through one image. There is no voice over to move the story along, no music to set the mood. Just one image to try to do all of that. I find that exciting. It leaves a lot more open to interpretation from your viewers, but don’t be mistaken, you want to tell your story through that photo.

Tell a story through the image. Everything you have in the image should be lending itself to the story. If not, cut it. It's a distraction.
Here’s a list of what I use —> Fred’s Camera Gear
Use the above suggestions to help you do that. What elements can you add to your photos to create this story?
I’d love to see how you guys are telling your hunting stories. Get a hold of me on Instagram at fredbohm and send me some of the pictures you’re taking.
Continue on to Part 2 - Depth of Field
// Fred Bohm