How to Take Better Hunting Photos - Hunting Photography Series - Part 1
So you’re looking to take your hunting photography from impressing grandma at the nursing home to having every hunting company fighting over you for sponsorships? Well I have no clue how to get you to the later one (or me for that matter), but I can help you up your game. To get you to a point that you have something you will be proud to show at the end of the hunting season.
Snap a photo and you’ve taken a small segment of time and deposited it into your life’s savings account, able to be withdrawn repeatedly and at the time of your choosing. You take something that your feeble memory would otherwise alter or forget and you give it permanence. And if you capture that moment in a way that tells a captivating story you have something that others would be interested in viewing as well.
You may be looking back at last year’s hunt and saying to yourself, “I have none of the above. I have what looks like a half assed selfie of me standing in the woods. And I use the word “woods” lightly, it could actually be mistaken for my backyard. The only story I was telling is that I can stand up straight and slap an awkward smile on my face, or if I’m super talented some duck lips and my ass pushed out.”
I’ve been there. It’s good that you recognize that. Now you can move forward and create the photos that you’d be proud to post.
Photography has become insanely popular over the past years due to both the ability to get an amazing camera in your hands at an affordable price as well as the ability to show off your hard earned work to thousands of people with social media like Instagram and Facebook.
Back in the day you had to process film which was both expensive and didn’t give you immediate feedback. Enter digital cameras and everything changed. You now look back at the photo you took seconds ago and determine if it was a good shot or not, whether you need to take another one, try a new angle or move on to the next shot. Instant gratification in a world that not only expects it, but demands it.
Whether you’re looking to just advance your skills for your own personal satisfaction or trying to get noticed online, it’s hard to argue that becoming more proficient in photography has any adverse effects.
For those of you aspiring to the later of the two, social media can get you in front of a massive audience. That is if you can stand out from the crowd. The negative side to the ease of taking and posting photos online is obvious. Everyone is doing it. It is easier than ever to blend in with the crowd.
Another selfie of you sitting in a treestand? Great. Another sunset over the mountain? Super. If you’re goal is to get noticed, I’m sorry to say you’re failing miserably with those types of photos.
So how do you stand out? The same way you would in any aspect of life. Be different.
A great way to do this is to look at photographers online that you follow and would love to emulate. Then ask yourself some of these questions:
What is the subject doing in the photo?
How close-up is the shot of the subject? What angle is the shot taken at?
Are they using a shallow depth of field? If not, why?
Where is the subject in relation to the background?
Is there a foreground element framing the shot?
What in the composition is conveying emotion?
How did the photographer tell a story through the image?
Get into their minds and try to understand why they are doing what they are doing. A good photographer isn’t just lucky every time they go out and shoot. They take the time to compose the shot according to framing, angles, lighting and a multitude of other things.
I’ve compiled a list of game changers for me after analyzing the photos I’ve taken over the years.
Taking Better Hunting Photos
Take the Time to Stop and Take Pictures
So obvious, but almost never done. This could be the most important of all. You’re not going to get great pictures if you don’t have any to begin with. Every time you think to yourself “Man, that would be a great shot,”, force yourself to stop and pull out the camera. I promise you will thank yourself later.
Never convince yourself you will get the picture later. You won’t. The moment will be gone forever. You can’t depend on that perfect misty morning to happen again, the sun flaring through the trees just perfect or your gun dog shaking water off after a dip in the creek. When it’s gone it’s gone. Promise yourself you’ll capture it when you see it.
Buy a Peak Design Capture camera clip. This thing alone doubled the pictures I took after I bought it. It allows you to clip your camera on your backpack’s shoulder strap and gives you easy accessibility at all times. You won’t have to dread stopping and rummaging through your backpack to pull out your camera.

Lighting like this isn't around for long. Commit to taking pics when a moment like this comes along.
Pixels Are Cheap.
Shoot often and liberally. This is almost like suggestion number one. But now that you have your camera out in hand, shoot a ton of photos. Move angles, shoot from down low, up high. You never no what picture will capture the perfect expression on your subject’s face.
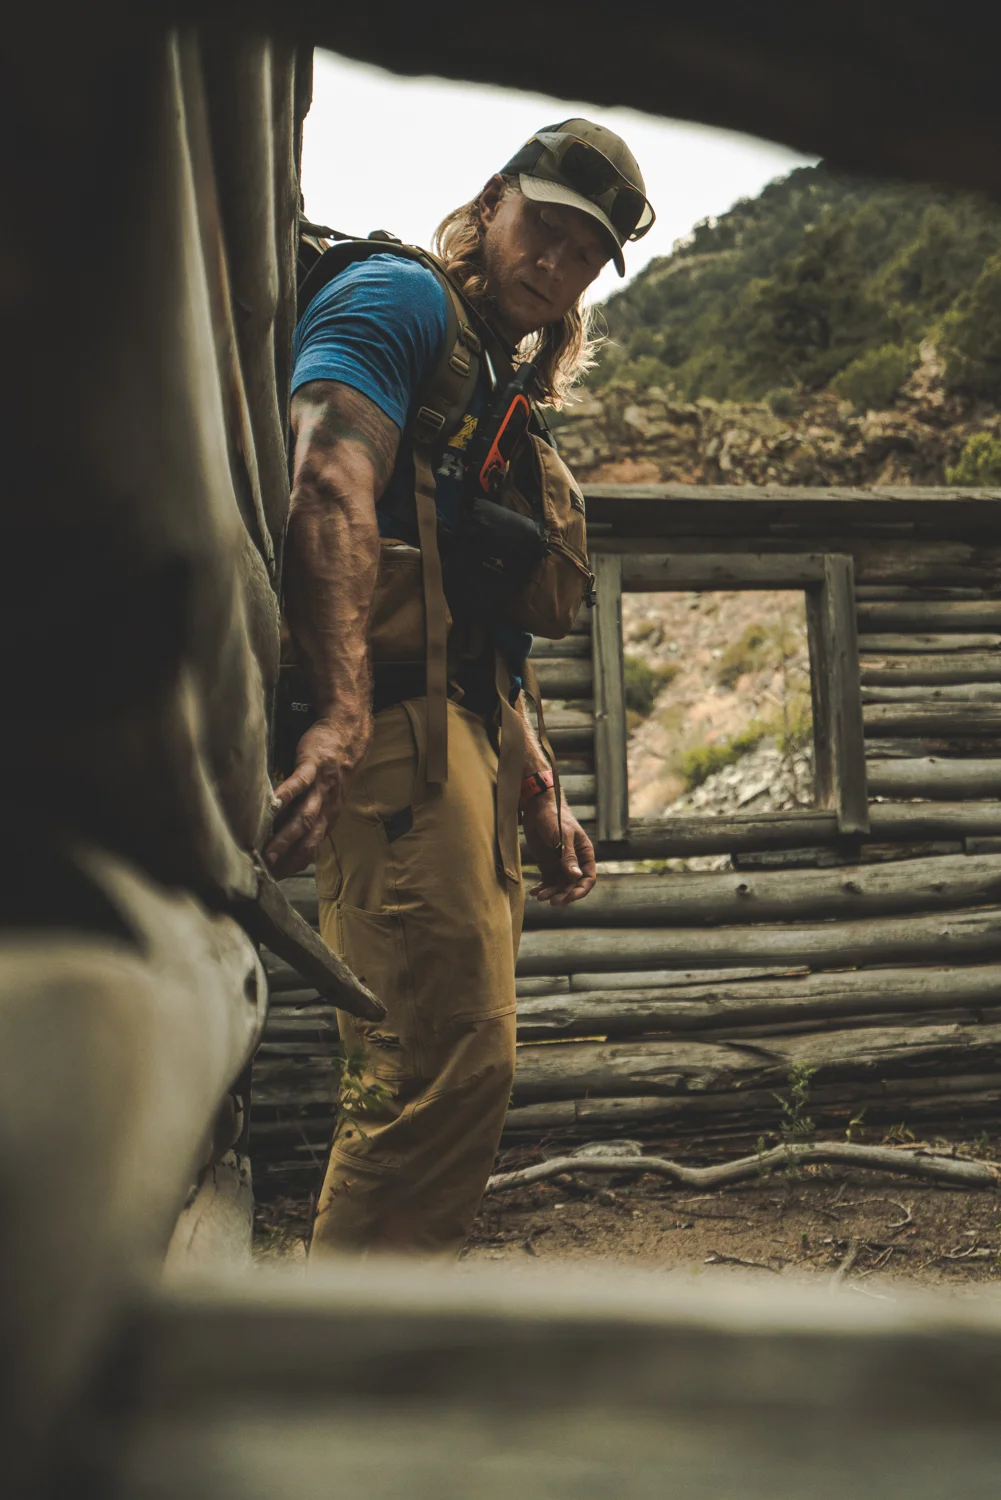
Get Up Close and Personal
The easiest way to fall into mediocrity with your photographs? Stand back from your hunting buddy and take a picture where he blends into the background. No emotion, no forced perspective and no fun.
Shoot close-ups. Get in there close. See the stubble on his face. Capture the light reflecting off his or her eyes. Show emotion. Make them the subject and let the background tell the rest of the story. But don’t let them blend in. You can achieve this by...
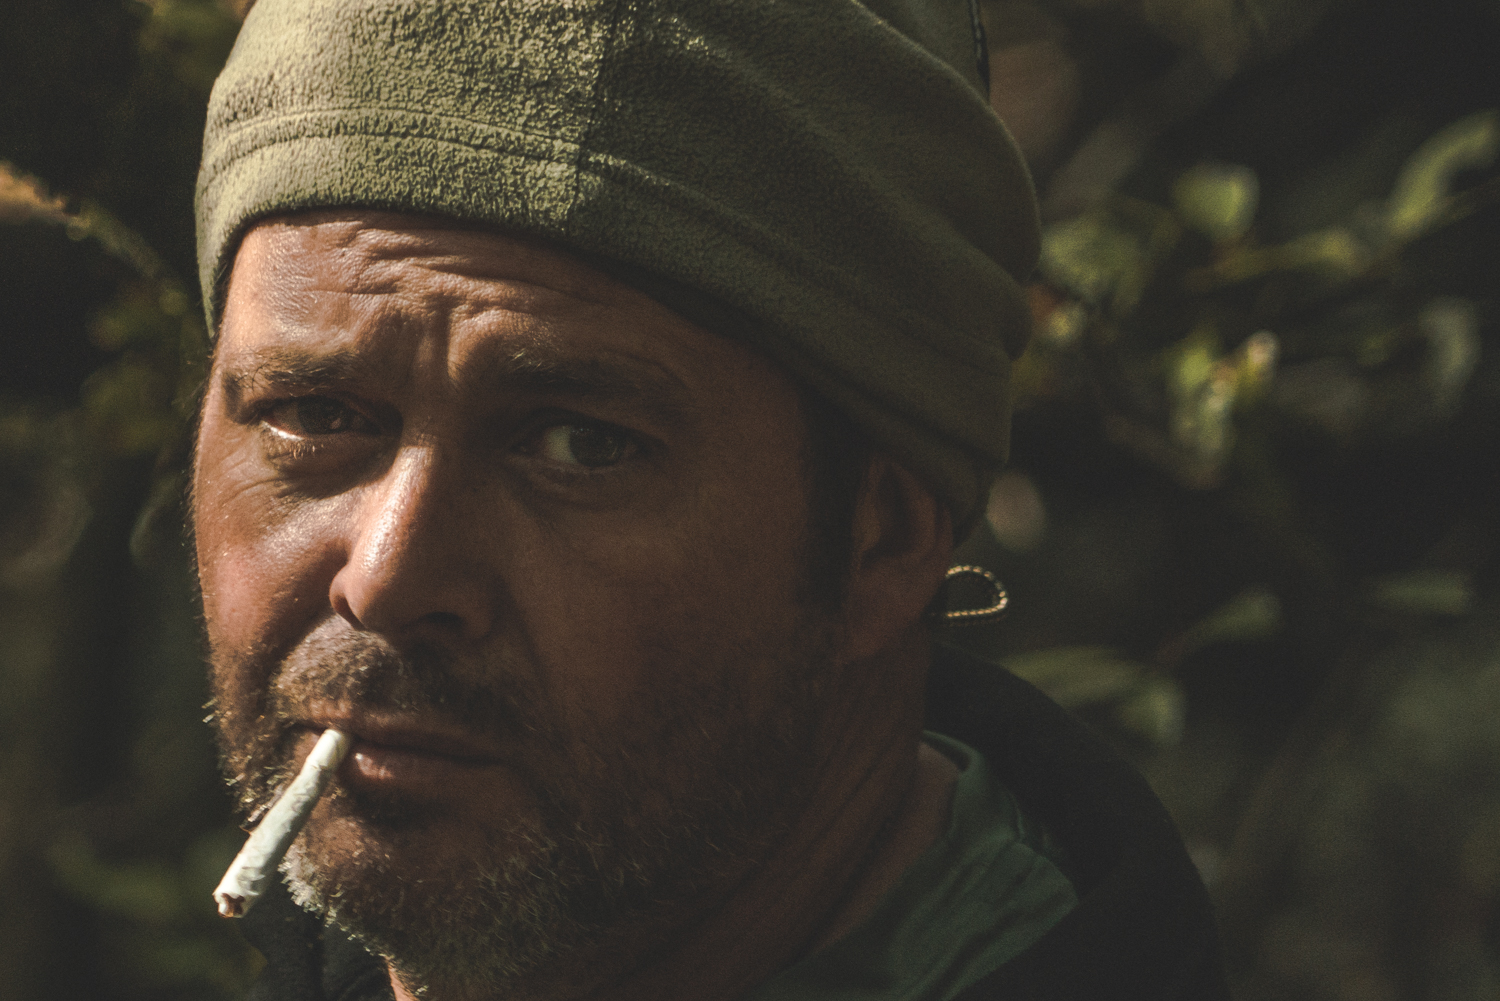
Get up close and personal.
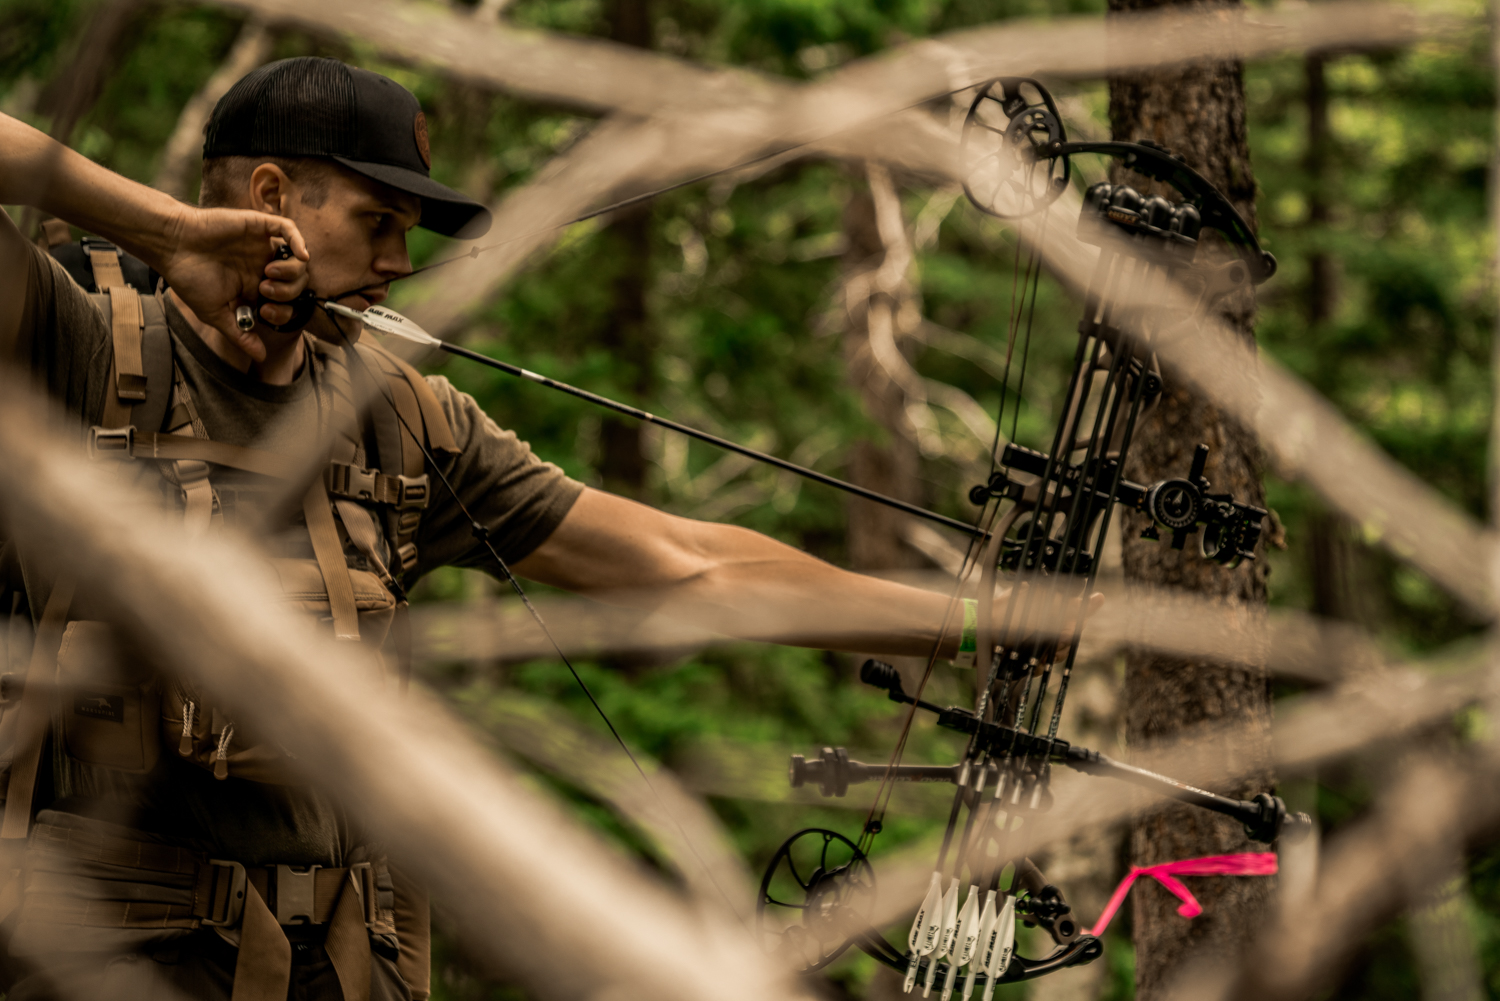
Shallow Depth of Field
Force the viewer to look where you want them too. One of the best ways of doing this is through a shallow depth of field. Your subject is nice and crisp while the secondary element of the picture is out of focus. The viewer’s eye will naturally go to what is in focus.
Using this technique is one of the easiest ways to separate yourself from the crowd.
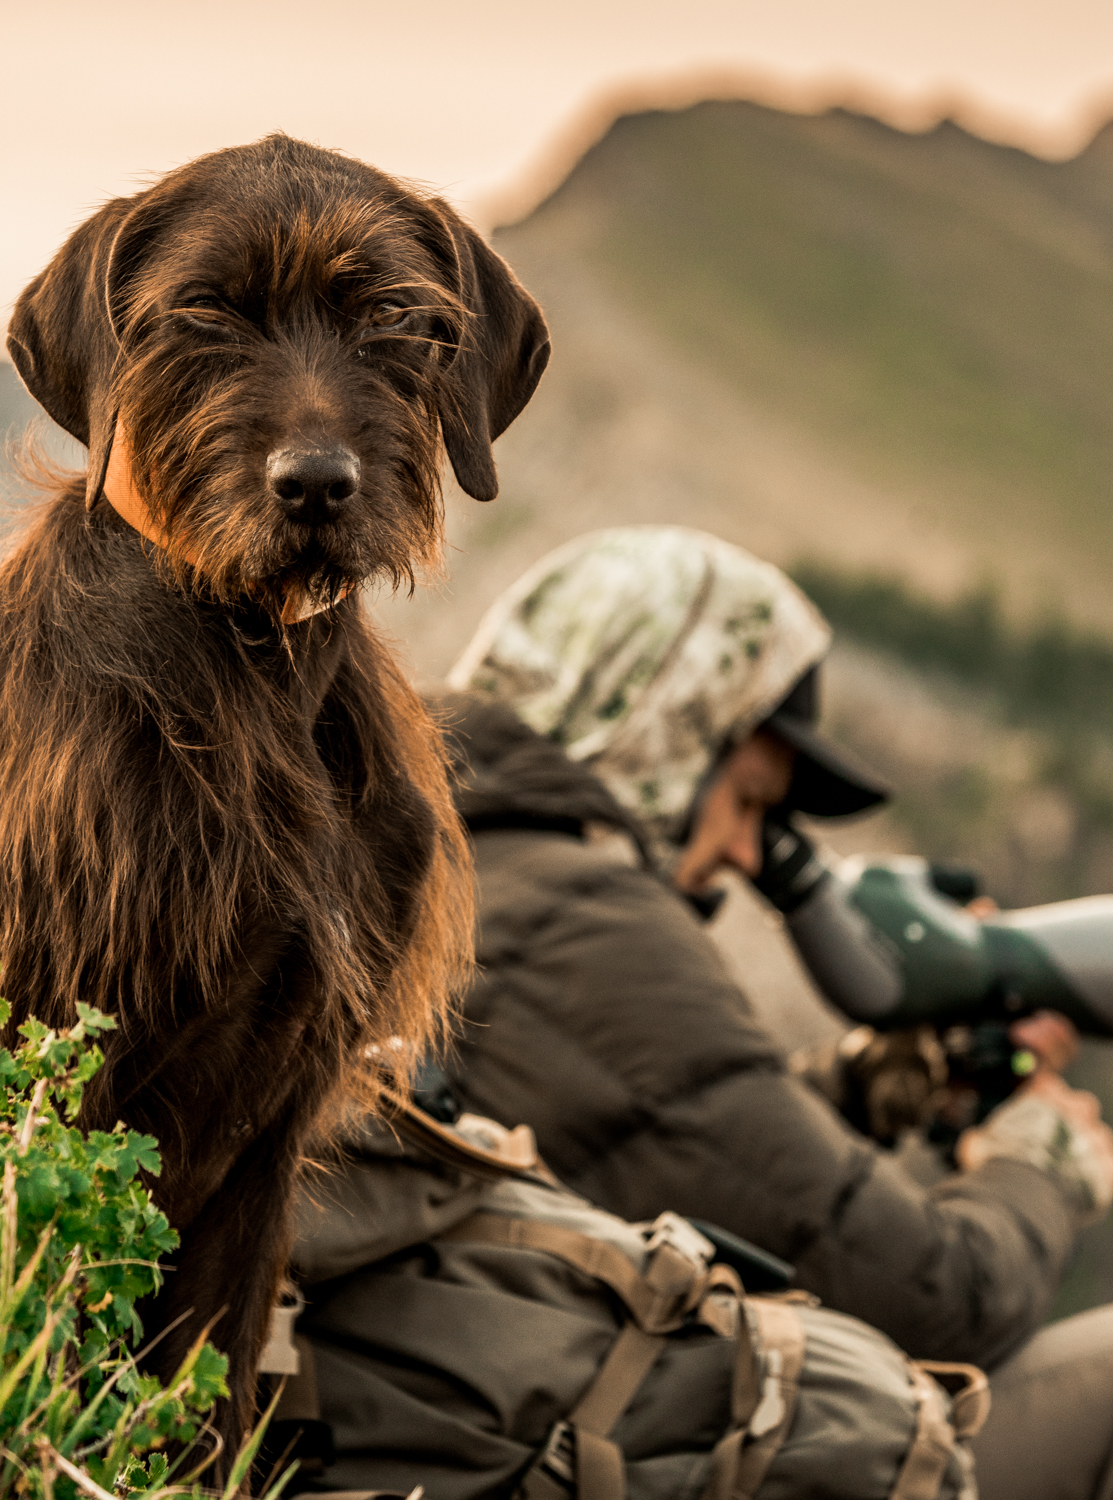
Force the viewer's eye where you want it to be. Then use interesting background imagery to help support the story.
Rule of Thirds is More of a Suggestion, Not a Rule
The rule of thirds has its place, don’t get me wrong. But when everyone is using a rule it becomes the norm. It also can take away from your creativity when you think you need to adhere to strict rules. This is photography, the only rule that counts is getting a spectacular photo.
When using the rule of thirds, make sure you face your subject towards the empty space or you will create an awkward tension that something is coming up behind him or he is looking at something of screen that the viewer can’t see. Or if you are looking for that tension, do exactly this! Remember there are no rules, but know what you are intending your viewer to feel.
Remind the Subject You’re Not There
You’re not taking family photos, you’re trying to capture the essence of the hunt. Having your subjects act as natural as possible and not looking at the camera goes a long way into making the shot believable.
The above is easier said than done. Likely your hunting partner is not an actor whose sole purpose is to act natural in front of a camera. The average person get weird and act awkward when a camera is pulled out. They are self-conscious and don’t know how to act. This is where your job as a great photographer comes in. You need to sneak photos in and take them of them when they are not expecting it. If they know your camera is out start pretending to shoot a picture of a tree your standing next to, then whip the camera around after they’ve lost interest in what you are doing and snap those pics. Whatever it takes to have them act natural.

Interact with kids and make them feel like they're playing, not standing in front of a camera.
Framing Your Trophy
You can really make your trophy stand out by getting the antlers, face and your head above the skyline. This way the backdrop won’t be competing with your trophy. He’ll be the center of the show. If the background is boring, use a shallow depth of field. If you are in front of a beautiful backdrop, don’t be afraid to get more of the image in focus to show off the amazing setting you were hunting in.
Wide angle and arms out. But please, don’t take this to far. Hunters can smell B.S. from a mile away. Using a wide angle lens and separating yourself from the trophy with your arms out will make the animal and it’s headgear appear larger than it is. Now that this is the norm, if you shoot with a regular focal length your trophy will feel average. Use the wide angle with caution. Don’t overdue it.

Get those horns/antlers above the horizon.
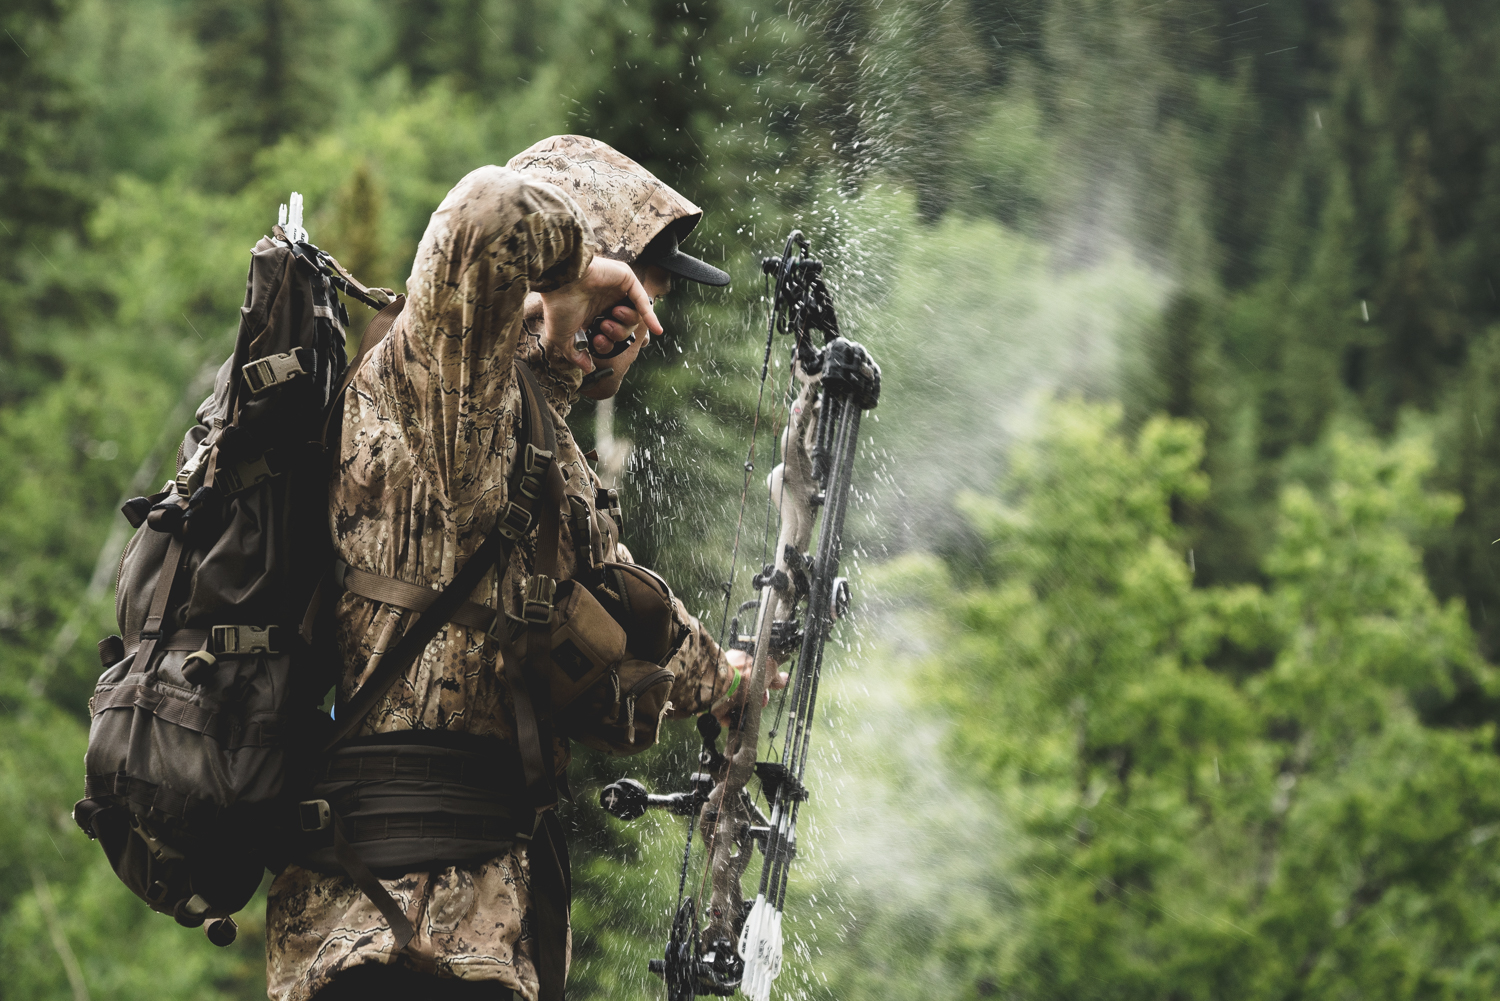
The Golden Hour(s)
You absolutely can and should shoot throughout the day and if you’re looking for night shots, well then at night as well. But and this is a big ‘but’, an hour after sunrise and before sunset can often take a picture to the next level. Nice warm tones and long, non-harsh shadows appear at this time.

Golden hour and sun flares. An easy way to spice up a shot.
Interesting Pictures With Sun Flares
Most people will try not to shoot their subject with the sun in the sky behind them. It creates harsh shadows and makes the subject to dark. Try having the sun peak through areas of the subject to highlight them and create interesting sun flares on your lens.
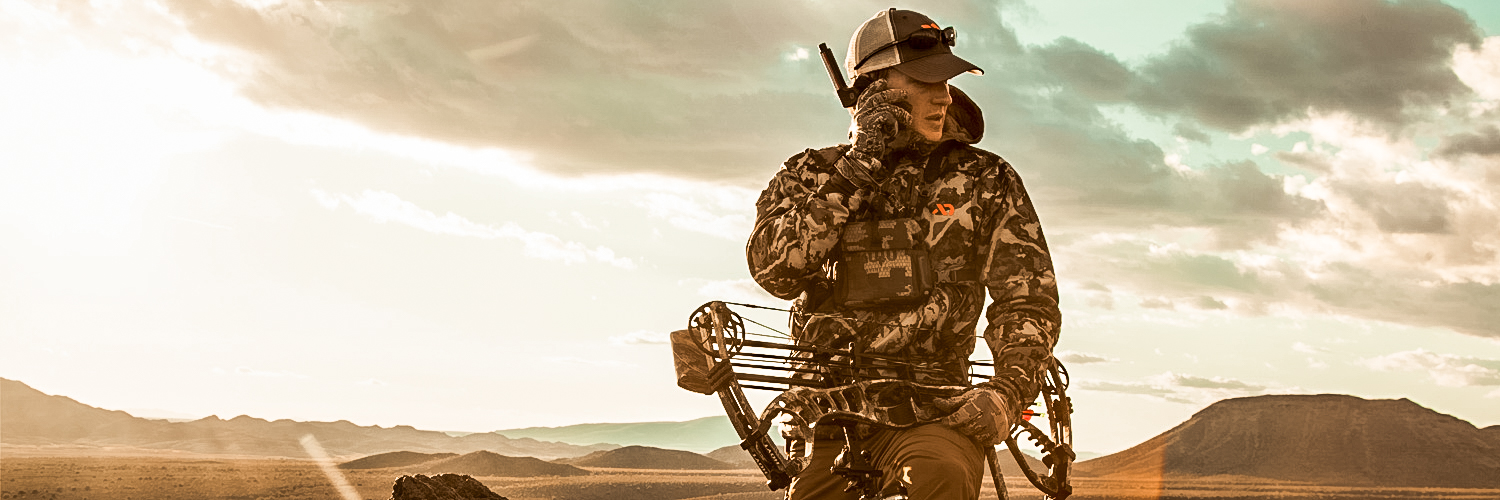
We do more than just hunt when we're hunting. Make sure to show that as well.
Angles, Angles and More Angles
95% of the pictures I see on Instagram is taken with the photographer standing dead level with their subject. The thought never crossed their mind to squat down, get above or use foreground objects to frame their subject. You will. You want to be better and you want to be different. Run around the subject shooting pictures then look back through those images and see what works best. That’s instant feedback from your camera. Use it!
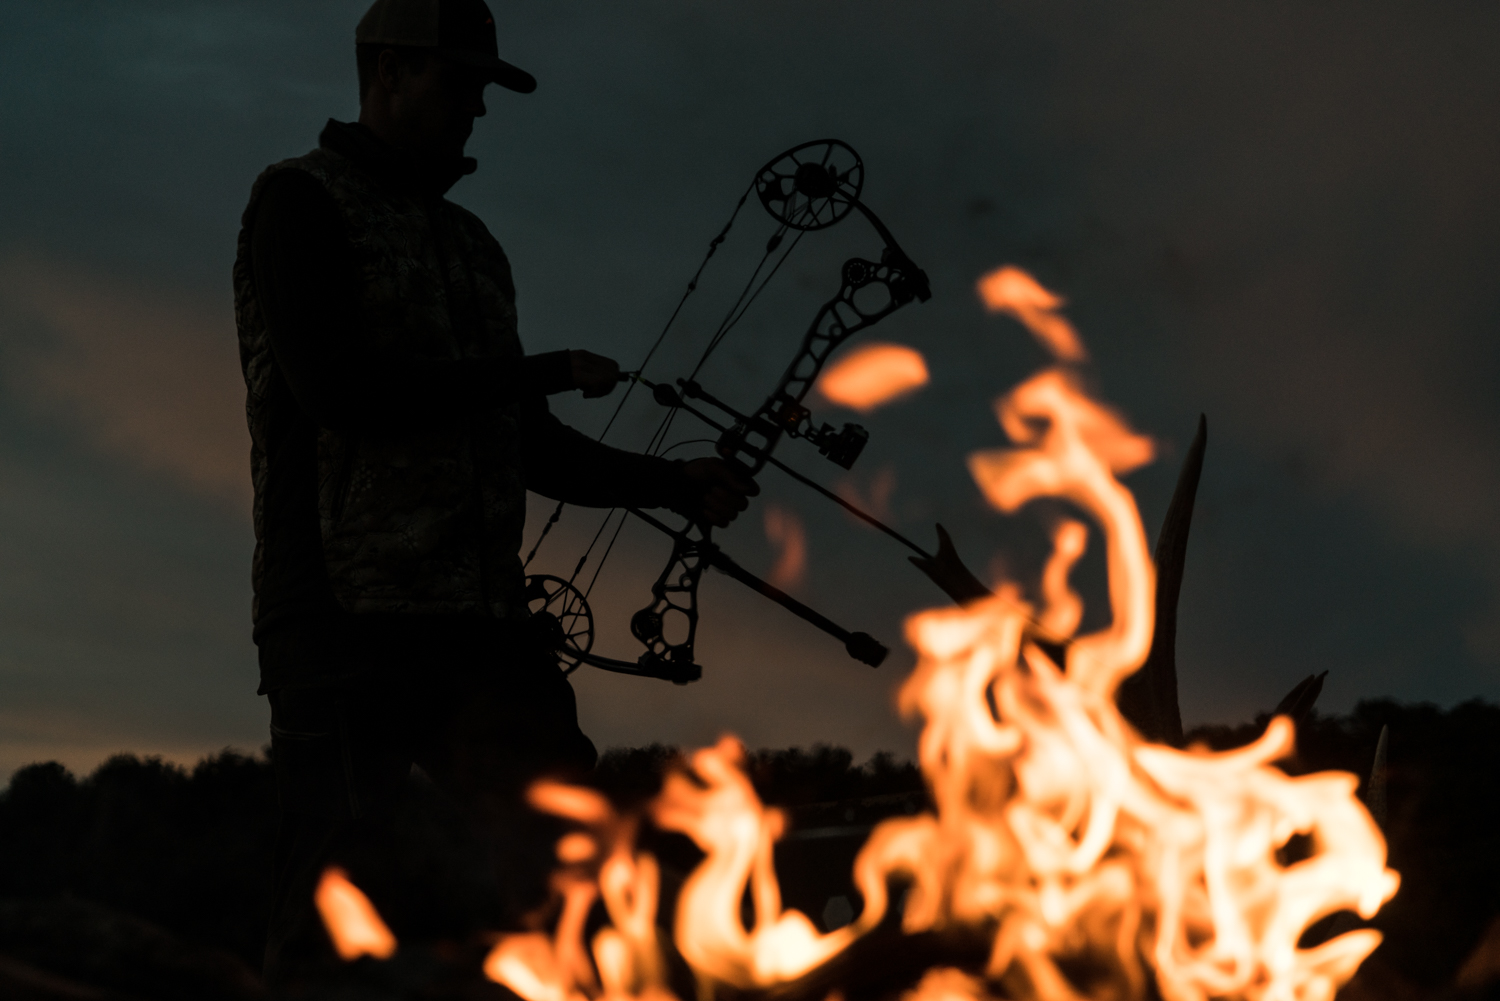
Camp fires are cool. Campfires with something else going on? Extra cool.
Framing Shots and Using Foreground, Subject and Backgrounds
Here is one of the other major factors that separate the big swingers from the pee-wee league. Depth and Framing. This is absolutely critical.
Framing. Use whatever is available to frame your subject. Tree limbs, tree stumps, the corner of a tent. Get creative. You’re using this in the foreground in order to build a natural “frame” for your picture.
Foreground, Subject, Background. Frame the foreground as talked about above. Then keep your subject in focus as the focal point of your composition. Lastly make sure the background is helping tell the story of your photograph. Are you in the mountains? Well then by golly you best have some towering mountains in the background.
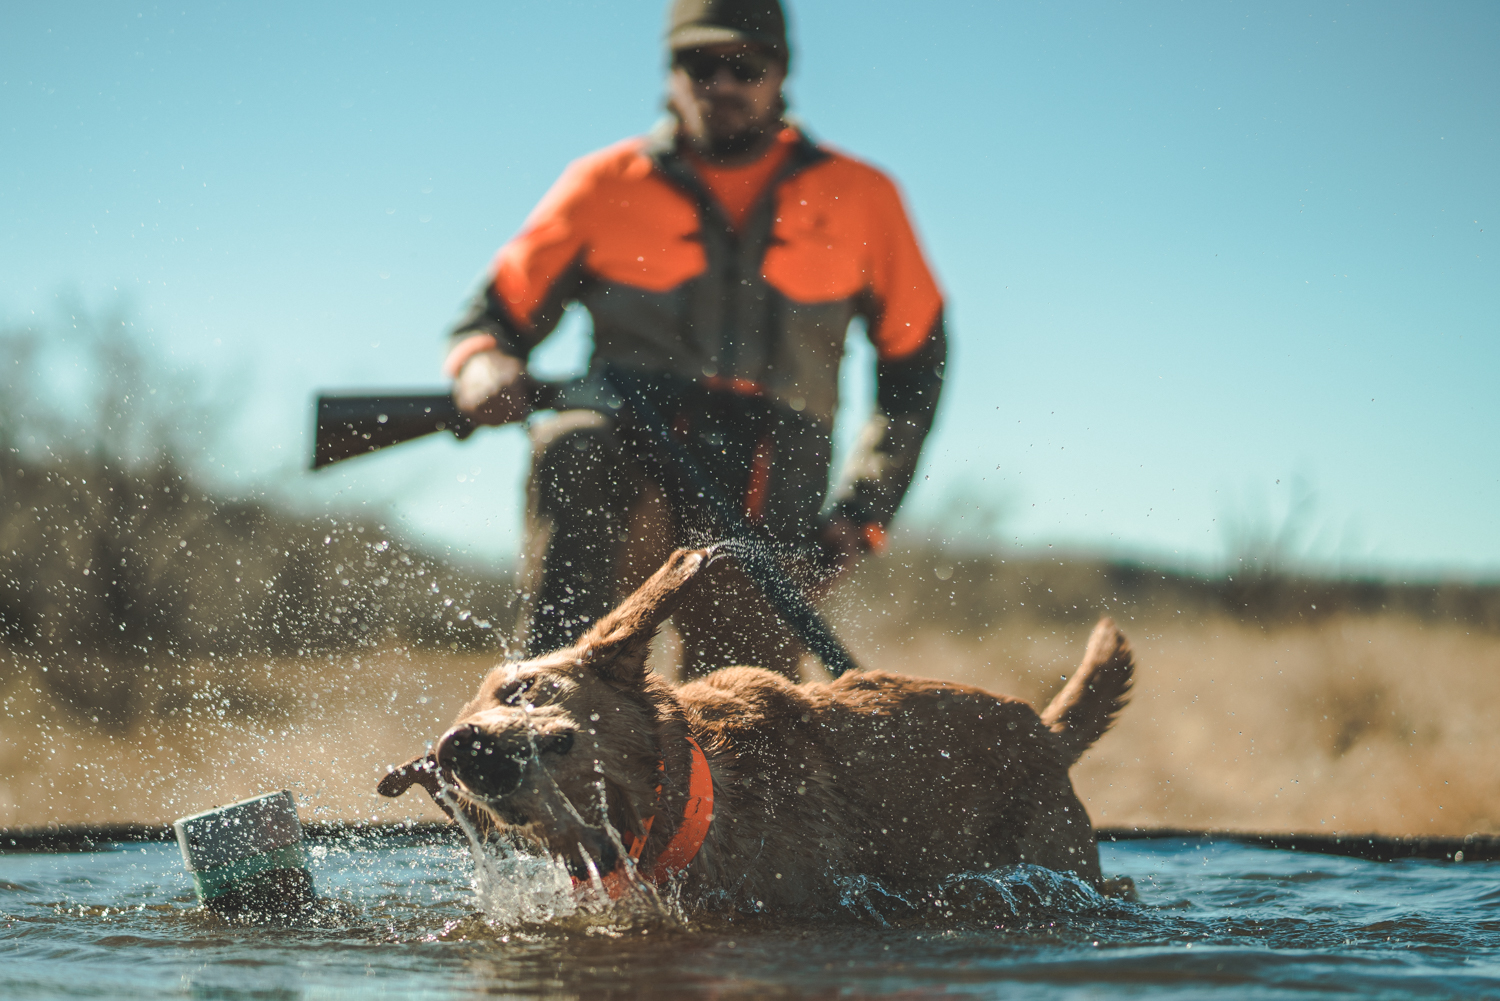
Capture Action
Pictures of people standing around is just about as interesting of the action of standing around… boring! Capture movement and imply action in your shots. You may want to slow down your shutter speed to allow for motion blur. Maybe a fast shutter speed to freeze your hunting partner jumping off that boulder you needed to get down from.
The Shot Doesn’t End After You Snap the Shutter
The image captures the raw image for you and is the foundation of a picture. However don’t underestimate the power of post production work. Lightroom and Photoshop are your friends. Learn them and you open a whole new world of telling a story.

Raw image from the camera.
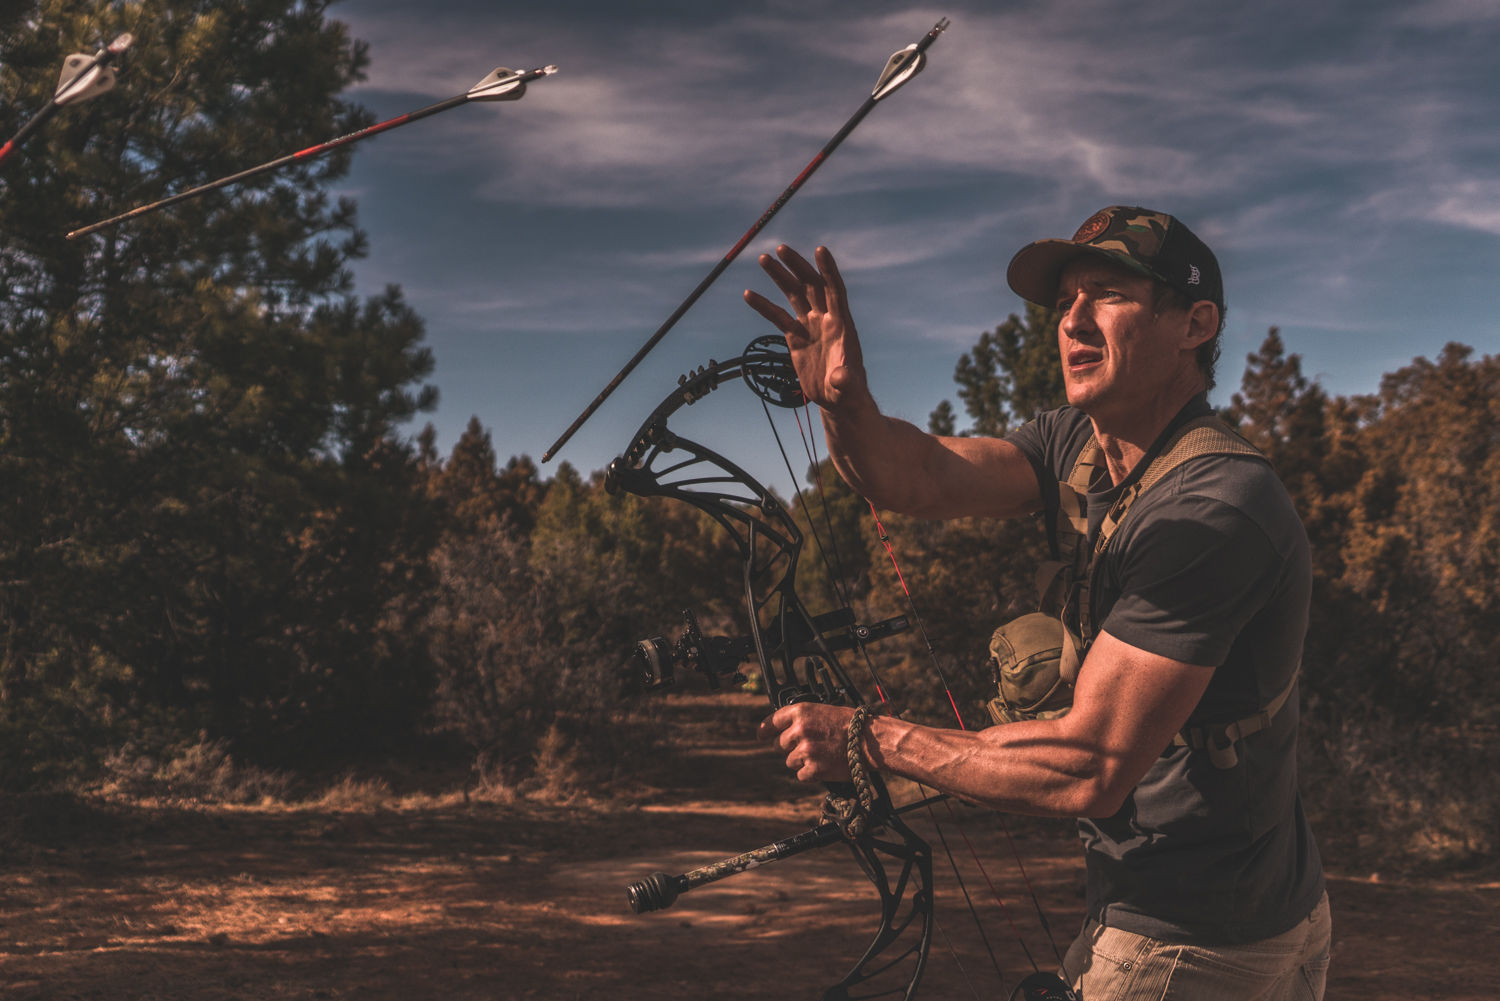
Image after color grading and composited.
Emulate Pro Photographers
I follow photographers I love on Instagram both to be inspired and to get ideas. I see what is working in my eye and then I type up a shot sheet on my phone for my next hunt. This way I have a slew of ideas to work with and don’t get caught up by taking the some old shots. Look for angles you like, different ways of using lighting and how they are framing their subject. Get inspired!
Get Your Work Seen
Never has this been easier. With social media, especially Instagram, never has it been easier to get noticed by Ω the attention of viewers. This point again reiterates why you need to stand out. Find your own style and work your tail off to refine it.
We have a special and unique job as photographers. We get to tell a story through one image. There is no voice over to move the story along, no music to set the mood. Just one image to try to do all of that. I find that exciting. It leaves a lot more open to interpretation from your viewers, but don’t be mistaken, you want to tell your story through that photo.

Tell a story through the image. Everything you have in the image should be lending itself to the story. If not, cut it. It's a distraction.
Here’s a list of what I use —> Fred’s Camera Gear
Use the above suggestions to help you do that. What elements can you add to your photos to create this story?
I’d love to see how you guys are telling your hunting stories. Get a hold of me on Instagram at fredbohm and send me some of the pictures you’re taking.
Continue on to Part 2 - Depth of Field
// Fred Bohm